# Welcome!
Welcome to the official documentation of LV Soft Store.
{% hint style="success" %}
Welcome to the official repository of FiveM script documentation! Here, you'll find a treasure trove of knowledge, detailed guides, and practical examples to make the most out of your scripts. From basic functions to advanced techniques, this platform is designed to support you on your development journey. Explore, learn, and elevate your creations to new heights with our comprehensive and accurate documentation! Welcome to the community of FiveM creators and enthusiasts. May your experience here be inspiring and filled with discoveries!
{% endhint %}
How to use it?
This space is designed to be read linearly, so start with our Vision, Mission & Focus and work down from there! We recommend reading everything through in one sitting and then revisiting and re-reading if you need to.
Contributing
If you want to contribute changes, start a new change request and submit it for review. The People team will review it soon after.
# lvs-loading
lvs-loading documentation
## LVS Loading
Loading screen...
## Important information:
To change the color of the entire interface, some knowledge of photo editing is required. A .psd file with icons is provided for you to customize the color to your preference.
{% hint style="info" %}
The video is only for demonstration purposes, and the script does not apply any color tint to it.
{% endhint %}
***
{% tabs %}
{% tab title="v1.0" %}
### 2024/03/17
Initial commit
**Files Changed:**
* [ ] All Files
* [ ] All Files Except config.lua
* [ ] Specific Files
{% hint style="warning" %}
Fix:
{% endhint %}
{% hint style="success" %}
Add:
{% endhint %}
{% hint style="info" %}
Edit:
{% endhint %}
{% endtab %}
{% endtabs %}
# Installation
### Step 1
Drag And Drop, put `lvs_np_loading` in `resources` folder
***
### Step 2
Edit the file `config.lua` to your needs
***
### Step 3
Start the script in **server.cfg** , `ensure lvs_np_loading`
# Configuration
Explore and fine-tune your settings effortlessly. Customize your script experience according to your preferences
## Configuration File
```lua
Config = {}
Config.ServerName = {
line1 = 'Loading',
line2 = 'LVS Scripts'
}
Config.Logo = './img/np_logo.png'
Config.Video = 'video.webm'
Config.Links = {
{icon = './img/tiktok.png', link = 'https://fivem.lvsoft.com.ar/'},
{icon = './img/youtube.png', link = 'https://www.youtube.com/@lvsoft.scripts'},
{icon = './img/discord.png', link = 'https://discord.gg/V596dVE74e'},
{icon = './img/np_logo.png', link = 'https://lvsoft.com.ar/'},
}
Config.UIColors = { -- for complete color change you need to edit images in client/web/img/ folder
primary = '#00F8B9',
secondary = '#1A6250',
}
```
# lvs-multichar
lvs-multichar documentation
## LVS Multichar
Diversify your roleplaying experience on FiveM with our Multi-Character Selection Script. This feature-rich script introduces a seamless and immersive process for players to manage multiple characters, enhancing the depth of storytelling and engagement.
> Revolutionize character selection on your server. Download our Multi-Character Selection Script today and provide your players with a seamless and immersive way to navigate their diverse roles.
{% embed url="" %}
## Key Features
* **All-in-One Character Display**: Visualize all characters in a dynamic scene, providing players with an overview of their entire roster at a glance, fostering an immersive and organized character selection experience.
* **Character Creation and Slot Purchase**: Easily create new characters and purchase additional slots to expand your character lineup. The script supports seamless integration with Tebex for convenient slot purchases.
* **Maximum Slots Control**: Define the maximum number of character slots available on your server, giving you flexibility in tailoring the experience to your community's preferences.
* **Free Slots and Custom Scenes**: Provide players with free slots and the ability to create custom scenes, allowing for a personalized and enjoyable character selection process.
* **Simple Configuration**: Enjoy hassle-free setup with straightforward configuration options, ensuring a smooth implementation on your server.
* **Color and Image Customization**: Personalize the character selection interface by easily changing colors and images directly from the configuration, allowing for a visually cohesive and unique experience.
* **Job Image Customization**: Tailor the visual representation of jobs by allowing custom images, enhancing the immersion and thematic coherence of your server.
* **Tebex Integration**: Streamline the process of slot purchases by seamlessly integrating with Tebex, offering players a convenient way to expand their character slots.
* **Performance-Optimized**: Enjoy the benefits of a feature-rich script without compromising server performance, ensuring a smooth and responsive character management system.
***
{% tabs %}
{% tab title="v2.3.1" %}
## 2024/11/30
{% hint style="info" %}
* QBox Support
{% endhint %}
{% endtab %}
{% tab title="v2.2.2" %}
### 2024/11/17
{% hint style="info" %}
* Support Steam as license control method for player
{% endhint %}
### 2024/09/21
{% hint style="info" %}
* Improvements in the integration of lvs-clothing in \[ESX]
* Changes in character identification \[ESX]
* Spawn locations \[ESX]
{% endhint %}
{% endtab %}
{% tab title="V2.1.1" %}
### 2024/05/13
{% hint style="info" %}
* Added confirmation on character deletion
* Added commands for open, remove slots and generate redeem codes
{% endhint %}
{% endtab %}
{% tab title="v2.0.0" %}
### 2024/05/13
Important update, a lots internal changes
{% hint style="info" %}
* Added support to **lvs\_clothing**
* Significant code changes (refactoring)
{% endhint %}
{% endtab %}
{% tab title="v1.10" %}
### 2024/04/14
...
{% hint style="info" %}
**ESX Compatible!!!**
{% endhint %}
{% hint style="success" %}
ADD:
* ESX Support
* Character age limits options
* No special character on name option
* Date format option
{% endhint %}
{% hint style="warning" %}
FIX:
* When a player hasn't a character properly created (without skin)
* Some clothing issues
{% endhint %}
{% endtab %}
{% tab title="v1.4" %}
### 2024/03/20
New way to select date of birth and improvements
**Files Changed:**
* [ ] All Files
* [ ] All Files Except config.lua
* [x] Specific Files
| File |
| ------------------------------------------------------------------------------------------ |
|
|
{% hint style="warning" %}
Fix:
* Issue with illenium-appearance
* Scroll issue when have more character than screen can show
{% endhint %}
{% hint style="success" %}
Add:
{% endhint %}
{% hint style="info" %}
Edit:
{% endhint %}
{% endtab %}
{% endtabs %}
# Installation
### Step 1
Run the **qb.sql** file located in the resource folder in your database!\
Or execute the SQL:
```sql
CREATE TABLE `lvs_multichar` (
`id` int(11) NOT NULL,
`license` varchar(90) DEFAULT NULL,
`uses` int(11) DEFAULT 0
) ENGINE=InnoDB DEFAULT CHARSET=utf8;
-- --------------------------------------------------------
CREATE TABLE `lvs_multichar_codes` (
`id` int(11) NOT NULL,
`code` varchar(50) DEFAULT NULL,
`used` int(11) DEFAULT 0
) ENGINE=InnoDB DEFAULT CHARSET=utf8;
-- --------------------------------------------------------
ALTER TABLE `lvs_multichar`
ADD PRIMARY KEY (`id`),
ADD UNIQUE KEY `identifier` (`license`);
ALTER TABLE `lvs_multichar_codes`
ADD PRIMARY KEY (`id`) USING BTREE;
ALTER TABLE `lvs_multichar`
MODIFY `id` int(11) NOT NULL AUTO_INCREMENT;
ALTER TABLE `lvs_multichar_codes`
MODIFY `id` int(11) NOT NULL AUTO_INCREMENT;
```
***
### Step 2
Drag And Drop, put `lvs_multichar` in `resources` folder
***
### Step 3
Remove `qb-multicharacter` from **\[qb]** folder
***
### Step 4
Install the dependencies if they are not installed.
***
### Step 5
Now configure and translate your resource.
Config files
`/lvs_mutichar/config/config.lua`\
`/lvs_mutichar/config/cutscenes.lua`\
`/lvs_mutichar/config/translations.lua`\
`/lvs_mutichar/config/clothing.lua`
***
### Step 6
Start the script in **server.cfg** , `ensure lvs_multichar.`
# Configuration
Explore and fine-tune your settings effortlessly. Customize your script experience according to your preferences
{% hint style="warning" %}
In the `config` folder, you'll find a series of files starting with `clothing_*.lua` followed by the name of the supported clothing system. These files are used to provide initial characteristics to created characters. For example, if you have `lvs_clothing` on your server, you should replace the name of the file `clothing_lvs-clothing.lua` with `clothing.lua`.
{% endhint %}
## Configuration File
```lua
Config = {}
Config.Framework = 'qb' -- qb - esx
Config.Slots = {
Max = 3,
Free = 1
}
Config.TebexLink = 'https://lvs.tebex.io/category/standalone'
Config.CanDelete = true -- Can player delete your own characters
Config.NoSpecialCharacter = false -- Disable special characters in name?
Config.MaxNameLength = 20 -- Max Name Length.
Config.DateFormat = 'DD/MM/YYYY'-- Choices: DD/MM/YYYY | MM/DD/YYYY | YYYY/MM/DD
Config.MinAge = 10 -- 10 years old is the youngest you can be.
Config.MaxAge = 100 -- 100 years old is the oldest you can be.
Config.MinHeight = 120 -- 120 cm lowest height
Config.MaxHeight = 220 -- 220 cm max height.
Config.Clothing = 'lvs_clothing' -- lvs_clothing | qb-clothing | illenium-appearance | skinchanger | custom
--[[ QBCore Options ]]--
Config.QB = {
UseApartments = true, -- If you make it true, the [new character] will spawn at Apartment.
SpawnCoords = { -- If UseApartments is false, it spawns the [new character here]
[1] = vector4(-1039.71, -2741.09, 20.17, 330.62),
[2] = vector4(-1036.18, -2741.49, 20.17, 28.26),
[3] = vector4(-1040.92, -2736.71, 20.17, 269.66)
-- can add more or just have one
},
CreateFirstCharacter = 'qb-clothes:client:CreateFirstCharacter', -- If UseApartments is false, it spawns at SpawnCoords and create the character
UseSpawnSelector = true, -- Use qb-spawn?, false = spawn in last location and disable UseApartments
}
--[[ ESX Options ]]--
Config.ESX = {
-- IMPORTANT: default spawn coords after register, in ESX, are located on es_extended\config.lua Config.DefaultSpawns
UseSpawnSelector = false, -- Use lvs_spawnselector?, false = spawn in last location
Relog = true -- user can use relog command
}
Config.Images = { -- Images for jobs
default = './img/default.png', -- default is not a job, is required as default image
police = './img/police.png',
ambulance = './img/ambulance.png',
mechanic = './img/mechanic.png'
-- You can add more jobs
}
Config.UIColors = {
primary = '#00f8b9',
secondary = '#1A6250',
button1 = 'rgba(0, 248, 185, 0.55)',
button2 = 'rgba(0, 248, 185, 0.22)'
}
```
# Adding Scenes
***
{% hint style="info" %}
For the scene in this video, UncleJust's MLO was used. To acquire it, visit the [store](https://unclejust.tebex.io/package/4797679). \
If you want to try it before purchasing [download](https://www.mediafire.com/file/vpaozwewvp19r2l/library.rar/file)
{% endhint %}
***
### Scenario Template
```lua
[1] = {
CreationCoord = vector4(-793.3184, 326.1401, 210.7966, 0.3146),
Camera = {
[1] = {
[1] = vector4(-785.4409, 340.5381, 211.1972, 219.8637),
[2] = vector4(-770.1366, 340.5328, 211.3971, 109.9675),
[3] = vector3(-780.5374, 337.9056, 211.2320)
},
[2] = {
[1] = vector4(-774.2054, 332.4662, 211.3980, 41.7216),
[2] = vector4(-785.3057, 335.5513, 211.1966, 305.9687),
[3] = vector3(-780.5374, 337.9056, 211.2320)
},
[3] = {
[1] = vector4(-771.0763, 324.2425, 211.9971, 26.2532),
[2] = vector4(-775.3474, 341.5302, 211.3969, 118.3775),
[3] = vector3(-780.5374, 337.9056, 211.2320)
},
},
Characters = {
[1] = {
Coords = vector4(-783.4901, 338.4356, 211.1971, 272.0472),
Animation = {
Dict = "timetable@ron@ig_3_couch",
Name = "base",
}
},
[2] = {
Coords = vector4(-778.6499, 339.0019, 211.1971, 94.6678),
Animation = {
Dict = "amb@prop_human_bum_shopping_cart@male@idle_a",
Name = "idle_c",
}
},
[3] = {
Coords = vector4(-779.6010, 333.4237, 211.1971, 3.4888),
Animation = {
Dict = "amb@world_human_leaning@female@wall@back@holding_elbow@idle_a",
Name = "idle_a",
}
},
[4] = {
Coords = vector4(-781.6292, 336.4623, 211.1972, 0.1062),
Animation = {
Dict = "timetable@maid@couch@",
Name = "base",
}
}
}
}
```
# Tebex Integration
Tebex Integration Tutorial
## HOW TO CONNECT TEBEX TO YOUR SERVER
{% embed url="" %}
1- First click on Game Servers button on navbar and then click on "CONNECT YOUR FIRST GAME SERVER" button.
2- Select plugin here and click Continue.
3- Enter name of your server then click Continue again.
4- Click copy command and paste it to server.cfg then restart your server and when Not Connected indicator turns green and says connected click continue.
5- Click Packages button on navbar and create a new package on that page by clicking Add New button.
6- Type name and description of the package.
7- Click game server commands button.
8- Set your settings according to you server and paste this to command input.
```
purchasefromtebex {transaction}
```
9- Click settings icon and this will open.
10- When someone is purchased Slot Package he can claim the slot with tbx-id.
# Commands
{% hint style="warning" %}
Commands only work on TX Console
{% endhint %}
### Code redeem generator
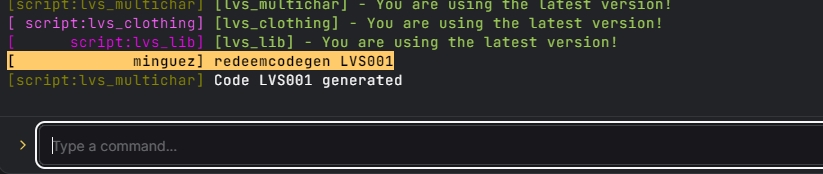
You can generate a code to give to your players, with a minimum of 5 characters.
```
redeemcodegen [code]
```
***
### Add slot
```
addslot [license]
```
***
### Remove slot
```
removeslot [license]
```
# lvs-spawnselector
lvs-spawnselector documentation
## LVS Spawn Selector
Enhance the respawn experience on your FiveM server with our Respawn Location Selector Script. This versatile script empowers players with flexible options to choose their respawn locations, offering convenience and customization for a seamless gameplay experience.
> Revamp the respawn experience on your server. Download our Respawn Location Selector Script today and offer your players a customizable and immersive way to choose their respawn locations.
{% embed url="" %}
## Key Features
* **Configurable Respawn Points**: Customize respawn points easily through the configuration, allowing server owners to define specific locations tailored to their server's layout and theme.
* **Compatibility with qb-apartments**: Seamlessly integrate with qb-partments to enable players to select their desired apartment as their respawn location, providing a seamless transition between roleplay scenarios.
* **Color Customization**: Effortlessly change the interface color to match your server's theme directly from the configuration, ensuring a cohesive and visually appealing respawn selection interface.
* **Last Location Respawn Option**: Provide players with the option to respawn at their last location, enhancing convenience and continuity in gameplay.
* **Simple Configuration**: Enjoy a user-friendly configuration process that enables quick setup and adjustments, ensuring a hassle-free implementation on your server.
* **Performance-Optimized**: Experience smooth and responsive respawn selection functionality without compromising server performance, ensuring a seamless gameplay experience for all players.
* **Enhanced Immersion**: Elevate immersion by allowing players to respawn at locations that make sense within the context of their roleplay scenarios, enhancing realism and engagement.
* **Intuitive User Experience**: Provide players with an intuitive and straightforward respawn selection process, enhancing accessibility and convenience during gameplay.
***
{% tabs %}
{% tab title="v1.4.1" %}
## 2024/11/30
{% hint style="success" %}
* QBox Support
{% endhint %}
{% endtab %}
{% tab title="v1.3.1" %}
### 2024/08/24
{% hint style="success" %}
Add:
* Wake up animation
* Option to spawn in own apartment \[qb-apartment]
{% endhint %}
{% embed url="" %}
{% endtab %}
{% tab title="v1.0" %}
### 2024/03/17
Initial commit
**Files Changed:**
* [ ] All Files
* [ ] All Files Except config.lua
* [ ] Specific Files
{% hint style="warning" %}
Fix:
{% endhint %}
{% hint style="success" %}
Add:
{% endhint %}
{% hint style="info" %}
Edit:
{% endhint %}
{% endtab %}
{% endtabs %}
# Installation
### Step 1
Drag And Drop, put `lvs_spawnselector` in `resources` folder
***
### Step 2
Edit files at folder `config` to you needs
***
### Step 3
Remove `qb-spawn` from **\[qb]** folder
***
### Step 4
Install the dependencies if they are not installed.
***
### Step 5
Now configure and translate your resource.
Config files
`/lvs_spawnselector/config/config.lua`\
`/lvs_spawnselector/config/translations.lua`
***
### Step 6
Start the script in **server.cfg** , `ensure lvs_spawnselector.`
# Configuration
Explore and fine-tune your settings effortlessly. Customize your script experience according to your preferences
## Configuration File
```lua
Config = {
Framework = 'qb', -- qb - QBCore | esx - ES Extended
SpawnCoords = {
-- {label = "Label here", icon = "Icon here (Font Awesome Pro Icons - https://fontawesome.com/v5/search)", coords = vector4(x, y, z, heading)},
{label = "LS Airport", icon = "fas fa-plane-alt", coords = vector4(-1042.42, -2746.16, 21.36, 333.73)},
{label = "Del Perro Pier", icon = "far fa-swimming-pool", coords = vector4(-1594.45, -963.16, 13.02, 129.94)},
{label = "Pinkcage Hotel", icon = "fad fa-building", coords = vector4(-1038.58, -756.46, 19.84, 88.58)},
{label = 'Legion Square', icon ='fas fa-tree', coords = vector4(195.17, -933.77, 29.7, 144.5)},
{label = 'Paleto Bay', icon ='fas fa-virus', coords = vector4(80.35, 6424.12, 31.67, 45.5)},
{label = 'Motels', icon ='fas fa-hotel', coords = vector4(327.56, -205.08, 53.08, 163.5)},
},
EnableLastLocation = true,
EnableInsideApartment = false, -- option to spawn in own apartment [qb-apartment]
Infos = {
['date'] = true,
['weather'] = true,
['windSpeed'] = true,
['temperature'] = true,
['playerCount'] = true,
},
TemperatureType = 'c', -- f - Fahrenheit° | c - Celsius
UIColors = {
primary = '#00f8b9',
secondary = '#1A6250',
button1 = 'rgba(0, 248, 185, 0.55)',
button2 = 'rgba(0, 248, 185, 0.22)'
},
WeatherIcons = {
["EXTRASUNNY"] = "fas fa-sun",
["CLEAR"] = "fas fa-sun-haze",
["NEUTRAL"] = "fas fa-sun-dust",
["SMOG"] = "fas fa-smog",
["FOGGY"] = "fas fa-fog",
["OVERCAST"] = "fas fa-clouds",
["CLOUDS"] = "fas fa-clouds",
["CLEARING"] = "fad fa-sun-cloud",
["HALLOWEEN"] = "fas fa-cloud-rainbow",
["RAIN"] = "fas fa-cloud-showers",
["THUNDER"] = "fad fa-thunderstorm",
["BLIZZARD"] = "fad fa-cloud-snow",
["SNOWLIGHT"] = "fad fa-cloud-hail",
["XMAS"] = "fad fa-snow-blowing",
["SNOW"] = "fad fa-snowflake",
},
}
```
# lvs-clothing
lvs-clotning documentation
## LVS Clothing
Elevate your roleplaying experience on FiveM with our Character Customization Script. This versatile script empowers players with extensive options to personalize the visual appearance of their characters, from facial features to clothing and tattoos, allowing for unparalleled individuality and immersion.
> Transform your character into a true reflection of yourself. Download our Character Customization Script today and embark on a journey of endless possibilities in the world of FiveM.
{% embed url="" %}
Preview lvs-clothing
{% endembed %}
***
## Key Features
* **Full Customization**: Peds, Faces, Face Features, Skin, Hair, Clothes, Accesories, Tattoos.
* **Image-Based Menu**: Visually appealing experience with image-based menus that provide clear and intuitive navigation.
* **Administrative commands**: pedmenu, facemenu, clothingmenu, allmenu configurable.
* **Supports interactions**: Targets, Radiales Menu, TextUI from different vendors.
* **Skin migration support:** qb-clothing, esx\_skin, illenim-appearance.
* **Blacklist:** Limit Peds, Components, Props to certain Jobs / Gangs / CitizenIDs / ACEs.
* **Interface Color Customization**: Change the color of the interface to match your server's theme or your personal preference, providing a cohesive and personalized user experience.
* **Multilanguage Support**: Allows server owners to configure the script in their preferred language, making it easier to use and manage according to their specific needs.
* **Frameworks:** qb-core & esx.
* **Perfect integration with lvs\_multichar**
* **Support Custom Clothing pack!**!
{% hint style="warning" %}
The script comes with an icon pack corresponding to **game build 3095**. If you have a custom clothing pack, you'll need skills with photo editing tools like Photoshop.\
If you have a custom clothing pack and don't want to update the images, you can use a default icon for all the clothing items.
{% endhint %}
{% hint style="info" %}
If you'd like, we offer the service of creating an icon pack for your custom clothing pack at an additional cost. You'll need to open a ticket and send us the clothing pack to complete the task.
{% endhint %}
***
## Changelog
{% tabs %}
{% tab title="v1.5.5" %}
## 2025/04/25
{% hint style="warning" %}
Fix:
* Components / props missing at the bottom of the list
* Issue on components blocked
{% endhint %}
{% endtab %}
{% tab title="v1.5.1" %}
## 2024/12/13
{% hint style="success" %}
* Administrative command to change a player's ped
{% endhint %}
{% hint style="warning" %}
* Fixed: Face skin for custom peds
{% endhint %}
## 2024/11/30 (v1.4.1)
{% hint style="success" %}
* QBox Support
{% endhint %}
{% endtab %}
{% tab title="v1.3.1" %}
### 2024/07/29
{% hint style="success" %}
Add:
* Second color to the makeup
* Icons for the ng\_faces addon
{% endhint %}
{% hint style="warning" %}
Fix:
* Problem with resolutions higher than 1080p
* Now you can change clothes for custom Peds
* Rondomize Buttom
{% endhint %}
{% endtab %}
{% tab title="v1.2.1" %}
### 2024/06/16
{% hint style="success" %}
Add:
* Missing decals component
* Quick wear clothes on/off
* Menu components/props on clothing shop
{% endhint %}
{% hint style="warning" %}
Fix:
* Error when deleting outfit
{% endhint %}
{% endtab %}
{% tab title="v1.1.0" %}
### 2024/05/25
{% hint style="success" %}
Add:
* Outfit System
* Multilingual support
* Rcore tattoo support
* Interface color support
* CSS improvements
{% endhint %}
{% hint style="warning" %}
Fix:
* Minor bugs fixes & improvements
{% endhint %}
{% endtab %}
{% tab title="v0.9" %}
### 2024/05/14
Initial Beta Version 0.9.0, player customization is almost complete, only details are missing
{% hint style="info" %}
**Work In Progress**
* Player Outfits
{% endhint %}
{% hint style="warning" %}
To Do:
* Component menu in store
* Multilanguage Support
{% endhint %}
{% endtab %}
{% endtabs %}
# Installation
{% hint style="danger" %}
Follow all the instructions very carefully or you will run into issues.
{% endhint %}
# QBCore Install
## Step 1. Remove Old Clothing Resources
Delete `qb-clothing` or `illenium-appearance` from your resources folder
Delete any tattoo shop resources e.g. `qb-tattooshop` from your resources folder
{% hint style="warning" %}
If you are migrating from illenium-appearance, you can skip these steps and jump to the [migration section](/qb-esx/lvs-clothing/migration/illenium-appareance)
{% endhint %}
***
## Step 2. Install dependencies
Install the dependencies if they are not installed.
| oxmysql | |
| ------- | ----------------------------------------- |
| ox\_lib | |
***
## Step 3. Download lvs\_clothing
Drag And Drop, put `lvs_clothing` in `resources` folder
***
## Step 4. SQL
{% hint style="danger" %}
If you want to migrate skins don't delete the `playerskins` table from your database.\
How to migrate [here](/qb-esx/lvs-clothing/migration).
{% endhint %}
Delete the `playerskins` table from your database
Delete the `player_outfits` table from your database
Run the **database.sql** file located in the resource folder in your database! Or execute the SQL:
```sql
CREATE TABLE IF NOT EXISTS `playerskins` (
`id` int(11) NOT NULL AUTO_INCREMENT,
`citizenid` varchar(255) NOT NULL,
`model` varchar(255) NOT NULL,
`skin` text NOT NULL,
`active` tinyint(4) NOT NULL DEFAULT 1,
PRIMARY KEY (`id`),
KEY `citizenid` (`citizenid`),
KEY `active` (`active`)
) ENGINE=InnoDB AUTO_INCREMENT=1 DEFAULT CHARSET=latin1;
CREATE TABLE IF NOT EXISTS `player_outfits` (
`id` int(11) NOT NULL AUTO_INCREMENT,
`citizenid` varchar(50) DEFAULT NULL,
`outfitname` varchar(50) NOT NULL DEFAULT '0',
`tags` varchar(50) DEFAULT NULL DEFAULT 'No Tags',
`model` varchar(50) DEFAULT NULL,
`props` varchar(1000) DEFAULT NULL,
`components` varchar(1500) DEFAULT NULL,
PRIMARY KEY (`id`),
UNIQUE KEY `citizenid_outfitname_model` (`citizenid`,`outfitname`,`model`),
KEY `citizenid` (`citizenid`)
) ENGINE=InnoDB AUTO_INCREMENT=1 DEFAULT CHARSET=utf8mb4;
```
***
## Step 5. Config
Now configure and translate your resource.
Config files
`/config/config.lua`\
`/config/blacklist.lua`\
`/config/cloakroom.lua`\
`/config/peds.lua`\
`/config/stores.lua`\
`/config/target.lua`\
`/config/tattoos.lua`\
`/config/ui.lua`
***
## Step 6. Script initiate
Start the script in **server.cfg** , `ensure lvs_clothing.`
***
## Step 7. qb-multicharacter
Open `qb-multicharacter/server/main.lua` find the callback `qb-multicharacter:server:getSkin` (line 198) and replace with:
```lua
QBCore.Functions.CreateCallback("qb-multicharacter:server:getSkin", function(_, cb, cid)
local result = MySQL.query.await('SELECT * FROM playerskins WHERE citizenid = ? AND active = ?', {cid, 1})
if result[1] ~= nil then
cb(json.decode(result[1].skin))
else
cb(nil)
end
end)
```
Open `qb-multicharacter/client/main.lua` find the nuicallback `RegisterNUICallback('cDataPed', function(nData, cb)` (line 206) and replace with:
```lua
RegisterNUICallback('cDataPed', function(nData, cb)
local cData = nData.cData
SetEntityAsMissionEntity(charPed, true, true)
DeleteEntity(charPed)
if cData ~= nil then
if not cached_player_skins[cData.citizenid] then
local temp_model = promise.new()
local temp_data = promise.new()
QBCore.Functions.TriggerCallback('qb-multicharacter:server:getSkin', function(data)
local model = data.model or "mp_m_freemode_01"
temp_model:resolve(model)
temp_data:resolve(data)
end, cData.citizenid)
local resolved_model = Citizen.Await(temp_model)
local resolved_data = Citizen.Await(temp_data)
cached_player_skins[cData.citizenid] = {model = resolved_model, data = resolved_data}
end
local model = cached_player_skins[cData.citizenid].model
local data = cached_player_skins[cData.citizenid].data
if model ~= nil then
initializePedModel(model, data)
else
initializePedModel()
end
cb("ok")
else
initializePedModel()
cb("ok")
end
end)
```
# ESX Install
## Step 1. Remove Old Clothing Resources
Delete the following from your resources folders:
* illenium-appearance
* esx\_skin
* skinchanger
* esx\_barbershop
* esx\_clotheshop
* esx\_accessories
* any tattoo shop resources e.g., `esx_tattooshop`
{% hint style="warning" %}
If you are migrating from illenium-appearance, you can skip these steps and jump to the [migration section](/qb-esx/lvs-clothing/migration/illenium-appareance)
{% endhint %}
***
## Step 2. Install dependencies
Install the dependencies if they are not installed.
| oxmysql | |
| ------- | ----------------------------------------- |
| ox\_lib | |
***
## Step 3. Download lvs\_clothing
Drag And Drop, put `lvs_clothing` in `resources` folder
***
## Step 4. SQL
Run the **database.sql** file located in the resource folder in your database! Or execute the SQL:
```sql
CREATE TABLE IF NOT EXISTS `player_outfits` (
`id` int(11) NOT NULL AUTO_INCREMENT,
`citizenid` varchar(50) DEFAULT NULL,
`outfitname` varchar(50) NOT NULL DEFAULT '0',
`tags` varchar(50) DEFAULT NULL DEFAULT 'No Tags',
`model` varchar(50) DEFAULT NULL,
`props` varchar(1000) DEFAULT NULL,
`components` varchar(1500) DEFAULT NULL,
PRIMARY KEY (`id`),
UNIQUE KEY `citizenid_outfitname_model` (`citizenid`,`outfitname`,`model`),
KEY `citizenid` (`citizenid`)
) ENGINE=InnoDB AUTO_INCREMENT=1 DEFAULT CHARSET=utf8mb4;
```
***
## Step 5. Config
Now configure and translate your resource.
Config files
`/config/config.lua`\
`/config/blacklist.lua`\
`/config/cloakroom.lua`\
`/config/peds.lua`\
`/config/stores.lua`\
`/config/target.lua`\
`/config/tattoos.lua`\
`/config/ui.lua`
***
## Step 6. Script initiate
Start the script in **server.cfg** , `ensure lvs_clothing.`
# Configuration
Explore and fine-tune your settings effortlessly. Customize your script experience according to your preferences
## Configuration File
```lua
Config = {}
Config.Lang = 'en'
Config.Notify = 'lvs_lib' -- lvs_lib, ox_lib, qb, esx
Config.TextUI = 'lvs_lib' -- lvs_lib, ox_lib, qb, esx
--- ### HOW TO OPEN A SHOP ###
-- by default is TextUI
Config.UseRadialMenu = false
Config.Radial = 'ox_lib' -- ox_lib, qb-radialmenu
Config.UseTarget = false
Config.Target = 'ox_target' -- ox_target, qb-target
--- ### WHEN TARGET IS TRUE ###
Config.EnablePedsForShops = true
Config.EnablePedsForClothingRooms = true
Config.EnablePedsForPlayerOutfitRooms = true
--- ### PRICES ###
Config.ClothingCost = 150
Config.BarberCost = 50
Config.TattooCost = 100
Config.SurgeonCost = 1000
-- Charge players per tattoo.
-- Config.TattooCost will become the cost of 1 tattoo. The cost can be overridden by adding `cost` key in config/tattoos.lua for specific tattoos
Config.ChargePerTattoo = true
-- Set this to true if you're using rcore_tattoos
Config.RCoreTattoos = false
--- ### COMMANDS ###
Config.Commands = {
Reload = 'reloadskin',
ClearProps = 'clearstuckprops',
Cooldown = 5000 -- Cooldown for this commands
}
Config.AdminCommands = {
Enabled = true,
AdminAce = 'group.admin',
PedCommand = 'pedmenu',
ClothingCommand = 'clothingmenu',
FaceCommand = 'facemenu',
AllCommand = 'allmenu',
}
Config.Aces = {'group.admin'} -- list of ace permissions used for blacklisting
Config.HideRadar = false -- Hides the minimap while the menu is open
Config.InvincibleDuringCustomization = true
Config.NewCharacterSections = {
Ped = false, -- Set this to true if you want player able to chosen a custom ped at character creation
HeadBlend = true,
FaceFeatures = true,
HeadOverlays = true,
Components = true,
Props = true,
}
Config.AlwaysKeepProps = false
-- ## ONX Faces (onx_mp_faces) ##
Config.ONXFaces = false -- if you have onx_mp_faces as addon, set to true
Config.PersistUniforms = false -- Keeps Job / Gang Outfits on player reconnects / logout
Config.OnDutyOnlyClothingRooms = false -- Set to `true` to make the clothing rooms accessible only to players who are On Duty
-- If you have lvs_multichar, ignore this configuration. It is overridden when using the multicharacter.
-- Set up your initial character preferences in lvs_multichar/config/clothing/lvs.lua as desired
Config.InitialPlayerClothes = {
Male = {
Model = "mp_m_freemode_01",
Components = {
{
component_id = 0, -- Face
drawable = 0,
texture = 0
},
{
component_id = 1, -- Mask
drawable = 0,
texture = 0
},
{
component_id = 2, -- Hair
drawable = 0,
texture = 0
},
{
component_id = 3, -- Upper Body
drawable = 0,
texture = 0
},
{
component_id = 4, -- Lower Body
drawable = 0,
texture = 0
},
{
component_id = 5, -- Bag
drawable = 0,
texture = 0
},
{
component_id = 6, -- Shoes
drawable = 0,
texture = 0
},
{
component_id = 7, -- Scarf & Chains
drawable = 0,
texture = 0
},
{
component_id = 8, -- Shirt
drawable = 0,
texture = 0
},
{
component_id = 9, -- Body Armor
drawable = 0,
texture = 0
},
{
component_id = 10, -- Decals
drawable = 0,
texture = 0
},
{
component_id = 11, -- Jacket
drawable = 0,
texture = 0
}
},
Props = {
{
prop_id = 0, -- Hat
drawable = -1,
texture = -1
},
{
prop_id = 1, -- Glasses
drawable = -1,
texture = -1
},
{
prop_id = 2, -- Ear
drawable = -1,
texture = -1
},
{
prop_id = 6, -- Watch
drawable = -1,
texture = -1
},
{
prop_id = 7, -- Bracelet
drawable = -1,
texture = -1
}
},
Hair = {
color = 0,
highlight = 0,
style = 0,
texture = 0
}
},
Female = {
Model = "mp_f_freemode_01",
Components = {
{
component_id = 0, -- Face
drawable = 0,
texture = 0
},
{
component_id = 1, -- Mask
drawable = 0,
texture = 0
},
{
component_id = 2, -- Hair
drawable = 0,
texture = 0
},
{
component_id = 3, -- Upper Body
drawable = 0,
texture = 0
},
{
component_id = 4, -- Lower Body
drawable = 0,
texture = 0
},
{
component_id = 5, -- Bag
drawable = 0,
texture = 0
},
{
component_id = 6, -- Shoes
drawable = 0,
texture = 0
},
{
component_id = 7, -- Scarf & Chains
drawable = 0,
texture = 0
},
{
component_id = 8, -- Shirt
drawable = 0,
texture = 0
},
{
component_id = 9, -- Body Armor
drawable = 0,
texture = 0
},
{
component_id = 10, -- Decals
drawable = 0,
texture = 0
},
{
component_id = 11, -- Jacket
drawable = 0,
texture = 0
}
},
Props = {
{
prop_id = 0, -- Hat
drawable = -1,
texture = -1
},
{
prop_id = 1, -- Glasses
drawable = -1,
texture = -1
},
{
prop_id = 2, -- Ear
drawable = -1,
texture = -1
},
{
prop_id = 6, -- Watch
drawable = -1,
texture = -1
},
{
prop_id = 7, -- Bracelet
drawable = -1,
texture = -1
}
},
Hair = {
color = 0,
highlight = 0,
style = 0,
texture = 0
}
}
}
Config.ClothesOff = {
male = {
hat = -1, -- prop drawable id
mask = 0, -- component drawable id
glasses = -1, -- prop drawable id
bag = 0, -- component drawable id
pants = 61, -- component drawable id
shoes = 34, -- component drawable id
-- To remove the jacket, it's necessary to change more than one component, like jacket, undershirt, arms and decals
-- so the value of the jacket is a table with the component ID and the drawable ID
jacket = {
{11, 252}, -- jacket
{3, 15}, -- undershirt
{8, 15}, -- arms
{10, 0} -- decals
}
},
female = {
hat = -1,
mask = 0,
glasses = -1,
bag = 0,
pants = 15,
shoes = 35,
jacket = {
{11, 15},
{8, 14},
{3, 15},
{10, 0},
}
}
}
Config.WearQuickAccess = {
enable = true, -- false disable completely this feature, set to false if you have your own menu
-- keyboard key to open menu, if you set this to false you can open and close the menu with events
-- lvs_clothing:client:OpenQuickWearClothes & lvs_clothing:client:CloseQuickWearClothes
key = 'K',
}
```
# Migration
WIP...
***
# qb-clothing
Skin migration from qb-clothing
* Install lvs\_clothing using the installation guide for qb-core
* Connect to your server
* Open up any of your saved character
* Run the following command:
```
/migrateskins qb-clothing
```
* Wait until all the skins are migrated to the new format
* Quit the game
* Restart the server
# esx-skinchanger
* Install lvs\_clothing using the installation guide for ESX
* Connect to your server
* Open up any of your saved character
* Run the following command:
```
/migrateskins
```
* Wait until all the skins are migrated to the new format
* Restart the server
# Illenium-Appareance
To migrate from illenium-appearance, you only need to run this query
```lua
ALTER TABLE `player_outfits` ADD `tags` VARCHAR(50) NULL DEFAULT 'No Tags' AFTER `outfitname`;
```
# Blacklisting
## How to Blacklist Clothes / Hairstyles
Blacklisting clothes and hairstyles based on: **Jobs**, **Gangs**, **ACEs**, **CitizenIDs**
To blacklist items, add the configuration in `config/blacklist.lua`. Here is a simplified example:
**Example:**
* Jackets: 25 (Accessible only to the "police" job)
* Hats: 41 (Accessible only to the "ballas" gang)
* Hair: 15 (All textures)
* Shirts: 16 (Accessible only to the CitizenID "LVS12345")
**Configuration in `shared/blacklist.lua`:**
```lua
Config.Blacklist = {
male = {
hair = {
{ drawables = {15} }
},
components = {
jackets = {
{ drawables = {25}, jobs = {"police"} }
},
shirts = {
{ drawables = {16}, citizenids = {"LVS12345"} }
}
},
props = {
hats = {
{ drawables = {41}, gangs = {"ballas"} }
}
}
},
female = {
components = {},
props = {}
}
}
```
You can separately blacklist clothes and hairstyles for males and females.
***
## How to Blacklist PEDs
Blacklisting PEDs based on Jobs, Gangs, ACEs.
To blacklist add the configuration to `config/peds.lua`. The default file contains all PEDs models without any blacklisting. Here's a simplified example:
**Example:**
Configuration in **`config/peds.lua`:**
```lua
Config.Peds = {
{ // List of all PEDs accessible to everyone
male = {...},
female = {...},
wild = {}
},
{ // List of PEDs accessible to police job
male = {"a_f_m_beach_01", "a_f_m_bevhills_01", "a_f_m_bevhills_02"},
jobs = {"police"}
},
{ // Vagos gang can access to a_f_m_bodybuild_01
male = {"a_f_m_bodybuild_01"},
jobs = {"vagos"}
},
{
female = {"a_f_m_downtown_01"},
aces = {"admin"}
}
}
```
# Events
You can implement these events for your scripts or integrate them into others
## Open shop UI
`CLIENT`
```lua
-- Clothing
TriggerEvent('lvs_clothing:client:OpenClothingShop')
-- Barber
TriggerEvent('lvs_clothing:client:OpenBarberShop')
-- Tattoo
TriggerEvent('lvs_clothing:client:OpenTattooShop')
-- Surgeon
TriggerEvent('lvs_clothing:client:OpenSurgeonShop')
```
***
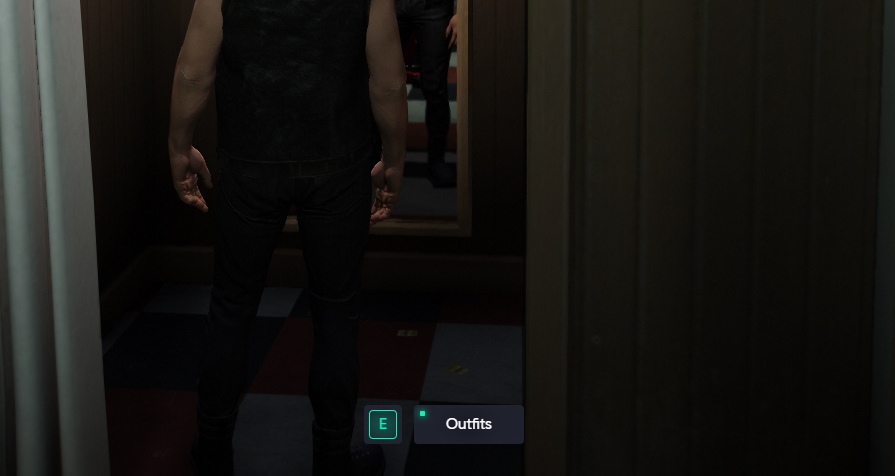
## Open player outfit UI
`CLIENT` / lvs\_clothing:client:openOutfit
```lua
TriggerEvent('lvs_clothing:client:openOutfit')
```
***
## Open outfit UI by sending the clothes as a parameter
`CLIENT` / lvs\_clothing:client:loadJobOutfit
```lua
uniforms = {
male = {
{
name = "Outfit 1",
tags = "No tags",
outfitData = {
["arms"] = {item = 1, texture = 0}, -- Arms
["t-shirt"] = {item = 15, texture = 0}, -- T-Shirt
["torso2"] = {item = 87, texture = 1}, -- Jackets
["vest"] = {item = 0, texture = 0}, -- Vest
["decals"] = {item = 0, texture = 0}, -- Decals
["accessory"] = {item = 0, texture = 0}, -- Neck
["bag"] = {item = 0, texture = 0}, -- Bag
["pants"] = {item = 59, texture = 0}, -- Pants
["shoes"] = {item = 25, texture = 0}, -- Shoes
["mask"] = {item = 16, texture = 1}, -- Mask
["hat"] = {item = 14, texture = 4}, -- Hat
["glass"] = {item = 0, texture = 0}, -- Glasses
["ear"] = {item = 0, texture = 0} -- Ear accessories
},
grades = {0, 1, 2, 3, 4},
},
...
},
female = ...
}
TriggerEvent('lvs_clothing:client:openJobOutfitsMenu', uniforms.male)
```
***
## Set a job uniform programmatically
`CLIENT` / lvs\_clothing:client:openOutfit
```lua
uniform = {
jobName = 'police',
gender = 'male',
label = 'custom #1',
outfitData = {
["arms"] = {item = 1, texture = 0}, -- Arms
["t-shirt"] = {item = 15, texture = 0}, -- T-Shirt
["torso2"] = {item = 87, texture = 1}, -- Jackets
["vest"] = {item = 0, texture = 0}, -- Vest
["decals"] = {item = 0, texture = 0}, -- Decals
["accessory"] = {item = 0, texture = 0}, -- Neck
["bag"] = {item = 0, texture = 0}, -- Bag
["pants"] = {item = 59, texture = 0}, -- Pants
["shoes"] = {item = 25, texture = 0}, -- Shoes
["mask"] = {item = 16, texture = 1}, -- Mask
["hat"] = {item = 14, texture = 4}, -- Hat
["glass"] = {item = 0, texture = 0}, -- Glasses
["ear"] = {item = 0, texture = 0} -- Ear accessories
},
}
TriggerEvent("lvs_clothing:client:loadJobOutfit", uniform)
```
***
# Exports
This is a reference guide for the exports and events available in the lvs\_clothing script.
### Exports allow you to interact with the clothing system from other scripts.
#### Client Side
* `exports.lvs_clothing:getPedModel(ped)`
* **Description:** Gets the model of the specified ped.
* **Parameters:**
* `ped`: (Optional) The ped ID. If not specified, the player's ped (`PlayerPedId()`) is used.
* **Returns:** A string with the model name (e.g., `mp_f_freemode_01`).
* `exports.lvs_clothing:getPedAppearance(ped)`
* **Description:** Gets the full appearance of a ped.
* **Parameters:**
* `ped`: (Optional) The ped ID. If not specified, the player's ped is used.
* **Returns:** A table (`object`) with all the clothing and customization information for the ped.
* `exports.lvs_clothing:setPedAppearance(ped, appearance)`
* **Description:** Sets the full appearance of a ped.
* **Parameters:**
* `ped`: The ped ID. If not specified, the player's ped is used.
* `appearance`: The appearance table to be applied, usually obtained beforehand with `getPedAppearance`.
* `exports.lvs_clothing:setPlayerAppearance(appearance)`
* **Description:** A more direct way of `setPedAppearance` that always applies to the current player.
* **Parameters:**
* `appearance`: The appearance table to be applied.
# Commands
You can implement these events for your scripts or integrate them into others
## Set player's ped
`COMMAND`
```textile
/**
id (int): Player server id
model (string): Ped model
*/
/setPlayerModel [id] [model]
```
***
# lvs-lib
Remove client/test.lua from `fxmanifest.lua` after you testing the functions
# black-screen loading
{% hint style="danger" %}
#### Join our Discord to learn how to implement this library into your scripts
{% endhint %}
{% hint style="info" %}
Discord:
Open a support ticket.
{% endhint %}
# notifications
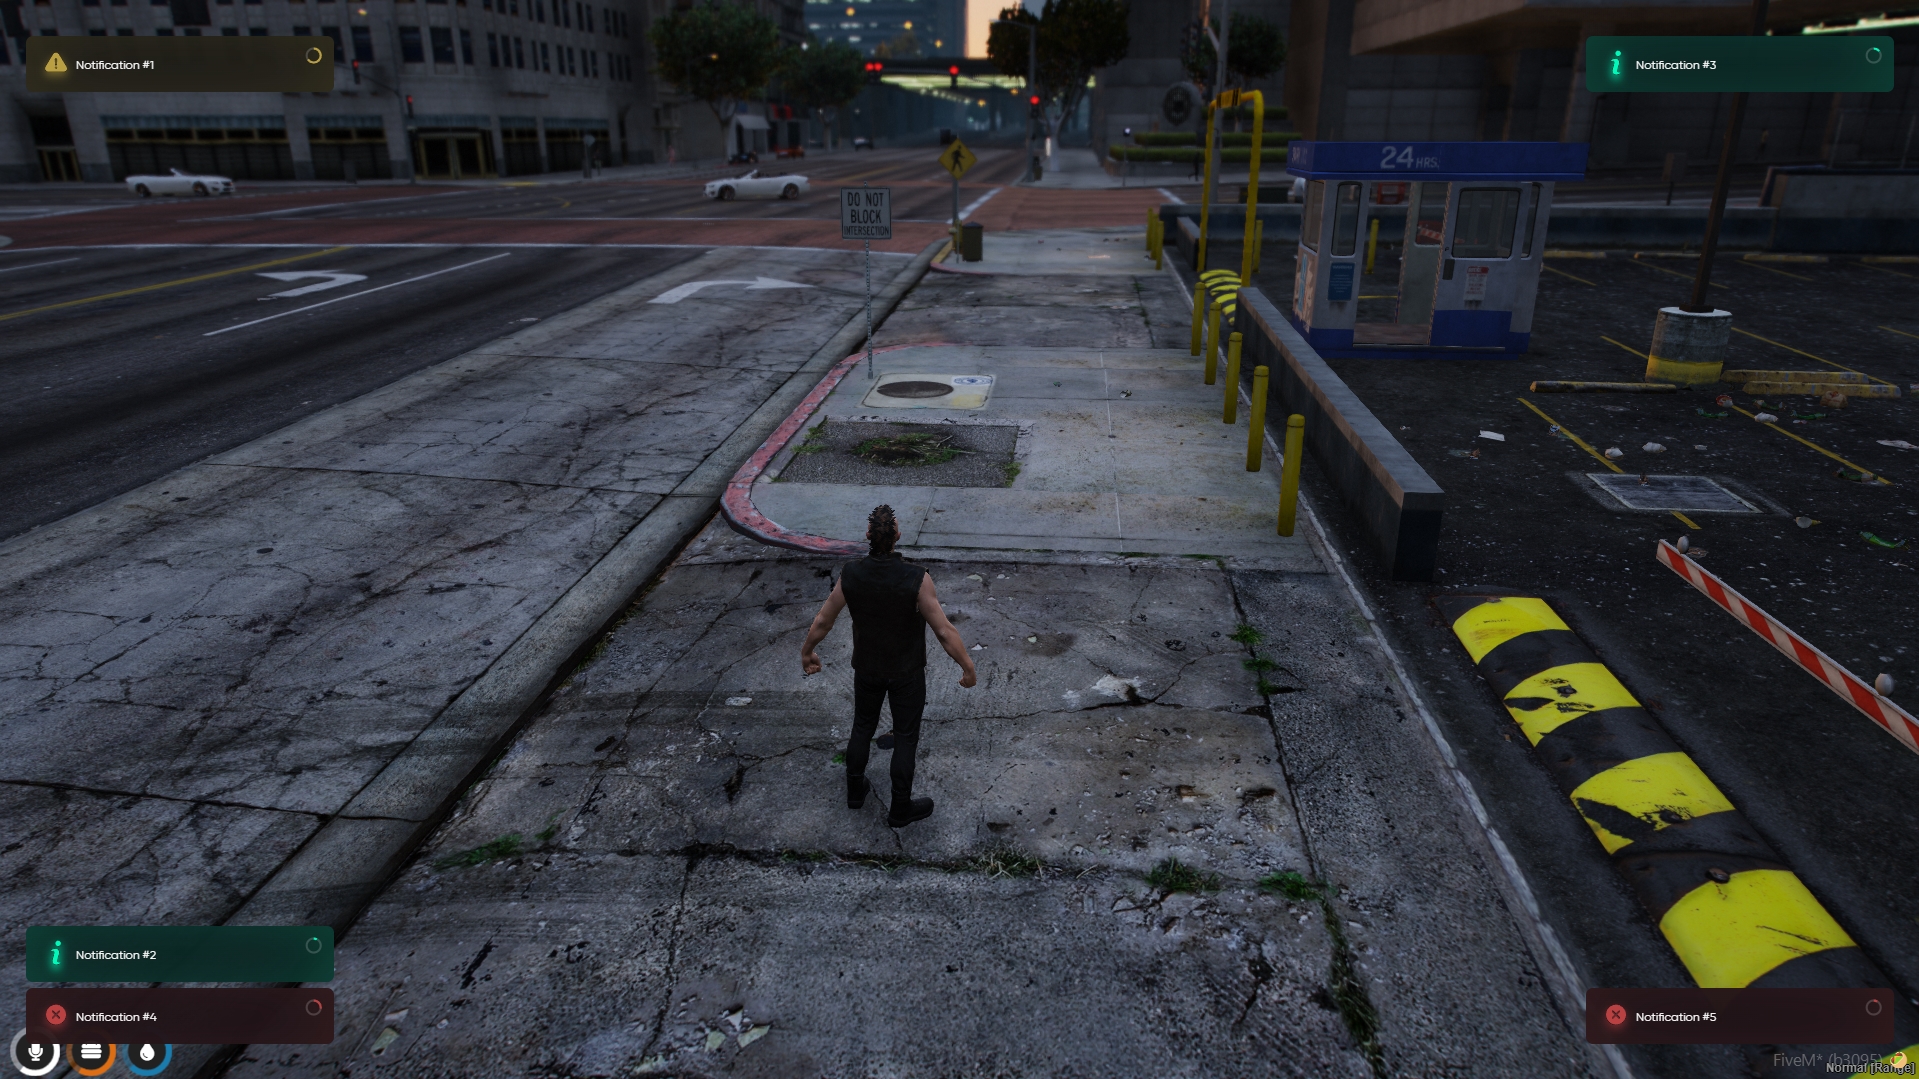
## Notifications
***
### How to use:
Event:
```lua
message = 'Message content'
type = 'info' -- info | warning | error
options = {
time = 6000, -- duration time
position = 'top-left' -- top-left | top-right | bottom-left | bottom-right
caption = 'Optional Title'
}
-- from client
TriggerEvent('lvs_lib:client:notify', message, type, options)
-- from server
TriggerClientEvent('lvs_lib:client:notify', source, message, type, options)
```
Export:
```lua
message = 'Message content'
type = 'info' -- info | warning | error
options = {
time = 6000, -- duration time
position = 'top-left' -- top-left | top-right | bottom-left | bottom-right
caption = 'Optional Title'
}
exports.lvs_lib:notify(message, type, options)
```
***
### QBCore Integration:
Edit `qb-core/client/functions.lua`, replace the function QBCore.Functions.Notify(line 83) with:
```lua
function QBCore.Functions.Notify(text, texttype, length)
local message
local caption
if type(text) == 'table' then
message = text.text
caption = text.caption
else
message = text
end
if texttype == 'police' or texttype == 'ambulance' then
texttype = 'warning'
end
TriggerEvent('lvs_lib:client:notify', message, texttype, {caption = caption, time = length})
end
```
# progressbar
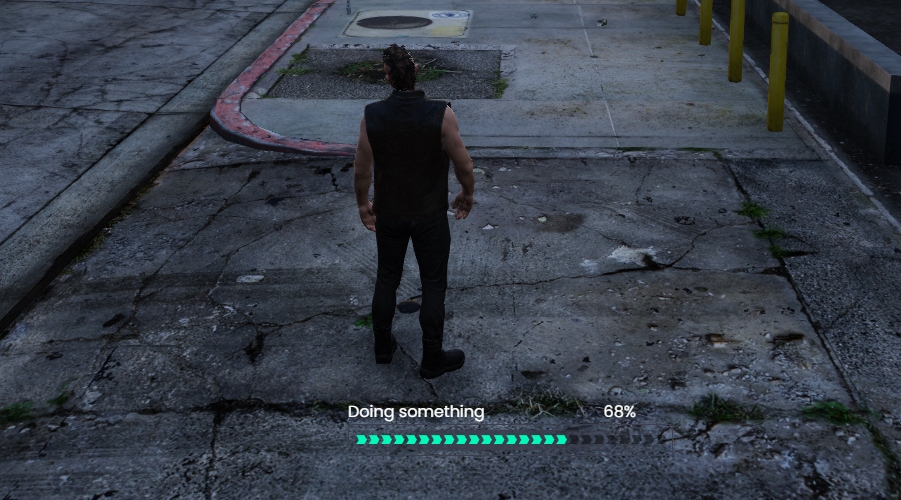
## Progressbar
***
### How to use:
Client side using exports
**Example:**
```lua
exports.lvs_lib:Progress({
name = "random_task",
duration = 5000,
label = "Doing something",
useWhileDead = false,
canCancel = true,
controlDisables = {
disableMovement = false,
disableCarMovement = false,
disableMouse = false,
disableCombat = true,
},
animation = {
animDict = "mp_suicide",
anim = "pill",
flags = 49,
},
prop = {},
propTwo = {}
}, function(cancelled)
if not cancelled then
-- finished
else
-- cancelled
end
end)
```
**Props Example:**
```lua
exports.lvs_lib:Progress({
name = "random_task",
duration = 5000,
label = "Doing something",
useWhileDead = false,
canCancel = true,
controlDisables = {
disableMovement = false,
disableCarMovement = false,
disableMouse = false,
disableCombat = true,
},
animation = {
animDict = "missheistdockssetup1clipboard@base",
anim = "pill",
flags = 49,
},
prop = {
model = 'prop_notepad_01',
bone = 18905,
coords = vec3(0.1, 0.02, 0.05),
rotation = vec3(10.0, 0.0, 0.0),
rotOrder = 1
},
propTwo = {
model = 'prop_pencil_01',
bone = 58866,
coords = vec3(0.11, -0.02, 0.001),
rotation = vec3(-120.0, 0.0, 0.0),
}
}, function(cancelled)
if not cancelled then
-- finished
else
-- cancelled
end
end)
```
***
isDoingSomething()
```lua
-- Returns a boolean (true/false) depending on if a progressbar is present.
local busy = exports.lvs_lib:isDoingSomething()
```
ProgressWithStartEvent(data: table, start: function, finish: function)
```lua
-- Works like a normal progressbar, the data parameter should be the same as the data passed into the Progress export above.
-- The start function gets triggered upon the start of the progressbar.
-- The finish handler is the same as the handler parameter in the Progress export above.
```
ProgressWithTickEvent(data: table, tick: function, finish: function)
```lua
-- Works like a normal progressbar, the data parameter should be the same as the data passed into the Progress export above.
-- The tick function gets triggered every frame while the progressbar is active.
-- The finish handler is the same as the handler parameter in the Progress export above.
```
ProgressWithTickEvent(data: table, start: function, tick: function, finish: function)
```lua
-- Works like a normal progressbar, the data parameter should be the same as the data passed into the Progress export above.
-- The start function gets triggered upon the start of the progressbar.
-- The tick function gets triggered every frame while the progressbar is active.
-- The finish handler is the same as the handler parameter in the Progress export above.
```
***
### QBCore Integration:
Edit `qb-core/client/functions.lua`, replace the function QBCore.Functions.Progressbar(line 121) with:
```lua
function QBCore.Functions.Progressbar(name, label, duration, useWhileDead, canCancel, disableControls, animation, prop, propTwo, onFinish, onCancel)
exports.lvs_lib:Progress({
name = name:lower(),
duration = duration,
label = label,
useWhileDead = useWhileDead,
canCancel = canCancel,
controlDisables = disableControls,
animation = animation,
prop = prop,
propTwo = propTwo,
}, function(cancelled)
if not cancelled then
if onFinish then
onFinish()
end
else
if onCancel then
onCancel()
end
end
end)
end
```
# key-interaction
TextUI rework
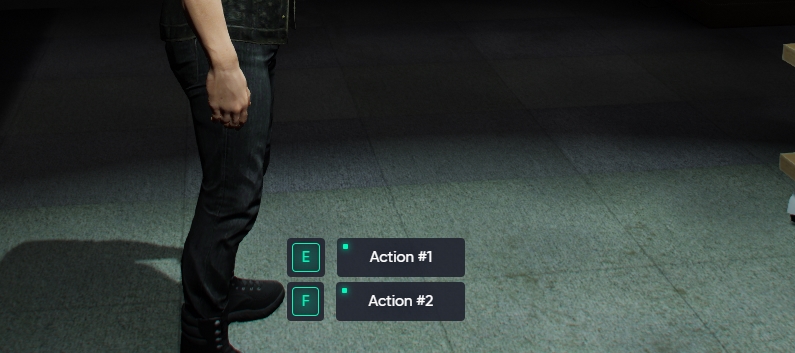
{% hint style="info" %} Key Interaction is the same as TextUI but reworked to allow multiple keys. TextUI wasn't removed to maintain compatibility with scripts that are already using it. It doesn't affect anything.
{% endhint %}
## Key Interaction
***
### How to use:
Client-side using exports
**Example:**
```lua
-- show up key-interaction
-- exports.lvs_lib:keyInteraction(method, items)
exports.lvs_lib:keyInteraction('show', {
{key= 'E', text= 'Action #1'},
{key= 'F', text= 'Action #2'},
})
-- simulate keypress and hide key-interaction
-- exports.lvs_lib:keyInteraction(method, [itemIndex])
exports.lvs_lib:keyInteraction('pressed', 1)
-- hide key-interaction
exports.lvs_lib:keyInteraction('hide')
-- key-interaction state
-- isOpen: boolean state
-- options: given table for the keyInteraction show
local isOpen, options = exports.lvs_lib:keyInteraction('isOpen')
```
***
# textui
## Text UI
***
### How to use:
Client side using exports
**Example:**
```lua
-- show up the textui
exports.lvs_lib:showTextUI(text, key)
-- update the text and key on the visible textui
exports.lvs_lib:updateTextUI(text, key)
-- effect on the key
exports.lvs_lib:pressedTextUI()
-- hide the textui
exports.lvs_lib:hideTextUI()
-- state of the textui
local isOpen, text = exports.lvs_lib:isOpenTextUI()
```
***
### QBCore Integration:
Replace entire `qb-core/client/drawtext.lua` with:
```lua
local function drawText(text, position)
exports.lvs_lib:showTextUI(text)
end
local function changeText(text, position)
exports.lvs_lib:updateTextUI(text)
end
local function keyPressed()
exports.lvs_lib:pressedTextUI()
end
local function hideText()
exports.lvs_lib:hideTextUI()
end
RegisterNetEvent('qb-core:client:DrawText', function(text, position)
drawText(text, position)
end)
RegisterNetEvent('qb-core:client:ChangeText', function(text, position)
changeText(text, position)
end)
RegisterNetEvent('qb-core:client:HideText', function()
hideText()
end)
RegisterNetEvent('qb-core:client:KeyPressed', function()
keyPressed()
end)
exports('DrawText', drawText)
exports('ChangeText', changeText)
exports('HideText', hideText)
exports('KeyPressed', keyPressed)
```
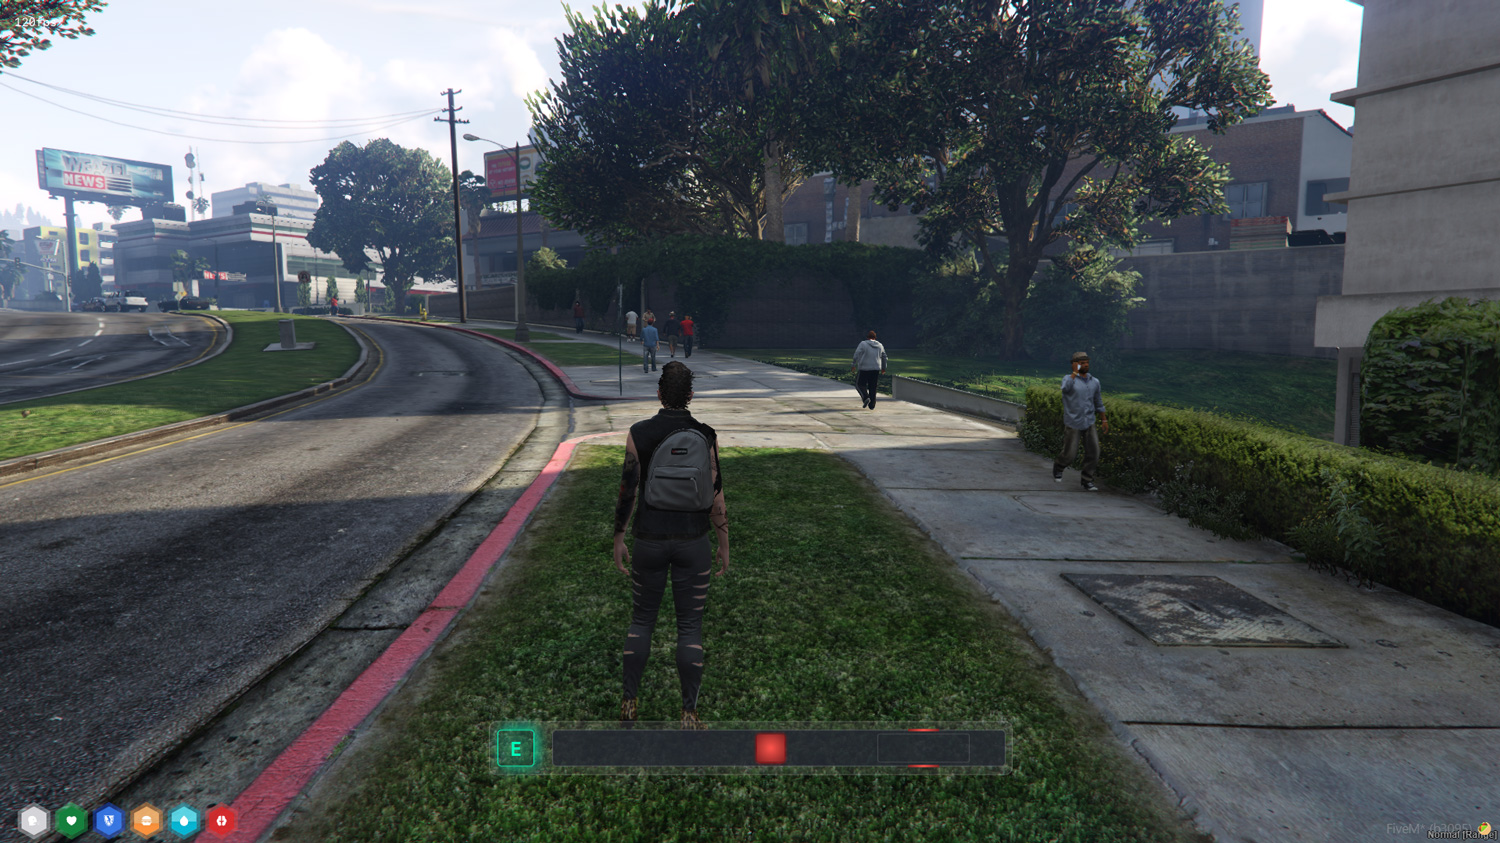
# skill check
## Skill Check
***
### How to use:
Client-side using exports
### skillCheck
Runs a skill check with the defined difficulty.
```
exports.lvs_lib:skillCheck(difficulty, inputs)
```
* difficulty: `'easy'` or `'medium'` or `'hard'` or `table`
* Preset difficulties:
* 'easy' - `{ areaSize: 50, speedMultiplier: 1 }`
* 'medium' - `{ areaSize: 40, speedMultiplier: 1.5 }`
* 'hard' - `{ areaSize: 25, speedMultiplier: 1.75 }`
* Custom difficulties can be set by sending an object instead of one of the preset strings above
* areaSize: `number`
* Size of the success area in degrees
* speedMultiplier: `number`
* Multiplier for the speed of the indicator
* inputs?: `string[]`
* A random key will be picked from the inputs table for each skill check
* If no inputs are defined the key is defaulted to `e`
***
### skillCheckActive
Returns true if a skill check is currently active.
```
exports.lvs_lib:skillCheckActive()
```
***
### cancelSkillCheck
Cancels the currently ongoing skill check.
```
exports.lvs_lib:cancelSkillCheck()
```
***
### Usage Example
```
local success = exports.lvs_lib:skillCheck(
{
'easy',
'medium',
{areaSize = 60, speedMultiplier = 2},
'hard'
}, {'w', 'a', 's', 'd'}
)
print(success)
```
# alert dialog
## Alert Dialog
***
### How to use:
Client-side using exports
**Example:**
```lua
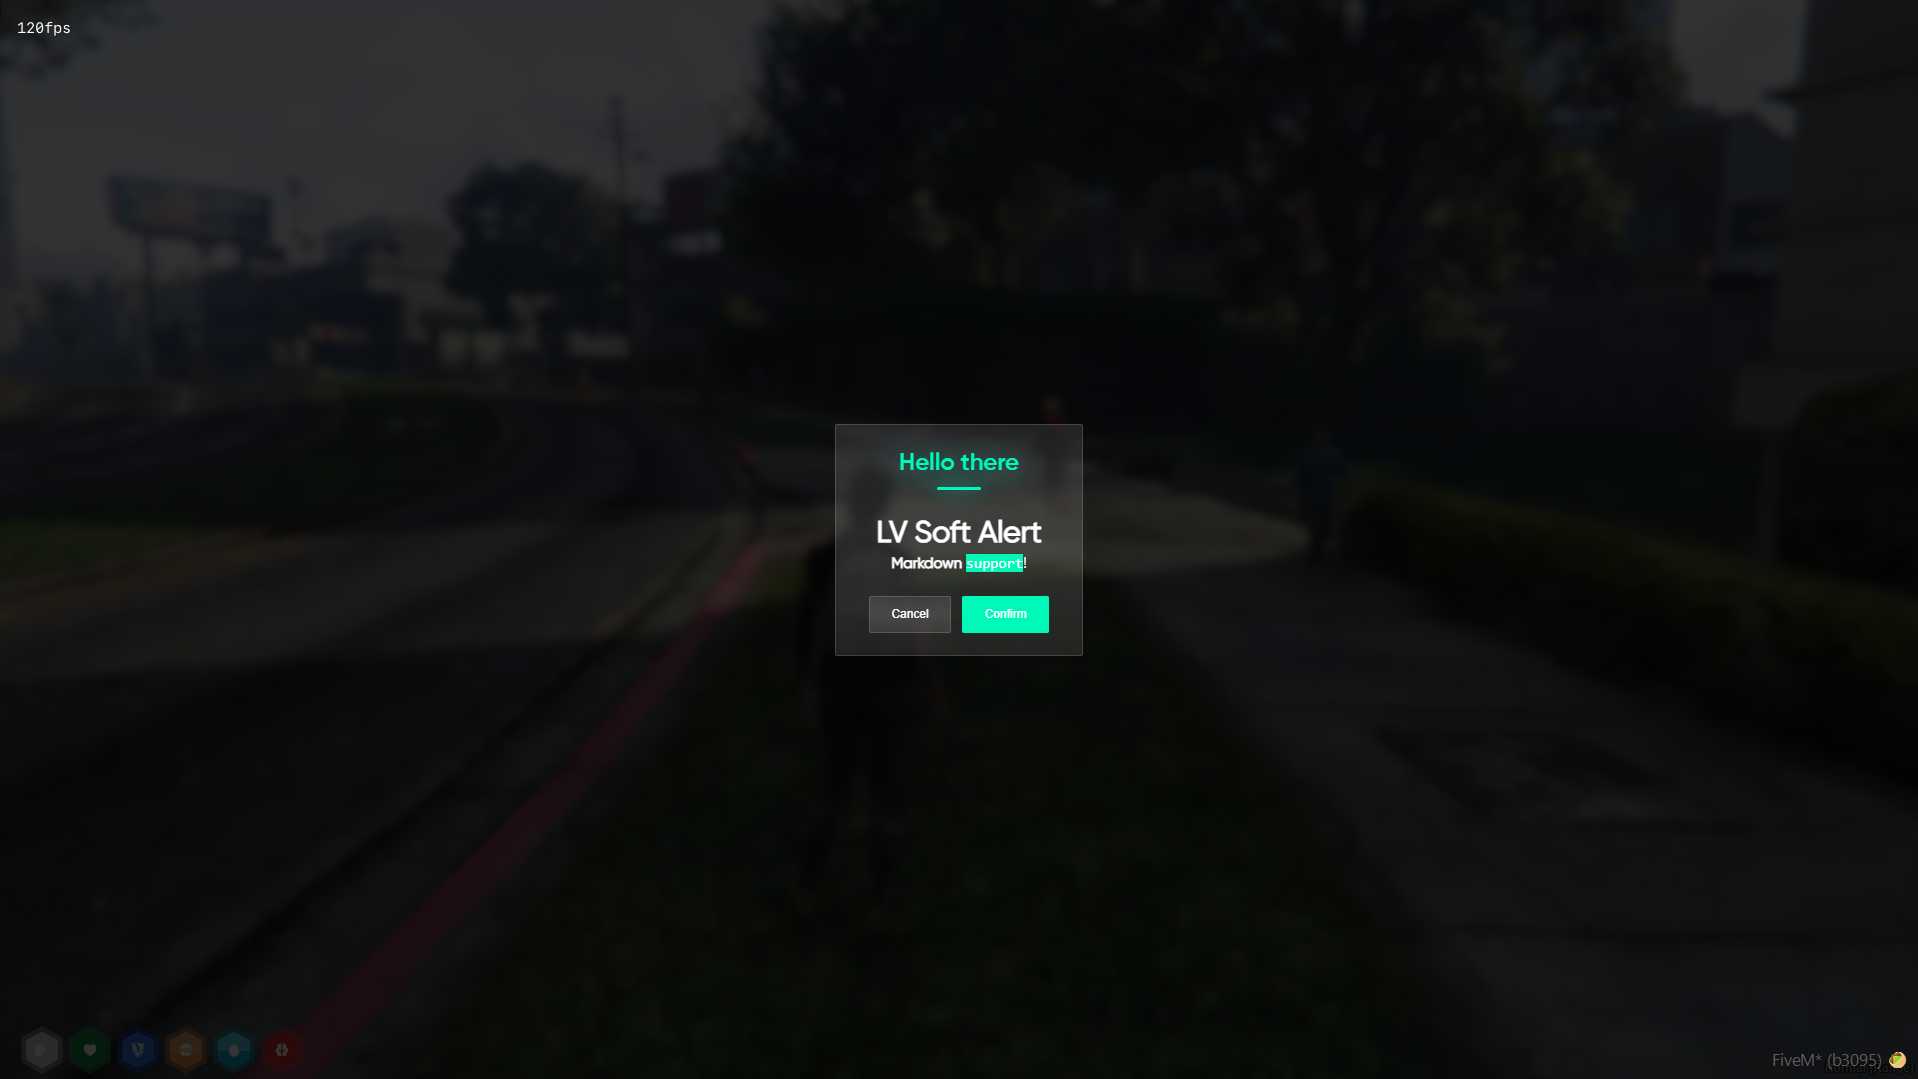
local alert = exports.lvs_lib:alertDialog({
header = 'LVS Scripts',
content = '# Hello there \n **Markdown** `support`!',
cancel = true
})
-- returns 'confirm' if the player pressed the confirm button,
-- otherwise if the player pressed the cancel button return will be 'cancel'
print(alert)
-- close de alert
-- force closes the active alert dialog and sets its return data as nil
exports.lvs_lib:closeAlertDialog()
```
***
# info
## Info
***
### How to use:
Client-side using exports
**Example:**
```lua
-- show up the info card
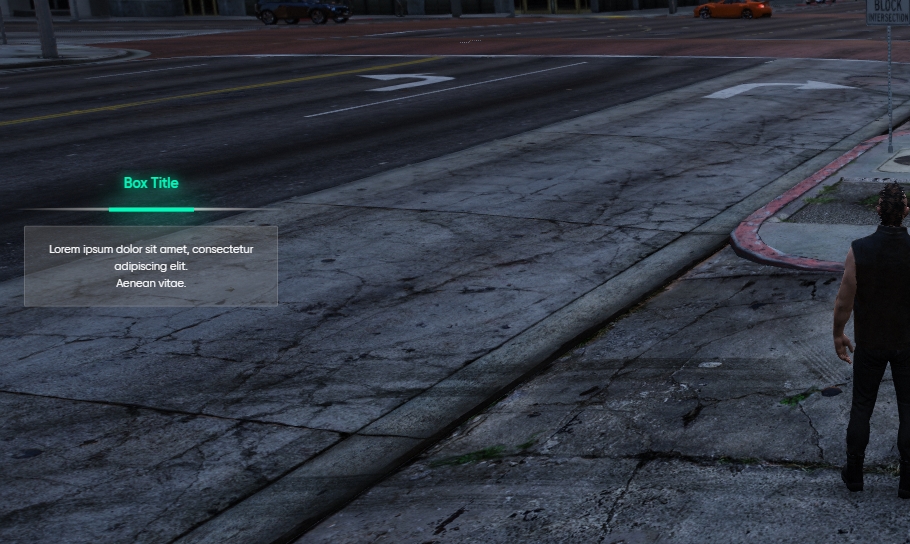
exports.lvs_lib:displayInfo({
title = 'Box Title',
message = 'Lorem ipsum dolor sit amet, consectetur adipiscing elit. \n Aenean vitae.'
--time = 10000 -- [optional] The time in milliseconds you want the alert to disappear
})
-- update the title and mesagge on the visible info
exports.lvs_lib:updateInfo({
title = 'New Title',
message = 'Message updated'
})
-- hide the info
exports.lvs_lib:hideInfo()
```
***
Server-side using events
**Example:**
```lua
-- show up the info card
TriggerClientEvent('lvs_lib:client:displayInfo', source, {
title = 'Box Title',
message = 'Lorem ipsum dolor sit amet, consectetur adipiscing elit. \n Aenean vitae.'
--time = 10000 -- [optional] The time in milliseconds you want the alert to disappear
})
-- hide the info
TriggerClientEvent('lvs_lib:client:hideInfo', source)
```
***
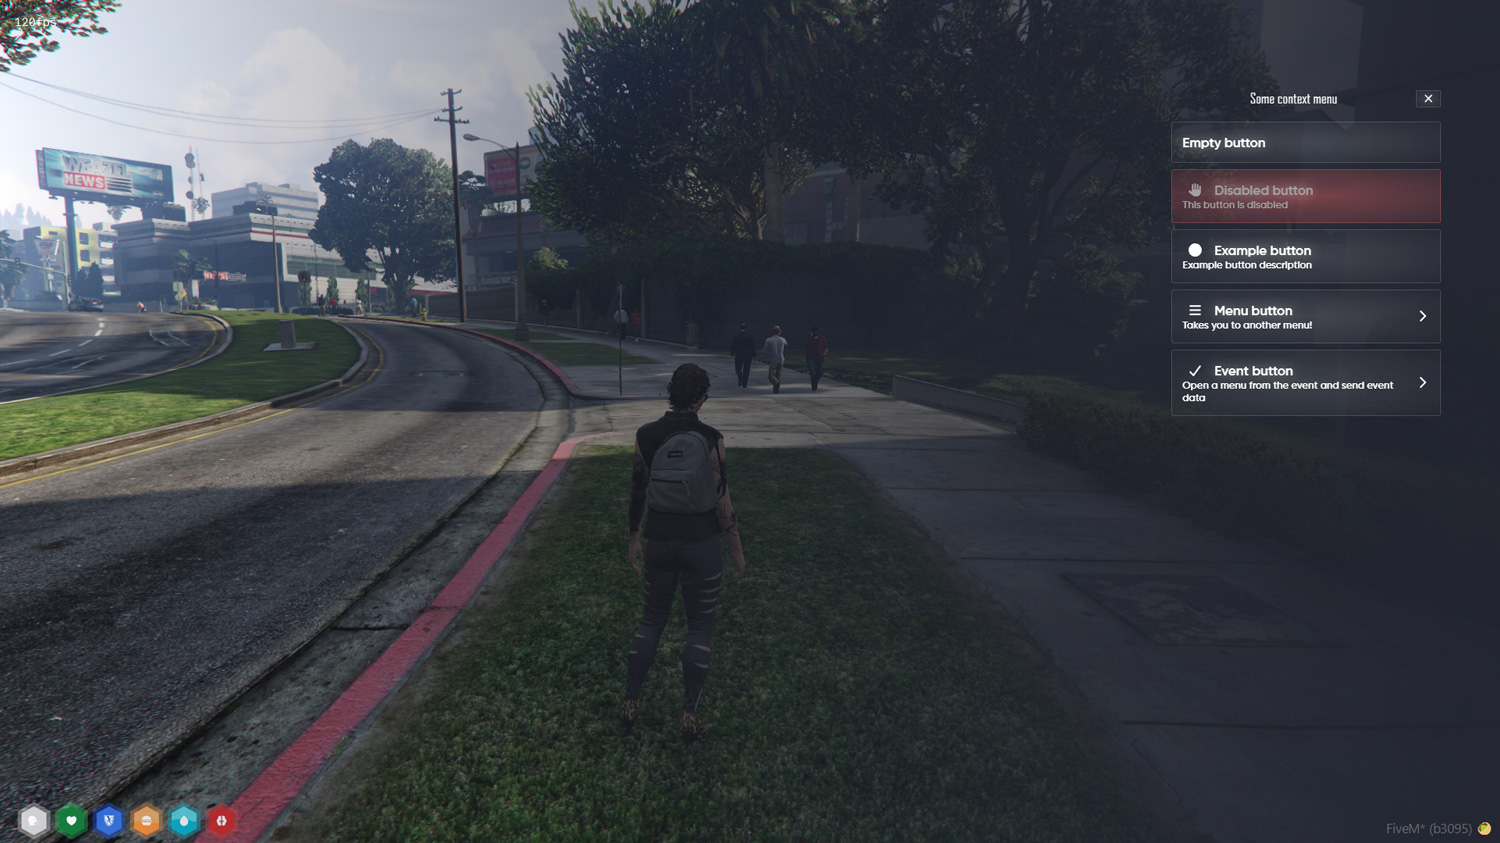
# context menu
{% hint style="info" %} Fontawesome is used to add icons to the list items, you can find the code [here](https://fontawesome.com/v5/search?o=r\&m=free).
{% endhint %}
## Context Menu
***
### How to use:
Client-side using exports
**Example:**
```lua
-- menu table
local menu = {
{
header = "Item #1",
txt = "This trigger an event",
icon = "fas fa-user", -- add icon to item
--disabled = true, -- make item disabled
params = {
event = "event:client:test1",
args = {
number = 1,
}
}
},
{
header = "Item #2",
txt = "Can trigger a server event",
params = {
event = "qb-menu:server:test2",
isServer = true,
args = {
number = 2,
}
}
},
{
header = "Item #3",
txt = "Can trigger a function",
params = {
event = function(args)
print(json.encode(args))
end,
isAction = true,
args = {
number = 3,
}
}
},
}
-- open context menu
exports.lvs_lib:openContext('Menu Title', menu)
-- close context menu
exports.lvs_lib:closeContext()
```
***
### qb-menu replacement
To replace qb-menu with this script, you need to enable the functionality in the `config.lua` and remove a comment in the `fxmanifest.lua`
{% code title="fxmanifest.lua (line 58)" %}
```lua
provide 'qb-menu'
```
{% endcode %}
{% code title="config.lua" %}
```lua
--- ### CONTEXT ###
-- make lvs context menu replace of qb-menu
-- uncomment line 57 on fxmanifest.lua [provide 'qb-menu']
-- remove qb-menu
Config.ContextAsQBMenu = true
Config.QBMenuCommand = {
name = 'playerfocus',
description = 'Give Menu Focus',
key = 'Alt',
keymapping = 'LMENU'
}
```
{% endcode %}
# input dialog
{% hint style="info" %} Fontawesome is used to add icons to the list items, you can find the code [here](https://fontawesome.com/v5/search?o=r\&m=free).
{% endhint %}
## Context Input
***
## How to use:
Client-side using exports
**Example:**
```lua
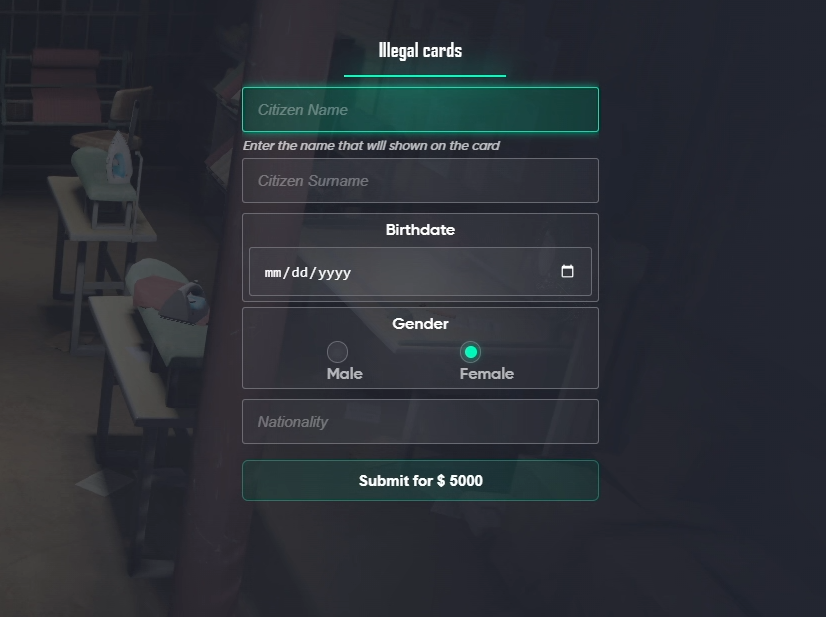
exports.lvs_lib:openInput(heading, rows, options)
```
* heading: `string`
* rows: `string[]` or `table` (`array`)
* type: `'text'` or `'password'` or `'number'` or `'textarea'` or `'checkbox'` or `'select'` or `'slider'` or `'radio'` or `'date'`
* options?: `table`(`object`)
* allowCancel: `boolean`
* If false the user will not be able to cancel and close the input dialog until submitted.
* If not defined, the user is able to cancel and close the input dialog.
***
## Field Type Properties
* text / password
* name: `string`
* label: `string`
* description?: `string`
* placeholder?: `string`
* icon?: `string`
* required? `boolean`
* disabled?: `boolean`
* default?: `string`
* min?: `number`
* max?: `number`
* number
* name: `string`
* label: `string`
* description?: `string`
* placeholder?: `string`
* icon?: `string`
* required? `boolean`
* disabled?: `boolean`
* default?: `number`
* min?: `number`
* max?: `number`
* step?: `number`
* textarea
* name: `string`
* label: `string`
* description?: `string`
* placeholder?: `string`
* icon?: `string`
* required? `boolean`
* disabled?: `boolean`
* default?: `number`
* checkbox / radio
* name: `string`
* label: `string`
* options: `table`(`array`)
* value: `string`
* label?: `string`
* disabled?: `boolean`
* required?: `boolean`
* default?: `string`
* select
* label: `string`
* options: `table`(`array`)
* value: `string`
* label?: `string`
* description?: `string`
* placeholder?: `string`
* icon?: `string`
* required? `boolean`
* disabled?: `boolean`
* default?: `string`
* slider
* label: `string`
* placeholder?: `string`
* icon?: `string`
* required? `boolean`
* disabled?: `boolean`
* default?: `number`
* min?: `number`
* max?: `number`
* step?: `number`
* date
* label: `string`
* description?: `string`
* icon?: `string`
* required? `boolean`
* disabled?: `boolean`
* default?: `string` or `true`
* True defaults to current date
* format?: `string`
* Date format to display in the field
* returnString?: `boolean`
* Returns the date as a string, default format is `DD/MM/YYYY`, but if `format` is defined it will use that.
* clearable?: `boolean`
* min?: `string`
* "01/01/2000"
* max?: `string`
* "12/12/2023"
The callback data is promise based meaning that the thread will not continue executing until the user either sends the data or exits the popup
***
## Usage Example
local input = exports.lvs_lib:openInput('Dialog title', {
  {name='field1', type = 'text', label = 'Text input', required = true, min = 4, max = 16},
  {name='field2', type = 'number', label = 'Number input'},
  {name='field3', type = 'textarea', label = 'TextArea input'},
  {name='field4', type = 'date', label = 'Date input', format = "DD/MM/YYYY"}
  {
      label =  "Some Select",
      name =  "someselect",
      type = "select",
      options = {
          { value = "none", label = "None" },
          { value = "other", label = "Other" },
          { value = "other2", label = "Other2" },
          { value = "other3", label = "Other3" },
          { value = "other4", label = "Other4" },
          { value = "other5", label = "Other5" },
          { value = "other6", label = "Other6" }
      }
  }
}{
  submitText = "Submit"
})

print(json.encode(input))
```lua
exports.lvs_lib:closeInput()
```
***
## qb-input replacement
To replace qb-input with this script, you need to enable the functionality in the `config.lua` and remove a comment in the `fxmanifest.lua`
{% code title="fxmanifest.lua (line 59)" %}
```lua
provide 'qb-input'
```
{% endcode %}
{% code title="config.lua" %}
```lua
--- ### CONTEXT INPUT ###
Config.InputAsQBInput = true
```
{% endcode %}
# lvs-chat
lvs-chat documentation
## LVS Chat
Revamp your communication experience in FiveM with our Enhanced Chat System. This powerful script replaces the default chat system, offering a wide range of integrated commands and features that elevate roleplaying and interaction on your server..
> Upgrade your FiveM server's communication with our Enhanced Chat System. Download the script today and provide your community with a feature-rich, immersive chat experience that takes roleplaying and interaction to the next level.
{% embed url="" %}
## Key Features
* **Integrated Commands**: Utilize a variety of built-in commands to enrich player interactions and enhance roleplaying scenarios:
* **/me**: Describe actions your character is performing, visible as a bubble above your character.
* **/do**: Provide contextual information about your character's actions or surroundings, also displayed as a bubble.
* **/ooc**: Communicate out-of-character messages to other players.
* **/help**: Request assistance or information from other players or staff.
* **/job**: Share job-related messages within your team or organization.
* **/announcement**: Broadcast important announcements to the entire server.
* **/operator**: Send messages as a server operator or admin.
* **/police**: Allow the police force to send important job-related announcements.
* **/ambulance**: Enable the ambulance or medical team to send critical work-related messages.
* **/try**: Attempt an action with a probability of success, adding an element of chance to roleplaying.
* **Character-Specific Bubbles**: Display command messages like /me and /do as bubbles above the character, providing a visual and immersive way to share actions and context with nearby players.
* **Message Filtering**: Filter messages by feed, out-of-character (OOC), game, dispatch, and staff modes to ensure clear and organized communication.
* **Customizable Interface**: Tailor the chat interface to match your server's theme or preferences, enhancing the visual consistency and user experience.
* **User-Friendly Design**: Enjoy an intuitive and easy-to-use chat system that streamlines communication and interaction on your server.
* **Enhanced Roleplay Immersion**: With specialized commands and visual bubbles, players can engage in deeper, more meaningful roleplaying interactions.
* **Seamless Integration**: Easily integrate the Enhanced Chat System into your existing server setup, ensuring smooth and efficient communication for all players.
***
## Changelog
{% tabs %}
{% tab title="v2.1.1" %}
### 2024/06/04
Quick update
{% hint style="info" %}
Add:
* Ability to disable any mode and change their labels.
{% endhint %}
{% endtab %}
{% tab title="v2.1.0" %}
### 2024/06/04
Initial commit
**Files Changed:**
* [ ] All Files
* [ ] All Files Except config.lua
* [ ] Specific Files
{% hint style="warning" %}
Fix:
{% endhint %}
{% hint style="success" %}
Add:
{% endhint %}
{% hint style="info" %}
Edit:
{% endhint %}
{% endtab %}
{% endtabs %}
# Installation
## Step 1. Remove old chat resource
Delete `chat` or any other chat resource, It's generally located in `\resources\[cfx-default]\[gameplay]\chat`
***
## Step 2. Install dependencies
Install the dependencies if they are not installed.
| ox\_lib | |
| ------- | ---------------------------------------- |
***
## Step 3. Download lvs\_chat
Download the lvs-chat package from your keymaster. It contains two resources: `chat` and `lvs_chat_extra`. Place both inside the `resources` folder.
{% hint style="danger" %}
Do not change the name of the `chat` resource.
{% endhint %}
***
## Step 4. Script initiate (server.cfg)
The `chat` should go where it normally does at the beginning, and `lvs_chat_extra` should go after `ox_lib`
```editorconfig
...
set resources_useSystemChat false # set false to build-in chat (newest version of fxserver))
...
# These resources will start by default.
ensure mapmanager
ensure chat # <-- still here
ensure spawnmanager
ensure sessionmanager
...
ensure ox_lib
ensure lvs_chat_extra # <-- somewhere after ox_lib
...
```
***
## Step 5. Config
Now configure and translate your resources.
Config files
`chat/config.lua`\
`lvs_chat_extra/config.lua`\
`lvs_chat_extra/server/webhook.lua`
***
## Step 6. qb-core
Open `qb-core/server/commands.lua` remove the commands ooc and me (line 272).
This ones:
{% code title="qb-core/server/commands.lua" %}
```lua
-- Out of Character Chat
QBCore.Commands.Add('ooc', Lang:t('command.ooc.help'), {}, false, function(source, args)
local message = table.concat(args, ' ')
local Players = QBCore.Functions.GetPlayers()
local Player = QBCore.Functions.GetPlayer(source)
local playerCoords = GetEntityCoords(GetPlayerPed(source))
for _, v in pairs(Players) do
if v == source then
TriggerClientEvent('chat:addMessage', v, {
color = QBCore.Config.Commands.OOCColor,
multiline = true,
args = { 'OOC | ' .. GetPlayerName(source), message }
})
elseif #(playerCoords - GetEntityCoords(GetPlayerPed(v))) < 20.0 then
TriggerClientEvent('chat:addMessage', v, {
color = QBCore.Config.Commands.OOCColor,
multiline = true,
args = { 'OOC | ' .. GetPlayerName(source), message }
})
elseif QBCore.Functions.HasPermission(v, 'admin') then
if QBCore.Functions.IsOptin(v) then
TriggerClientEvent('chat:addMessage', v, {
color = QBCore.Config.Commands.OOCColor,
multiline = true,
args = { 'Proximity OOC | ' .. GetPlayerName(source), message }
})
TriggerEvent('qb-log:server:CreateLog', 'ooc', 'OOC', 'white', '**' .. GetPlayerName(source) .. '** (CitizenID: ' .. Player.PlayerData.citizenid .. ' | ID: ' .. source .. ') **Message:** ' .. message, false)
end
end
end
end, 'user')
-- Me command
QBCore.Commands.Add('me', Lang:t('command.me.help'), { { name = Lang:t('command.me.params.message.name'), help = Lang:t('command.me.params.message.help') } }, false, function(source, args)
if #args < 1 then
TriggerClientEvent('QBCore:Notify', source, Lang:t('error.missing_args2'), 'error')
return
end
local ped = GetPlayerPed(source)
local pCoords = GetEntityCoords(ped)
local msg = table.concat(args, ' '):gsub('[~<].-[>~]', '')
local Players = QBCore.Functions.GetPlayers()
for i = 1, #Players do
local Player = Players[i]
local target = GetPlayerPed(Player)
local tCoords = GetEntityCoords(target)
if target == ped or #(pCoords - tCoords) < 20 then
TriggerClientEvent('QBCore:Command:ShowMe3D', Player, source, msg)
end
end
end, 'user')
```
{% endcode %}
# Configuration
Explore and fine-tune your settings effortlessly. Customize your script experience according to your preferences
## Configuration File
```lua
-- [General]
Config = {}
Config.Notify = 'lvs_lib'
-- [Date Format]
Config.DateFormat = '%H:%M' -- To change the date format check this website - https://www.lua.org/pil/22.1.html
-- [Over head text]
Config.OverHead = {
method = 'html', -- html | 3d
time = 10000, -- Time to display the text (in ms)
-- HTML
offset = vector3(0,0, 1.25),
-- 3D
font = 0, -- Text font
scale = 0.5, -- Text scale
}
-- [Commands]
Commands = {}
-- ooc
Commands.ooc = {
enable = true,
distance = 20.0,
overhead = nil
}
-- Me
Commands.me = {
enable = true,
showName = false,
distance = 20.0,
overhead = { -- you can remove this table if you don't want this
text3D = { color = { 120, 200, 30 } },
html = {
icon = 'fa-hiking',
label = '[ME]',
color = '0,0,0', -- custom color for command no longer support
}
}
}
-- Do
Commands['do'] = {
enable = true,
showName = false,
distance = 20.0,
overhead = { -- you can remove this table if you don't want this
text3D = { color = { 245, 215, 18} },
html = {
icon = 'fa-street-view',
label = '[DO]',
}
}
}
-- Job message
Commands.job = {
enable = true,
command = 'chat-job',
cooldown = 1, -- in munutes
}
-- Police
Commands.police = {
enable = true,
command = 'chat-police',
job = 'police'
}
-- Ambulance
Commands.ambulance = {
enable = true,
command = 'chat-ems',
job = 'ambulance'
}
-- Anonymous
Commands.anonymous = {
enable = true,
command = 'chat-anon',
money = 'cash', --(blackmoney)if you want anonymous messages to have a cost, you can configure this with money account or simply set it to false
price = 300, -- price of message if money not false
cooldown = 5, -- in minutes
JobsCantSee = {
'police',
'ambulance'
}
}
-- Try
Commands.try = {
enable = true,
command = 'chat-try',
}
-- Clear
Commands.clear = {
enable = true,
command = 'chat-clear',
}
--- ## STAFF CHAT ##
-- Announcement
Commands.announcement = {
enable = true,
command = 'chat-announcement',
AcePermsNeed = {'command'} -- Groups that can access the this command
}
-- Operator to player (direct message from operator to player)
Commands.operator = {
enable = true,
command = 'chat-operator',
AcePermsNeed = {'command'} -- Groups that can access the this command
}
Commands.help = {
enable = true,
command = 'chat-help',
AcePermsCanView = {'command'} -- Groups that can view this messages
}
-- [Auto Message]
Config.AutoMessage = {
enable = true,
time = 10, -- (in minutes) will send messages every x minutes
messages = {
'The server restarts every day at 6:00 AM and 7:00 PM UTC -3',
'Report errors on our Discord. Detail how to reproduce them with images or video',
'Upgrade your vehicle with a racing chip',
'Leave your opponents behind, install the nitro kit in your vehicle',
'Install the drift kit in your vehicle and experience realistic drift handling',
'Free gangs available.',
'Visit LVS Store at https://lvs.tebex.io/category/np-inspired',
}
}
-- ### PAY ATTENTION! ###
-- The RGB values below are expressed in table type and not as strings like in the other LVS scripts.
Config.UI = {
colors = {
primary = {0, 248, 185}, -- table: {R, G, B} (https://g.co/kgs/6PaotAk)
secondary = {0, 102, 76},
red = {248, 105, 105},
}
}
```
# Events & Exports
You can continue sending messages to the chat through the `chat:addMessage` event and the export `addMessage` just like before, except now you can add a tag and mode elements to the message table so that you can filter it in the different sections of the chat
## Event
`CLIENT` / chat:addMessage
```lua
-- tag => can be anything | default 'feed'
-- mode => can be feed, ooc, game, dispatch, staff | default 'feed'
local message = {
color = {240, 40, 0}, -- color of the left border
args = {'Title','Message text'} -- arguments for the chat box
tag = 'me', -- is new,
mode = 'game' -- is new
}
TriggerEvent('chat:addMessage', message)
```
***
# lvs-radio
lvs-radio documentation
## Advanced Radio System
Elevate your FiveM roleplaying experience with our Advanced Radio System, designed to provide immersive and realistic communication for your server. This script offers a range of features that enhance both functionality and immersion, ensuring seamless and engaging interactions.
> Upgrade your FiveM server with our Advanced Radio System and provide your community with a feature-rich, immersive communication tool. Enhance your roleplaying scenarios with secure, realistic, and user-friendly radio interactions. Download the script today and transform the way your players communicate!
{% embed url="" %}
***
## Key Features
* **Frequency Blocking**: Secure your communication with the ability to block specific frequencies. Control who can access certain channels, adding a layer of strategy and security to your server's radio usage.
* **Radio Animations**: Enhance realism with dynamic radio animations. Choose between different modes to visually represent your character using the radio, making interactions more immersive.
* **Key Assignment**: Customize your radio controls with easy key assignments. Set up the keys that work best for you, ensuring quick and efficient access to your radio functions.
* **Realistic Clicks**: Enjoy the authentic feel of using a real radio with realistic click sounds. Every interaction with your radio is accompanied by these sounds, adding to the immersion.
* **User-Friendly Interface**: The radio interface is intuitive and easy to use, allowing players to quickly navigate through frequencies and settings without disrupting gameplay.
* **Enhanced Roleplay**: With features like frequency blocking and realistic animations, players can engage in more strategic and immersive roleplay scenarios, enhancing the overall experience on your server.
* **Easy Configuration**: The script is easy to install and configure, allowing server admins to tailor the radio system to their specific needs. Adjust settings and preferences effortlessly to match your server's requirements.
***
## Changelog
{% tabs %}
{% tab title="v1.0" %}
### 2024/06/28
Initial commit
**Files Changed:**
* [ ] All Files
* [ ] All Files Except config.lua
* [ ] Specific Files
{% hint style="warning" %}
Fix:
{% endhint %}
{% hint style="success" %}
Add:
{% endhint %}
{% hint style="info" %}
Edit:
{% endhint %}
{% endtab %}
{% endtabs %}
# Installation
## Step 1. Remove other radio script
Remove any other script that manages the radio, such as `qb-radio`
***
## Step 2. Install dependencies
Install the dependencies if they are not installed.
| ox\_lib | |
| ------- | ---------------------------------------- |
***
## Step 3. Download lvs\_radio
Download the lvs\_radio package from your keymaster. Place the folder inside the `resources` folder.
***
## Step 4. Voice config (server.cfg)
In the server.cfg file, you need to change the setting `setr voice_enableRadioAnim 1` to `setr voice_enableRadioAnim 0`
```editorconfig
...
# Voice config
setr voice_useNativeAudio true
setr voice_useSendingRangeOnly true
setr voice_defaultCycle "GRAVE"
setr voice_defaultVolume 0.3
setr voice_enableRadioAnim 0 #<--- here !!!
setr voice_syncData 1
setr sv_maxclients 48
```
***
## Step 5. Config
Now configure and translate your resources.
Config files
`config/config.lua`\
`config/translation.lua`
***
# Configuration
Explore and fine-tune your settings effortlessly. Customize your script experience according to your preferences
## Configuration File
```lua
Config = {}
Config.Notify = 'lvs_lib' -- lvs_lib | ox_lib | qb | esx
Config.VoiceSystem = "pma-voice" -- pma-voice | saltychat
Config.Inventory = 'qb' -- qb | ox | esx
Config.RadioItem = "radio"
Config.MaxFrequency = 200
Config.ItemCheckLoop = true
Config.RestrictedChannels = {
[1] = {
police = true,
},
[2] = {
ambulance = true
},
[3] = {
police = true,
ambulance = true
},
[4] = {
police = true,
ambulance = true
},
[5] = {
police = true,
ambulance = true
},
[6] = {
police = true,
ambulance = true
},
[7] = {
police = true,
ambulance = true
},
[8] = {
police = true,
ambulance = true
},
[9] = {
police = true,
ambulance = true
},
[10] = {
police = true,
ambulance = true
}
}
```
# Events & Exports
No Events or Exports
***
# lvs-playerlist
lvs-playerlist documentation
## Player List
Enhance your server management and player interaction with our Player List script for FiveM. This easy-to-use script provides a detailed overview of online and recently disconnected players, complete with customizable display options and interface colors.
> Upgrade your FiveM server with our Player List script. Provide your community with an efficient and customizable tool to monitor player activity and manage interactions seamlessly. Download the script today and take control of your player management like never before!
***
## Key Features
* **Player Information Display**: View essential details of online players, including their name, Discord ID, or Steam ID, depending on your configuration preferences. Additionally, see each player's server ID for quick identification.
* **Disconnected Player Log**: Keep track of players who have recently disconnected with a log that shows their details and the server ID they were using. This feature helps you identify which player was using a specific ID, even after they've left the server.
* **Nearby Players Count (Scope)**: Easily monitor the number of players in close proximity to you. This is particularly useful for roleplaying scenarios and server management.
* **Customizable Interface Colors**: Personalize the player list interface to match your server's theme or your preferences. Adjust the colors to ensure the list is visually appealing and easy to read.
* **User-Friendly Design**: The script is designed to be straightforward and easy to use, ensuring that both admins and players can access and interpret the information quickly.
* **Simple Installation and Configuration**: The script is easy to install and configure, allowing you to tailor it to your server's needs with minimal effort.
***
## Changelog
{% tabs %}
{% tab title="v1.0" %}
### 2024/06/28
Initial commit
**Files Changed:**
* [ ] All Files
* [ ] All Files Except config.lua
* [ ] Specific Files
{% hint style="warning" %}
Fix:
{% endhint %}
{% hint style="success" %}
Add:
{% endhint %}
{% hint style="info" %}
Edit:
{% endhint %}
{% endtab %}
{% endtabs %}
# Installation
## Step 1. Download lvs\_playerlist package
Download the lvs\_playerlist package from your keymaster. \
The best way to place the downloaded files is by creating a folder `[lvs]` in `resources`, where you can put all the scripts related to this **LVS Store.**
***
## Step 2. Install dependencies
Install the dependencies if they are not installed.
| ox\_lib | |
| ----------- | ---------------------------------------- |
| lvs\_bridge | Included in the package |
***
## Step 3. Config
Now configure and translate your resources.
Config files
`config/config.lua`\
`config/translation.lua`\
`server/sv_config.lua`
{% hint style="warning" %}
**Important**: don't forget to edit the `server/sv_config.lua` file. In it, you must enter the details of the Discord or Steam keys according to the identification method you have on your server.
{% endhint %}
***
## Step 4. Start the script (server.cfg)
In the `server.cfg` file, you need to start or ensure the scripts
```editorconfig
ensure qb-core
# ... some others
# lvs_bridge should go right after ensure the framework resource and before any other LVS scripts
start lvs_bridge
# ... some others
start lvs_playerlist
```
***
# Configuration
Explore and fine-tune your settings effortlessly. Customize your script experience according to your preferences
## Configuration File
```lua
Config = {}
Config.OpenKey = 'F10' -- change it whatever keybind do you like -- look more here https://docs.fivem.net/docs/game-references/input-mapper-parameter-ids/keyboard/
Config.ShowInfo = 'steam' -- discord | steam | game, Show player info from
Config.ShowStaff = true -- if true staff badge will show near the name
Config.StaffAcePerm = { -- if ShowStaff = true
{AcePerm = 'go', label = 'GO'},
{AcePerm = 'admin', label = 'ADMIN'},
{AcePerm = 'god', label = 'GOD'}
}
-- ### PAY ATTENTION! ###
-- The RGB values below are expressed in table type and not as strings like in the other LVS scripts.
Config.UI = {
colors = {
primary = {0, 248, 185}, -- table: {R, G, B} (https://g.co/kgs/6PaotAk)
secondary = {0, 102, 76},
red = {248, 105, 105},
}
}
Config.VersionControl = true
Config.onOpenClose = function(state)
if state then
--TriggerEvent('lv-core:client:hideHud') -- hide the hud on player list open
else
--TriggerEvent('lv-core:client:showHud') -- restore hud when close player list
end
end
```
# lvs\_weazelnews
lvs-weazelnews documentation
## Weazel News Job
Transform your roleplay experience with the Weazel News Job Script, designed to bring the world of journalism and media to life in your server. This script offers a wide range of features to immerse players in the world of news reporting, from capturing footage to publishing newspapers.
> Enhance your server's roleplay with the Weazel News Job Script and bring the fast-paced world of journalism to life!
***
## Key Features
* **Interactive Items with Animations**: Equip your reporters with a camera, microphone, and boom mic, each with realistic animations to enhance roleplay.
* **Create and Sell Newspapers**: Players can write articles, compile them into a newspaper, and sell them as items through vending machines. These newspapers store the information and can be opened by anyone who purchases them.
* **Video Capture Tasks**: Assign reporters to capture footage in specific areas around the city. The areas and objectives are configurable to suit your server’s needs.
* **Interview Tasks**: Send reporters to interview NPCs at various locations on the map. The chances of an NPC agreeing to the interview can be configured, adding an element of unpredictability.
* **Comprehensive Work Menus**: Includes different job-specific menus for storage, wardrobe, editing, and management (compatible with qb-management or esx\_society).
* **Material Sales**: Players can sell materials using qb-inventory or ox\_inventory, integrated seamlessly with the script.
* **Customizable Interface**: The interface colors can be changed to match the theme of your server, providing a personalized touch
***
{% hint style="info" %}
This script has a long list of **ToDo**, such as reputation, multiplayer jobs, more tasks, and much more complexity in them, so it isn’t repetitive and has a high degree of randomness
{% endhint %}
## Changelog
{% tabs %}
{% tab title="v1.1.1" %}
### 2024/08/25
Initial commit
**Files Changed:**
* [ ] All Files
* [ ] All Files Except config.lua
* [ ] Specific Files
{% hint style="warning" %}
Fix:
{% endhint %}
{% hint style="success" %}
Add:
{% endhint %}
{% hint style="info" %}
Edit:
{% endhint %}
{% endtab %}
{% endtabs %}
# Installation
## Step 1. Download lvs\_weazelnews package
Download the lvs\_weazelnews package from your keymaster. \
The best way to place the downloaded files is by creating a folder `[lvs]` in `resources`, where you can put all the scripts related to this **LVS Store.**
***
## Step 2. Install dependencies
Install the dependencies if they are not installed.
| ox\_lib | |
| -------------- | ---------------------------------------- |
| lvs\_bridge | Included in the package |
| lvs\_interact | Included in the package |
| lvs\_npcdialog | Included in the package |
| lvs\_elevators | Included in the package |
{% hint style="danger" %}
Please note that the script requires `lvs_interact` and `lvs_npcdialog`. You can set up any interaction you desire; the events are available in the configuration file. We can assist you with integration to other script, but we won't do it for you.
{% endhint %}
{% hint style="info" %}
Download this assets : [link](https://www.mediafire.com/file/tbr8u4o5luuq9l8/%255Bweazel%255D.rar/file)
{% endhint %}
***
## Step 3. Config
Now configure and translate your resources.
Config files
`config/config.lua`\
`config/dialog.lua`\
`config/garage.lua`\
`config/task.lua`
***
## Step 4. Start the script (server.cfg)
In the `server.cfg` file, you need to start or ensure the scripts
```editorconfig
ensure qb-core
# ... some others
start ox_lib
# lvs_bridge should go right after ensure the framework resource and before any other LVS scripts
start lvs_bridge
start lvs_lib
start lvs_interact
start lvs_npcdialog
start lvs_elevators
# ... some others
start lvs_weazelnews # ... or ensure [lvs]
```
***
## ESX Framework
{% hint style="info" %}
In **ESX framework**, you need to create the job and the ranks. If you don't know how to do it, in the install folder you can find the .sql file with the queries. Remember to configure the script with the number of ranks you create
{% endhint %}
***
# Configuration
Explore and fine-tune your settings effortlessly. Customize your script experience according to your preferences
## Configuration File
```lua
Config = {}
Config.Job = 'reporter'
Config.UseAnimation = true -- use animation when read the newspaper
Config.Items = {
camera = 'lvs_camera',
microphone = 'lvs_microphone',
boom_microphone = 'lvs_boom_microphone',
newspaper = 'lvs_newspaper'
}
Config.Blip = {
enable = true,
label = 'Weazel News',
coords = vector3(-607.16, -933.17, 23.86)
}
Config.Boss = {
coords = vector3(-583.83, -929.49, 28.0),
label = 'Boos Menu'
}
Config.Stashes = {
coords = {
vector3(-573.42, -922.67, 23.83),
vector3(-581.24, -920.44, 28.04),
},
id = 'Weazel Stash',
label = 'Open Stash',
slots = 50,
weight = 100000,
}
Config.Cloakroom = {
coords = vector3(-584.55, -938.96, 23.87),
label = 'Change outfit',
outfit = {
male = {
{
name = "Outfit 1",
tags = "No tags",
outfitData = {
["arms"] = {item = 1, texture = 0}, -- Arms
["t-shirt"] = {item = 15, texture = 0}, -- T-Shirt
["torso2"] = {item = 87, texture = 1}, -- Jackets
["vest"] = {item = 0, texture = 0}, -- Vest
["decals"] = {item = 0, texture = 0}, -- Decals
["accessory"] = {item = 0, texture = 0}, -- Neck
["bag"] = {item = 0, texture = 0}, -- Bag
["pants"] = {item = 59, texture = 0}, -- Pants
["shoes"] = {item = 25, texture = 0}, -- Shoes
["mask"] = {item = 16, texture = 1}, -- Mask
["hat"] = {item = 14, texture = 4}, -- Hat
["glass"] = {item = 0, texture = 0}, -- Glasses
["ear"] = {item = 0, texture = 0} -- Ear accessories
},
grades = {0, 1, 2, 3, 4},
}
},
female = {
{
name = "Outfit 1",
tags = "No Tags",
outfitData = {
["arms"] = {item = 3, texture = 0}, -- Arms
["t-shirt"] = {item = 3, texture = 0}, -- T-Shirt
["torso2"] = {item = 81, texture = 1}, -- Jackets
["vest"] = {item = 0, texture = 0}, -- Vest
["decals"] = {item = 0, texture = 0}, -- Decals
["accessory"] = {item = 0, texture = 0}, -- Neck
["bag"] = {item = 0, texture = 0}, -- Bag
["pants"] = {item = 61, texture = 0}, -- Pants
["shoes"] = {item = 33, texture = 6}, -- Shoes
["mask"] = {item = 16, texture = 1}, -- Mask
["hat"] = {item = 0, texture = 0}, -- Hat
["glass"] = {item = 0, texture = 0}, -- Glasses
["ear"] = {item = 0, texture = 0} -- Ear accessories
},
grades = {0, 1, 2, 3, 4},
}
}
}
}
Config.Editor = {
coords = vector3(-571.85, -935.78, 23.77),
label = 'Edit Newspaper'
}
Config.Vending = {
model = 'prop_news_disp_02a',
label = 'Buy Newspaper',
empty = 'Vending empty',
-- DEPRECATED
coords = {
vector3(-626.18, -976.13, 21.23),
vector3(128.7, -981.7, 29.22),
vector3(308.69, -358.38, 45.04)
}
}
Config.Elevator = {
[1] = {
keypad = {coords = vector3(-589.71, -928.61, 24.09)},
spawn = {coords = vector4(-588.84, -928.87, 22.87, 174.74)},
label = 'G', -- this can by a floor number 0
description = 'Ground Floor'
},
[2] = {
keypad = {coords = vector3(-589.67, -928.6, 28.33)},
spawn = {coords = vector4(-588.84, -928.93, 27.16, 180.12)},
label = 'T', -- Top floor
description = 'Top Floor'
},
[3] = { -- you can remove this, there’s no elevator. You can only reach the helipad by stairs
keypad = {coords = vector3(-568.51, -926.86, 37.07)},
spawn = {coords = vector4(-569.34, -927.74, 35.83, 85.44)},
label = 'H', -- Helipad
description = 'Helipad'
},
}
Config.Shop = {
id = 'WeazelStore',
name = 'Weazel Store',
items = {
{ name = 'lvs_empty_tape', price = 40, amount = 40 },
{ name = 'lvs_empty_notepad', price = 10, amount = 100 },
{ name = 'lvs_camera', price = 10, amount = 10 },
{ name = 'lvs_microphone', price = 10, amount = 10 },
{ name = 'lvs_boom_microphone', price = 10, amount = 10 }
}
}
-- These are the prices you'll be paid for the materials obtained.
-- It's a minimum and maximum range, and the payment will fall within that range
Config.Prices = {
lvs_full_tape = {100, 200},
lvs_high_value_tape = {300, 600},
lvs_full_notepad = {10, 30},
lvs_high_value_notepad = {100, 300},
-- You can create more items and let your imagination run wild.
-- You can create areas where the chance of an interview is low, making the note more valuable, or capture
-- a video in a hard-to-reach area and increase the reward by creating more items
}
Config.Camera = {
news = {
label = 'News Cam',
key = 'E', -- for display
keyIndex = 38 -- https://docs.fivem.net/docs/game-references/controls/
},
movie = {
label = 'Movie Cam',
key = 'M',
keyIndex = 244
}
}
Config.Interview = {
label = 'Interview',
key = 'E',
keyIndex = 38,
distance = 1.5,
progress = 'Interviewing...'
}
Config.UI = {
colors = {
primary = {0, 248, 185}, -- table: {R, G, B} (https://g.co/kgs/6PaotAk)
secondary = {0, 102, 76},
red = {}, -- not used
}
}
Config.Lang = {
ui = {
title = 'NEWSPAPER EDITOR',
fill = 'PLEASE FILL OUT THE FORM BELOW.',
description1 = 'Please enter the name of the newspaper you wish to configure for distribution in the vending machines.,',
description2 = 'Next, upload the images that will constitute each page of the newspaper. It is crucial that all images are uniform in size and possess the appropriate quality for display.',
description3 = 'Finally, specify the price you wish to set for the newspaper\'s sale in the vending machines',
enable_title = 'Enable Newspaper',
enable_description = 'Enable to buy on vending?',
enabled = 'ENABLED',
disabled = 'DISABLED',
edit_title = 'Title',
edit_title_desc = 'Title of the newspaper',
edit_images = 'Pages',
edit_images_desc = 'URLs of the images',
edit_images_placeholder = 'Enter the URLs of the images for each page, separated by spaces or with one URL per line.',
edit_price = 'Price',
edit_price_desc = 'Newspaper price',
edit_price_placeholder = 'Enter the price of the newspaper in the vending machines',
submit = 'Submit'
},
video = {
required = 'You don\'t have a clean tape for record a video',
},
interview = {
required = 'You don\'t have a required notepad for write the interview',
refused = 'The citizen does not want to give a interview',
},
notification_title = 'Weazel News',
already_working = 'You already job to do!',
cooldown = 'You need to wait %s for the next task',
no_money = 'You don\'t have enough money',
updated = 'Newspaper Updated!',
updated_error = 'Error occur when update newspaper',
enough_space = 'There is not enough space in your inventory',
paid = 'You have been paid $%s for %s x%s',
no_items = 'You don\'t have any material to deliver to us',
task_done = 'Congratulations, deliver the obtained materials to your superior at the headquarters',
garage = 'Garage',
helicopter = 'Helicopter',
vehicle_head_menu = 'Vehicle List'
}
Config.VersionControl = true
```
# lvs-inventory
lvs-inventory documentation
## LVS Inventory – Advanced Inventory System
> Deliver a smoother, faster, and more dynamic inventory experience while maintaining full compatibility with existing ox\_inventory-based resources.
### Overview
Upgrade your server’s inventory experience with **LVS Inventory**, a powerful extension built on top of **ox\_inventory**, fully compatible with all its methods, features, and ecosystem.
LVS Inventory enhances the core system by introducing a modern interface, advanced item interactions, multi-inventory management, and immersive gameplay mechanics that take roleplay to the next level.
{% embed url="" %}
***
### Key Features
#### 🧩 Built on Top of ox\_inventory
* Fully compatible with **ox\_inventory**.
* Supports all native methods and functionality.
* Easy integration with existing scripts that already use ox\_inventory.
***
#### 🖥 Multi-Inventory Interface
* Open **multiple inventories at the same time** in a single interface.
* Seamlessly **move items between inventories** without closing or reopening menus.
* Faster and more intuitive item management.
* Ideal for:
* Trading
* Storage interaction
* Job workflows
***
#### 🔍 Advanced Item Filtering & Search
* Highlight items by **category**.
* Real-time **text search**.
* Quickly locate items in large inventories.
* Improves usability and player experience significantly.
***
#### 🎒 Backpack System
* Backpacks act as **independent inventories**.
* Each backpack contains its own internal storage.
* If the backpack is:
* Lost
* Dropped
* Stolen → All items inside are lost with it.
* Adds risk/reward and realism to item management.
***
#### 🧷 Special Slots System
* Supports up to **10 configurable special slots**.
* Prebuilt examples included:
* `tool`
* `backpack`
* `vest`
* `wallet`
* Each slot can have:
* Custom logic
* Script interactions
* Unique restrictions
* Easily extendable for custom gameplay systems.
***
#### ❤️ Character Health Integration
* Detects player damage **internally**.
* Displays health status directly in the inventory UI.
* Can be:
* Disabled if needed
* Replaced with external systems via exports
* Allows integration with advanced medical or damage scripts.
***
#### 🧱 Advanced Item Interaction (Hold / Drop / Place)
* Players can **hold items in hand** with:
* Custom 3D models
* Custom animations per item
* Items can be:
* Dropped
* Placed in the world
* Supports **persistent world items** (permanent objects).
***
#### 🚗 Vehicle Interaction (Trunks & Physics)
* Items can be placed inside vehicle trunks.
* Objects can be **attached to vehicles**.
* If the vehicle moves or physics affect it:
* Items can fall off realistically.
* Adds immersion and dynamic gameplay.
***
#### 🏗 Modern UI (Shops & Crafting Integration)
* Includes **custom shop and crafting systems** ([lvs\_shops ](/qb-esx/lvs-shops)& [lvs\_crafting](/qb-esx/lvs-crafting)).
* Uses a **modern, dynamic UI**, not the default ox\_inventory interface.
* Designed for:
* Better UX
* Faster interactions
* Cleaner visuals
* Fully integrated with LVS ecosystem scripts.
## Changelog
{% tabs %}
{% tab title="v1.4.6" %}
### 2026/04/05
Initial commit
**Files Changed:**
* [ ] All Files
* [ ] All Files Except config.lua
* [ ] Specific Files
{% hint style="warning" %}
Fix:
{% endhint %}
{% hint style="success" %}
Add:
{% endhint %}
{% hint style="info" %}
Edit:
{% endhint %}
{% endtab %}
{% endtabs %}
# Installation
## Step 1. Download package
Download the lvs\_inventory package from your portal.
* lvs\_inventory
* lvs\_shops
* lvs\_crafting
* ox\_inventory
\
The best way to place the downloaded files is by creating a folder `[lvs]` in `resources`, where you can put all the scripts related to this **LVS Store.**
***
## Step 2. Install dependencies
Install the dependencies if they are not installed.
| ox\_lib | |
| ------------------- | ---------------------------------------- |
| ox\_inventory (mod) | Included in the package |
| lvs\_bridge | Included in the package |
| lvs\_interact | Included in the package |
***
## Step 3. Database
Create the necessary tables in the database for crafting and permanently placed objects, file `/lvs_inventory/tables.sql`
***
## Step 4. Config
Configure and translate the resources according to your server needs.\
Each script includes its own configuration files for customization.
***
## Step 5. server.cfg setup
Add the following settings to your `server.cfg`:
```
setr inventory:framework "qbx"
setr inventory:slots 25
setr inventory:weight 30000
setr inventory:dropslots 40
setr inventory:dropweight 30000
# Special Slots metadata type
setr inventory:specialslots ["tool", "armour", "drug", "radio", "backpack", "identification", "phone", "tablet", "key", "wallet"]
# Google Fonts Material Symbols
setr inventory:specialslotsicons ["tool", "armour", "mixture_med", "cell_tower", "backpack", "id_card", "phone_iphone", "tablet", "key", "wallet"]
# Allow all items to be held by default, enabling drop/throw/place interactions
setr inventory:heldall true
```
***
## Step 6. Resource Start Order
Ensure the correct start order in your `server.cfg`:
```editorconfig
# Qbox & Extra stuffensure
ensure ox_lib
ensure qbx_core
ensure ox_target
ensure lvs_bridge
ensure [ox]
start lvs_lib
start lvs_inventory
start lvs_interact
start lvs_npcdialog
ensure [lvs]
```
***
# Guide
Explore and fine-tune your settings effortlessly. Customize your script experience according to your preferences
## LVS Inventory Guide
### Table of Contents
1. Introduction
2. Configuration Files
3. Enhanced ox\_inventory Features
4. Custom Data Files
5. Setup Instructions
6. Troubleshooting
***
### Introduction
LVS Inventory is an enhanced version of ox\_inventory that adds additional features and customization options for your FiveM server. This guide will help you understand and configure the various aspects of the system.
#### Key Features
* Enhanced backpack system with configurable sizes and restrictions
* Special item slots (tool, armor, backpack, identification, phone, tablet, key, wallet)
* Prop holding system with 3D item visualization
* Vehicle inventory improvements
* Persistent item placement
* Body damage integration
***
### Configuration Files
#### Main Configuration (`config/config.lua`)
This is the primary configuration file that controls core inventory behavior.
```lua
Config = Config or {}
-- Interaction settings for placed items
Config.Interaction = {
type = 'interact', -- ['draw3DText', 'interact', 'target'] - interaction system type
distance = 1.0, -- Interaction distance
view = 2.5 -- Interaction display distance
}
-- Persistent items configuration
Config.Persistent = {
enabled = true,
maxPlacedForPlayer = 5 -- Max placed items per player
}
-- Body damage integration
Config.bodyDamageEnabled = true
-- Slot plugins toggles
Config.BackpackEnabled = true -- Enable backpack logic
Config.CheckForNestedBackpacks = true -- Prevent backpack nesting
Config.ToolEnabled = true -- Enable tool slot logic
Config.ArmourEnabled = true -- Enable armor slot logic
-- Language settings
Config.Lang = {
input = {
header = 'Backpack Tag',
tag_label = 'Backpack tag',
tag_desc = 'Enter a new tag for the backpack',
submit_btn = 'Save',
updated = 'Backpack updated'
},
notify = {
inventory_title = 'Inventory',
cant_carry = 'Can\'t carry too many things',
max_placed_items = 'Maximum number of items placed reached',
},
text3d = {
pickup_label = '~h~{ITEM_LABEL}~h~',
pickup_count = 'x{ITEM_COUNT}',
},
target = {
pickup = 'Pickup',
icon = 'fas fa-box'
}
}
Config.Debug = true -- Enable debug mode
```
#### Holding System Configuration (`config/holding.lua`)
Configures the prop holding system that displays items as 3D objects when held.
```lua
Config = Config or {}
-- Keybinds for item interactions
Config.keybinds = {
cancel = { label = 'Cancel', key = 'Backspace', keyIndex = 177 },
rotateL = { label = 'Left', key = 'Scroll Down', keyIndex = 96 },
rotateR = { label = 'Right', key = 'Scroll UP', keyIndex = 97 },
drop = { label = 'Drop', key = 'G', keyIndex = 58 },
throw = { label = 'Throw', key = 'Q', keyIndex = 52 },
place = { label = 'Place', key = 'E', keyIndex = 38 },
pickup = { label = '~g~[E]~s~ to pickup', keyIndex = 38 }
}
-- Fallback settings for items without specific configurations
Config.fallback = {
model = 'prop_paper_bag_small',
hold = {
bone = 28422, -- Right hand bone
offset = vector3(0.15, 0.0, 0.0),
rotation = vector3(0.0, 270.0, 0.0),
}
}
-- Preview settings for placement
Config.preview = {
alpha = 140, -- Opacity (0-255)
errorColor = {255, 0, 0}, -- Red for invalid placement
successColor = {0, 255, 0}, -- Green for valid placement
persistentColor = {255, 255, 0} -- Yellow for persistent placement
}
-- Visual settings
Config.textFont = 4
Config.textScale = 1.0
Config.outline = {
enabled = true,
color = { r = 126, g = 207, b = 147, a = 144 }
}
```
#### Vehicle Configuration (`config/vehicle.lua`)
Manages vehicle-specific inventory features.
```lua
Config = Config or {}
-- Pickup trucks with truck beds for item placement
Config.pickupTrucks = {
'bison', 'bison2', 'bison3', 'bobcatxl', 'bodhi2', 'boor',
'guardian', 'l35', 'rebel', 'rebel2', 'sadler', 'sadler2',
'sandking', 'sandking2', 'contender', 'dloader', 'scrap',
'slamvan', 'slamvan3', 'tiptruck', 'vetir', 'mesa3',
'warrener2', 'wastelander', 'driftyosemite', 'yosemite',
'yosemite2', 'yosemite3', 'insurgent', 'insurgent3', 'mule',
'mule2', 'mule3', 'mule4', 'mule5', 'benson'
}
-- Enable item dropping when vehicle is flipped
Config.FlippedEnabled = true
-- Vehicles whose props shouldn't be released when flipped
Config.enclosedVehicles = {
'mule', 'mule2', 'mule3', 'mule4', 'mule5', 'pounder',
'pounder2', 'stockade', 'benson', 'benson2'
}
```
***
### Enhanced ox\_inventory Features
#### Backpack System
The backpack system allows players to carry additional inventory slots through wearable backpacks.
**Configuration Structure**
Backpacks are configured in `ox_inventory/data/backpacks.lua`:
```lua
return {
lvs_backpack_1 = {
slots = 5,
maxWeight = 3000,
-- Optional restriction system
blacklist = { 'WEAPON_PUMPSHOTGUN' }, -- Items not allowed
-- OR
-- whitelist = { 'testburger' }, -- Only items allowed
-- Visual appearance
prop = {
model = 'sf_prop_sf_backpack_01a',
boneIndex = 24818, -- Back bone
position = {
x = -0.15, y = -0.15, z = -0.05,
rot_x = -5.0, rot_y = 90.0, rot_z = 0.0
}
}
},
lvs_backpack_2 = {
slots = 15,
maxWeight = 20000,
prop = {
model = 'vw_prop_vw_backpack_01a',
boneIndex = 24818,
position = { x = -0.17, y = -0.06, z = 0.0, rot_x = 0.0, rot_y = 90.0, rot_z = 180.0 }
}
}
}
```
**Specialized Backpacks**
The system also includes specialized backpacks like medical bags:
```lua
lvs_paramedic_bag = {
slots = 20,
maxWeight = 50000,
whitelist = { 'bandage', 'water' }, -- Only medical items
prop = {
model = 'xm_prop_smug_crate_s_medical',
boneIndex = 57005, -- Right hand
position = { x = 0.29, y = -0.05, z = 0.0, rot_x = -25.0, rot_y = 280.0, rot_z = 75.0 },
animation = {
dict = 'missheistdocksprep1hold_cellphone',
anim = 'static'
},
removeOnUseWeapon = true
}
}
```
#### Special Slots System
The inventory supports special item types with dedicated UI icons:
**Configuration**
Server configuration defines available special slots:
```cfg
setr inventory:specialslots ["tool", "armour", "three", "four", "backpack", "identification", "phone", "tablet", "key", "wallet"]
setr inventory:specialslotsicons ["tool", "armour", "counter_3", "counter_4", "backpack", "id_card", "phone_iphone", "tablet", "key", "wallet"]
```
**Tool Slot**
Configured in `ox_inventory/data/tools.lua`:
```lua
return {
lvs_wrench = {
durability = 100, -- Tool durability
},
lvs_lug_wrench = {
durability = 100,
}
}
```
**Armor Slot**
Configured in `ox_inventory/data/vest.lua`:
```lua
return {
lvs_light_vest = {
durability = 60,
cloth = {
male = { vest = { item = 11, texture = 1 } },
female = { vest = { item = 0, texture = 0 } }
}
},
lvs_heavy_vest = {
durability = 100,
cloth = {
male = { vest = { item = 15, texture = 2 } },
female = { vest = { item = 0, texture = 0 } }
}
}
}
```
#### Prop Holding System
This system displays items as 3D objects when held by players.
**Enabling Item Holding**
To enable the prop holding system, ensure `inventory:heldall` is set to `true` in your server.cfg. This allows all items to be held, dropped, thrown, and placed.
**Individual Item Configuration**
Even with `inventory:heldall` disabled, you can control which specific items can be held by adding a `held = true` property to their configuration in `ox_inventory/data/items.lua`:
```lua
['money'] = {
label = 'Money',
held = true, -- This enables holding for this specific item
client = {
image = 'lvs_cash.png',
}
},
```
**Item Props Configuration**
Item props are configured in `ox_inventory/data/props.lua`:
```lua
return {
-- Basic item configuration
burger = {
model = 'ng_proc_food_bag02a',
droppable = true,
throwable = true,
placeable = false,
persistent = true
},
-- Items with hold positioning
money = {
model = 'prop_anim_cash_pile_01',
hold = {
bone = 28422,
offset = vector3(0.08, 0.0, -0.02),
rotation = vector3(20.0, 0.0, 0.0)
}
},
-- Items with custom animations
radio = {
model = 'prop_cs_hand_radio',
hold = {
bone = 28422,
offset = vector3(0.08, 0.05, 0.0),
rotation = vector3(290.0, 0.0, 0.0)
}
}
}
```
**Common Bones**
* **28422** - SKEL\_R\_Finger02 (Right hand)
* **18905** - SKEL\_L\_Finger02 (Left hand)
* **64729** - SPINE1 (Spine)
* **31086** - HEAD (Head)
* **57005** - SKEL\_R\_Forearm (Right forearm)
#### Display Metadata System
Configured in `ox_inventory/data/display.lua`:
```lua
return {
id_number = 'Number',
id_firstname = 'Name',
id_lastname = 'Surname',
id_dob = 'Date of Birth',
id_sex = 'Gender',
id_nationality = 'Nationality',
id_class = 'Class',
id_grade = 'Grade',
id_job = 'Job',
}
```
This system controls how item metadata is displayed to players in the UI.
{% hint style="info" %}
If you need any specific labels for metadata, you can define them here. This is loaded every time the script starts
{% endhint %}
***
### Setup Instructions
#### Basic Configuration
1. **Enable/Disable Features**
* Toggle features in `config/config.lua` as needed
* Set `Config.Debug = true` during setup, then `false` for production
2. **Server Configuration** Add these to your server.cfg:
```cfg
setr inventory:framework "qbx"
setr inventory:slots 25
setr inventory:weight 30000
setr inventory:dropslots 40
setr inventory:dropweight 30000
setr inventory:specialslots ["tool", "armour", "three", "four", "backpack", "identification", "phone", "tablet", "key", "wallet"]
setr inventory:specialslotsicons ["tool", "armour", "counter_3", "counter_4", "backpack", "id_card", "phone_iphone", "tablet", "key", "wallet"]
setr inventory:heldall true
setr inventory:target true
setr inventory:screenblur false
setr inventory:keys ["F2", "K", "TAB"]
setr inventory:giveplayerlist false
setr inventory:weaponanims true
setr inventory:itemnotify true
setr inventory:weaponnotify true
setr inventory:dropprops true
setr inventory:dropmodel "prop_med_bag_01b"
set inventory:versioncheck false
set inventory:clearstashes "4 MONTH"
set inventory:bulkstashsave 1
set inventory:loglevel 0
set inventory:randomloot false
```
3. **Customizing Backpacks**
* Edit `ox_inventory/data/backpacks.lua`
* Add new backpack entries with desired slots, weight, and restrictions
4. **Setting Up Item Props**
* Configure 3D props in `ox_inventory/data/props.lua`
* Define models, positioning, and animations for each item
5. **Special Items Configuration**
* Configure tools in `data/tools.lua`
* Configure armor in `data/vest.lua`
* Customize display metadata in `data/display.lua`
#### Advanced Customization
**Creating Custom Backpacks**
1. Add a new entry to the backpacks table:
```lua
my_custom_backpack = {
slots = 25,
maxWeight = 50000,
-- Optional: Restrict certain items
blacklist = { 'WEAPON_', 'DRUG_' },
-- Visual configuration
prop = {
model = 'my_custom_backpack_model',
boneIndex = 24818,
position = { x = -0.2, y = -0.1, z = -0.05 }
}
}
```
**Custom Item Props**
1. Define a new prop configuration:
```lua
my_custom_item = {
model = 'prop_custom_item',
hold = {
bone = 28422,
offset = vector3(0.1, 0.0, -0.05),
rotation = vector3(0.0, 0.0, 45.0),
animation = {
dict = 'anim@custom@carry',
anim = 'idle'
}
}
}
```
### Troubleshooting
#### Common Issues
1. **Backpacks Not Working**
* Ensure `Config.BackpackEnabled = true` in config.lua
* Check that backpack entries are properly formatted
* Verify lvs\_bridge is properly installed
2. **Props Not Showing**
* Confirm `inventory:heldall` is set to `true` in server.cfg
* Check that item models are valid and loaded
* Ensure prop configurations are correctly formatted
3. **Special Slots Not Functioning**
* Verify server configuration includes special slots
* Check that items have the correct metadata types
* Ensure ox\_lib is updated to the required version
4. **Performance Issues**
* Reduce `Config.Debug` to `false` in production
* Limit the number of persistent items with `Config.Persistent.maxPlacedForPlayer`
* Consider reducing backpack slot counts if needed
#### Debug Mode
When enabled (`Config.Debug = true`), the system will provide additional information in the console to help identify issues. Use this during setup but disable it for production servers.
#### Getting Help
If you encounter issues not covered in this guide:
1. Check the console for error messages
2. Verify all configuration files are properly formatted
3. Ensure all required dependencies are installed and updated
4. Check the LVS documentation for additional resources
***
This guide should help you understand and configure the lvs\_inventory system effectively. For more detailed information about specific features, refer to the individual configuration files and test changes in a development environment before deploying to production.
# Special Slots
## Special Slots Events API
The Special Slots API allows developers to register custom events for special inventory slots (tool, armour, drug, radio, backpack, identification, phone, tablet, key, wallet).
### Available Slots
Available slots are configured via the `inventory:specialslots` convar in your `server.cfg`. By default, they include:
| Slot | Description |
| ---------------- | ------------------------ |
| `tool` | Tools |
| `armour` | Protective vests |
| `drug` | Substances / medications |
| `radio` | Communication radios |
| `backpack` | Backpacks |
| `identification` | Identity documents |
| `phone` | Mobile phones |
| `tablet` | Electronic tablets |
| `key` | Keys |
| `wallet` | Wallets |
***
### Registering Events
Use the `RegisterSpecialSlotEvent` export to register a slot with its events:
```lua
exports.lvs_inventory:RegisterSpecialSlotEvent('tool', {
onEquip = function(slotData)
print('Tool equipped')
end,
onUnequip = function(slotData)
print('Tool unequipped')
end,
onTick = function(slotData)
-- Logic that runs while the item is equipped
end,
tickRate = 1000 -- (optional) Interval in ms. Default: 100
})
```
***
### Available Events
#### onEquip
Triggered when an item is placed in the special slot.
**Parameters:**
| Parameter | Type | Description |
| ---------- | ----- | ------------------------------------------------------- |
| `slotData` | table | Data of the equipped item (name, count, metadata, etc.) |
**Example:**
```lua
onEquip = function(slotData)
print('Item equipped:', slotData.name)
print('Count:', slotData.count)
print('Metadata:', json.encode(slotData.metadata))
end
```
#### onUnequip
Triggered when an item is removed from the special slot.
**Parameters:**
| Parameter | Type | Description |
| ---------- | ----- | ------------------------------------ |
| `slotData` | table | Data of the item that was unequipped |
**Example:**
```lua
onUnequip = function(slotData)
if slotData then
print('Item unequipped:', slotData.name)
else
print('Slot cleared without previous data')
end
end
```
#### onTick
Executed periodically while the item remains in the special slot.
**Parameters:**
| Parameter | Type | Description |
| ---------- | ----- | --------------------------------- |
| `slotData` | table | Updated data of the equipped item |
**Example:**
```lua
onTick = function(slotData)
-- Check if a tool has durability
if slotData.metadata.durability then
if slotData.metadata.durability <= 0 then
-- Notify the player
exports['ox_lib']:notify({
title = 'Broken tool',
description = 'Your tool has worn out completely',
type = 'warning'
})
end
end
end
```
### Tick Rate Configuration
You can configure the frequency of `onTick` execution using the `tickRate` property in milliseconds:
```lua
exports.lvs_inventory:RegisterSpecialSlotEvent('phone', {
onTick = function(slotData)
-- Runs every 5 seconds
checkPhoneSignal(slotData.metadata.number)
end,
tickRate = 5000 -- 5 seconds
})
```
If `tickRate` is not specified, the default value is **100ms**.
> **Performance Note:** Very low values (such as 1ms) can impact server performance. Use the highest value that is functional for your use case.
***
### Complete Examples
#### Tool with Durability
```lua
exports.lvs_inventory:RegisterSpecialSlotEvent('tool', {
onEquip = function(slotData)
exports['ox_lib']:notify({
title = 'Tool equipped',
description = string.format('%s ready to use', slotData.label),
type = 'success'
})
end,
onUnequip = function(slotData)
exports['ox_lib']:notify({
title = 'Tool stored',
description = string.format('%s stored away', slotData.label),
type = 'info'
})
end,
onTick = function(slotData)
-- Reduce durability over time
if slotData.metadata.durability and slotData.metadata.durability > 0 then
-- Wear logic here...
end
end,
tickRate = 1000 -- Every second
})
```
#### Radio with Channel Verification
```lua
exports.lvs_inventory:RegisterSpecialSlotEvent('radio', {
onEquip = function(slotData)
local channel = slotData.metadata.channel or 1
SetRadioChannel(channel)
exports['ox_lib']:notify({
title = 'Radio turned on',
description = string.format('Channel: %d', channel),
type = 'success'
})
end,
onUnequip = function(slotData)
SetRadioChannel(0) -- Turn off radio
exports['ox_lib']:notify({
title = 'Radio turned off',
type = 'info'
})
end,
onTick = function(slotData)
-- Check if there is signal on the current channel
local channel = slotData.metadata.channel or 1
if not HasRadioSignal(channel) then
-- No signal...
end
end,
tickRate = 2000 -- Every 2 seconds
})
```
#### Phone with State Updates
```lua
local phoneActive = false
exports.lvs_inventory:RegisterSpecialSlotEvent('phone', {
onEquip = function(slotData)
phoneActive = true
local number = slotData.metadata.number or 'Unknown'
exports['ox_lib']:notify({
title = 'Phone started',
description = string.format('Number: %s', number),
type = 'success'
})
OpenPhoneUI()
end,
onUnequip = function(slotData)
phoneActive = false
ClosePhoneUI()
exports['ox_lib']:notify({
title = 'Phone turned off',
type = 'info'
})
end,
onTick = function(slotData)
if phoneActive then
-- Check for pending notifications
CheckPendingNotifications()
end
end,
tickRate = 3000 -- Every 3 seconds
})
```
### Manual Event Triggering
You can manually trigger events using the `TriggerSpecialSlotEvent` export:
```lua
local success, result = exports.lvs_inventory:TriggerSpecialSlotEvent('tool', 'onEquip', mySlotData)
if not success then
print('Error executing event:', result)
end
```
**Parameters:**
| Parameter | Type | Description |
| ----------- | ------ | --------------------------------------- |
| `slotName` | string | Name of the slot (tool, radio, etc.) |
| `eventType` | string | Event type (onEquip, onUnequip, onTick) |
| `...` | any | Additional arguments for the callback |
**Returns:**
| Value | Type | Description |
| -------------- | ------- | -------------------------------------------- |
| `success` | boolean | Whether the callback executed without errors |
| `result/error` | any | Callback result or error message |
### Important Notes
#### Slot Data (slotData)
The `slotData` parameter contains the equipped item's information and is automatically updated. Its general structure includes:
```lua
{
name = "lvs_wrench", -- Item name
label = "Wrench", -- Display label
count = 1, -- Quantity
weight = 500, -- Weight in grams
slot = 16, -- Slot number
metadata = { -- Custom metadata
durability = 85,
description = "A robust tool"
-- ...your own metadata
}
}
```
#### Avoid Heavy Operations in onTick
If you need to perform expensive operations inside `onTick`, consider using `Citizen.CreateThread` to avoid blocking the cycle:
```lua
onTick = function(slotData)
if not processing then
processing = true
Citizen.CreateThread(function()
-- Heavy operation here
processData(slotData)
processing = false
end)
end
end
```
# Exports
## Set Player info from other resources
Client side:
```lua
exports.lvs_inventory:setInfo('house', '742 Evergreen Terrace')
exports.lvs_inventory:setInfo('phone', '+54123456789')
exports.lvs_inventory:setInfo('vehicle', 'LVS1234')
-- or --
exports.lvs_inventory:setInfo({
house = '742 Evergreen Terrace',
phone = '+54123456789',
vehicle = 'LVS1234'
})
-- You can also set the name (character name) and cid (Citizen ID).
-- These are set when the character is loaded, but they can be updated any time.
exports.lvs_inventory:setInfo({
name = 'Hans Landa',
cid = 'SS123456789',
})
```
***
## Get special slot
Server side:
```lua
-- If a player is wearing a backpack, it returns the slot of it; otherwise, it's null.
-- The data structure is the slot from ox_inventory
local backpack = exports.lvs_inventory:getSpecialSlot('backpack')
```
# Body Damage
## Damage System API - LVS Inventory
### `GetPlayerDamage()`
Retrieves the current damage state of the player by body parts.
#### Description
Returns an object containing damage data for 6 main body zones, providing a simplified structure for external use.
#### Syntax
```lua
local damageData = exports['lvs_inventory']:GetPlayerDamage()
```
#### Return Value
**Type:** `table`
Object with the following properties:
* `head` (table): Head damage data
* `torso` (table): Upper torso damage data
* `leftArm` (table): Left arm damage data
* `rightArm` (table): Right arm damage data
* `leftLeg` (table): Left leg damage data
* `rightLeg` (table): Right leg damage data
Each body part contains:
* `percent` (number): Accumulated damage percentage (0-100)
* `bullets` (number): Number of bullet impacts received
* `severity` (boolean): Indicates if damage is severe
* `broken` (boolean): Indicates broken bones
* `bleeding` (boolean): Indicates if the zone is bleeding
#### Example
```lua
local damage = exports['lvs_inventory']:GetPlayerDamage()
if damage.head.percent > 50 then
print('Critical head damage!')
end
if damage.leftLeg.broken then
print('Left leg broken')
end
```
***
### `UpdatePlayerDamage()`
Updates damage for a specific body part and notifies linked systems.
#### Description
This function allows manual modification of the damage state for a specific body zone. It registers bullet impacts, updates damage percentage, and maintains negative states (severity, fractures, bleeding).
#### Syntax
```lua
exports['lvs_inventory']:UpdatePlayerDamage(bodyPart, bulletCount, newPercent, severity, broken, bleeding)
```
#### Parameters
| Parameter | Type | Description |
| ------------- | ------- | ------------------------------------------------------------------------------------------------ |
| `bodyPart` | string | Body part to update. Valid values: `head`, `torso`, `leftArm`, `rightArm`, `leftLeg`, `rightLeg` |
| `bulletCount` | number | Number of bullet impacts to register (typically 1 per impact) |
| `newPercent` | number | New damage percentage (0-100) |
| `severity` | boolean | Indicates if damage is severe |
| `broken` | boolean | Indicates broken bones |
| `bleeding` | boolean | Indicates if the zone is bleeding |
#### Behavior
* If `bodyPart` is invalid, defaults to `torso`
* Bullet impacts are accumulated to the existing counter
* Damage percentage is replaced with the new value
* Negative states are preserved if they already existed
* Automatically saves data to the server
* Triggers the `lvs_injury:client:UpdatePlayerDamage` event to notify other scripts
#### Example
```lua
-- Player shot in torso
exports['lvs_inventory']:UpdatePlayerDamage('torso', 1, 45, true, false, true)
-- Player falls and breaks leg
exports['lvs_inventory']:UpdatePlayerDamage('leftLeg', 0, 60, false, true, false)
-- Player receives severe head impact
exports['lvs_inventory']:UpdatePlayerDamage('head', 1, 85, true, true, true)
```
#### Notes
* This function is used internally by the system when a player takes damage
* Can be used externally to apply custom damage or synchronize states
* Changes are automatically persisted to the database
***
### Related Events
#### `lvs_injury:client:UpdatePlayerDamage`
Triggered whenever player damage is updated.
**Parameters:**
* `BodyParts` (table): Complete table with all body parts state
```lua
AddEventHandler('lvs_injury:client:UpdatePlayerDamage', function(bodyParts)
-- Update health UI, apply effects, etc.
end)
```
#### `lvs_injury:client:ResetPlayerDamage`
Triggered when player damage is reset (e.g., after being revived).
***
### Common Use Cases
#### Check player condition
```lua
local damage = exports['lvs_inventory']:GetPlayerDamage()
local totalDamage = 0
for _, part in pairs(damage) do
totalDamage = totalDamage + part.percent
end
if totalDamage > 300 then
-- Player heavily injured, will need medical attention
end
```
#### Apply fall damage
```lua
local fallHeight = 15.0
if fallHeight > 10.0 then
local damagePercent = math.floor((fallHeight - 10) * 2)
exports['lvs_inventory']:UpdatePlayerDamage(
'leftLeg',
0,
damagePercent,
false,
fallHeight > 20,
false
)
end
```
***
#### Medical treatment system example
```lua
function TreatBleeding(playerPart)
local damage = exports['lvs_inventory']:GetPlayerDamage()
if damage[playerPart] and damage[playerPart].bleeding then
-- Apply bandage
exports['lvs_inventory']:UpdatePlayerDamage(
playerPart,
0,
damage[playerPart].percent,
damage[playerPart].severity,
damage[playerPart].broken,
false -- Stop bleeding
)
end
end
```
# lvs-shops
## LVS Shops – Dynamic Shop System
### Overview
Enhance your server’s economy with **LVS Shops**, a flexible and modern shop system designed to deliver a clean user experience and realistic item distribution.
Built with a focus on simplicity and immersion, LVS Shops allows you to create fully customized stores with dynamic inventories, job restrictions, and advanced item handling — all powered by an intuitive and visually appealing interface.
From convenience stores to black market dealers, this system gives you full control over how items are bought, sold, and managed across your server.
***
### Key Features
#### 🛒 Fully Customizable Shops
* Create unlimited shops with unique configurations.
* Define:
* Shop name and description
* Inventory items
* Prices per item
* Each shop operates independently.
***
#### 📦 Stock System (Realistic Economy)
* Each item can have **limited stock**.
* Items can **run out** and become unavailable.
* Stock resets on server restart (or configurable logic).
* Adds realism and encourages:
* Player planning
* Market dynamics
* Resource scarcity
👉 This creates a more immersive economy where items are not infinitely available.
***
#### 👥 Job & Group Restricted Shops
* Restrict shops to specific:
* Jobs (e.g., police, ambulance)
* Groups or roles
* Perfect for:
* Armouries
* Job-exclusive stores
* Faction-based economies
***
#### 🧬 Advanced Item Metadata
* Support for **static metadata** (predefined values).
* Support for **dynamic metadata** (generated on purchase).
* Ideal for:
* Registered weapons
* Unique items
* Custom attributes per item
***
#### 🕶 Black Market Support
* Create **illegal shops** (black markets).
* Transactions use **dirty money / black money**.
* Perfect for:
* Criminal gameplay
* Hidden economies
* Risk-based trading systems
***
#### 🎨 Modern & Clean UI
* Custom-built interface (not default inventory UI).
* Designed for:
* Clarity
* Speed
* Smooth navigation
* Supports item filters and structured layouts.
# Installation
## Step 1. Download package
Download the lvs\_shops package from your portal.
* lvs\_shops
* lvs\_bridge
* lvs\_interact
* lvs\_npcdialog
\
The best way to place the downloaded files is by creating a folder `[lvs]` in `resources`, where you can put all the scripts related to this **LVS Store.**
***
## Step 2. Install dependencies
Install the dependencies if they are not installed.
| ox\_lib | |
| -------------- | ---------------------------------------- |
| lvs\_bridge | Included in the package |
| lvs\_interact | Included in the package |
| lvs\_npcdialog | Included in the package |
{% hint style="info" %}
**lvs\_interact** is optional; you can use a target system such as **ox\_target** or **qb-target**.
{% endhint %}
***
## Step 3. Config
Now configure and translate your resources.
* `lvs_shops/config/*.lua`
* `lvs_shops/server/editable.lua`
{% hint style="warning" %}
If this is your first time using **lvs\_bridge** or **lvs\_npcdialog**, you will need to adjust them to your needs in their respective **config.lua** files.
{% endhint %}
***
## Step 4. Start the script (server.cfg)
In the `server.cfg` file, you need to start or ensure the scripts
```editorconfig
ensure qb-core
start ox_lib
start ox_target
start lvs_bridge
start lvs_lib
start lvs_interact
start lvs_shops
# ensure [lvs]
```
***
# Metadata
## Shop Metadata Configuration
This script allows you to define **metadata for items sold in shops** in two different ways:
1. **Fixed metadata**, defined directly in the shop configuration file.
2. **Dynamic metadata**, generated in real time on the server using custom logic (player data, context, etc.).
This flexibility allows everything from simple static items to advanced items that depend on player-specific or external data.
***
### 1. Fixed Metadata (config/shops.lua)
Fixed metadata is defined directly inside the shop configuration file: `config/shops.lua`.
This method is ideal when:
* The item should always have the same data.
* It does not depend on the player or any external logic.
* You want a simple and straightforward setup.
#### Example
```lua
items = {
{
type = 'other',
name = 'card',
price = 10,
label = 'Pokemon Card',
metadata = {
label = 'Charizard',
type = 'Fire',
}
},
}
```
In this case:
* The `card` item will always be sold with the same metadata.
* No additional server-side logic is executed.
* The metadata is assigned directly at the time of purchase.
***
### 2. Dynamic Metadata (server/editable.lua)
When metadata needs to be generated dynamically (for example, based on the player, identity, progress, or any other logic), you must use the following file:
```
server/editable.lua
```
This system allows you to **intercept the item purchase** and assign metadata just before the item is added to the player's inventory.
#### When to Use Dynamic Metadata
This method is recommended when:
* The item requires unique data per player.
* Metadata depends on external or runtime information.
* Advanced logic is required.
Common examples include:
* Phones with unique numbers.
* Personal documents.
* Keys, cards, credentials.
* Items linked to player data.
***
### Using `LV.items:setMetadata`
The `server/editable.lua` file provides a dedicated function to handle this behavior:
```lua
LV.items:setMetadata(itemName, function(source, itemName, amount, shopType, metadata)
return {
-- dynamically generated metadata
}
end)
```
#### Function Parameters
The function receives the following parameters:
* **source**: Player ID who is making the purchase.
* **itemName**: Name of the item.
* **amount**: Quantity purchased.
* **shopType**: Type of shop where the item is bought.
* **metadata**: Base metadata (if any) defined in `shops.lua`.
{% hint style="warning" %}
**Important:** The function **must return a table** containing the final metadata that will be assigned to the item.
{% endhint %}
***
### Practical Example
```lua
LV.items:setMetadata('phone', function(source, itemName, amount, shopType, metadata)
return {
number = "+1 123 45678",
brand = "Apple",
model = "16 pro"
}
end)
```
In this example:
* Every time a `phone` item is purchased.
* The server dynamically generates its metadata.
* The item is added to the inventory with personalized data.
This system can easily be extended to:
* Generate unique serial numbers.
* Read player-specific data.
* Integrate with other scripts.
***
### Metadata Priority
* If an item **does not have dynamic metadata**, the metadata defined in `shops.lua` will be used.
* If a function exists in `server/editable.lua` for that item, **the returned metadata will replace or override** the fixed metadata.
***
### Recommendations
* Use **fixed metadata** for simple and generic items.
* Use **dynamic metadata** for unique items or items tied to server logic.
* Keep complex logic exclusively inside `server/editable.lua`.
***
With this system, shops can easily adapt to any use case without constantly modifying the base configuration.
# Exports & Events
This script allows registering and opening dynamic shops on your FiveM server using simple exports and events.
***
### Export: `exports.lvs_shops:RegisterShop`
#### Syntax (server-side)
```lua
exports.lvs_shops:RegisterShop(shopId, shopData)
```
#### Parameters
* **shopId** (*string*): A unique identifier for the shop.
* **shopData** (*table*): A table containing the shop's settings and inventory.
**shopData Structure**
* **name** (*string*): Display name of the shop.
* **inventory** (*table*): A list of items available in the shop. Each item should be a table with:
* `name` (*string*): Item name.
* `price` (*number*): Item price.
* `type` (*string, optional*): Item type (for categorization or filtering).
* **groups** (*table*): Restriction list based on player groups (e.g., `police = 0` for group access).
* **description** (*string*, optional): A short description of the shop.
* **filters** (*table*, optional): Used to organize shop items by categories. Each filter is a table with:
* `type` (*string*): The item type this filter applies to.
* `label` (*string*): Display label for the filter.
* `description` (*string*): Additional description for the filter.
* `icon` (*string*): Icon for the filter (currently not implemented).
#### Example Usage
```lua
exports.lvs_shops:RegisterShop('TestShop', {
name = 'Test shop',
inventory = {
{ name = 'burger', price = 10, type = 'drink' },
{ name = 'water', price = 10, type = 'drink' },
{ name = 'cola', price = 10, type = 'drink' },
},
groups = {
police = 0
},
description = 'Some description bla bla',
filters = {
{
type = 'drink',
label = 'Drinks',
description = 'Something refreshing',
}
},
})
```
***
### Event: `lvs_shops:client:openRuntimeShop`
#### Syntax (client-side)
```lua
TriggerEvent('lvs_shops:client:openRuntimeShop', shopId)
```
#### Parameters
* **shopId** (*string*): The ID of the shop you registered previously.
#### Description
This client-side event opens the specified runtime shop UI for the player.
#### Example Usage
```lua
TriggerEvent('lvs_shops:client:openRuntimeShop', 'TestShop')
```
***
### Notes
* `shopId` **must** be unique when registering a new shop to avoid conflicts.
* You can expand the `shopData` with more optional fields like in `shops.lua` of `lvs_shops` if needed.
* Group restrictions (`groups`) allow you to make certain shops accessible only to specific player groups or jobs.
# lvs-crafting
## LVS Crafting – Advanced Workbench System
### Overview
Transform your server’s crafting system with **LVS Crafting**, a powerful and flexible workbench script designed to add depth, progression, and realism to your roleplay experience.
From public crafting stations spread across the map to private workbenches placed inside player houses, this system brings dynamic item production, shared crafting queues, blueprint mechanics, and structured storage into one immersive solution.
Enhance your server’s economy, job systems, and progression mechanics with a crafting experience that feels meaningful, organized, and fully integrated into roleplay.
***
### Key Features
#### 🛠 Public & Private Workbenches
* Create **fixed crafting stations** across the map.
* Accessible to:
* All players
* Specific jobs
* Specific groups
* Workbench item available for purchase.
* Players can place their own workbench inside their house/apartment (compatible with housing systems).
***
#### 📦 Built-in Storage System
Each workbench includes two separate storage systems:
**1️⃣ General Storage**
* Shared storage per workbench.
* Supports **whitelist and blacklist configuration**.
* Prevents players from abusing it as a general-purpose inventory.
* Ideal for restricting storage to crafting materials only.
* Encourages use of the server’s main inventory system for better gameplay flow.
**2️⃣ Blueprint Storage**
* Dedicated storage for **blueprints only**.
* Accepts exclusively blueprint items.
* Keeps crafting progression structured and organized.
***
#### 📘 Blueprint System
* Items can:
* Require a specific blueprint.
* Require a shared blueprint used by multiple items.
* Not require any blueprint at all.
* One blueprint can unlock multiple craftable items.
**Example:**\
A mechanic blueprint for brake systems can allow crafting:
* Standard brakes
* Sport brakes
* Racing brakes
Each crafted item can have its own:
* Stats
* Metadata
* Individual characteristics
This allows for deep progression systems and realistic specialization.
***
#### 🔄 Shared Crafting Queue
* Crafting queues are **shared per workbench**.
* Not player-based.
* If a job-restricted workbench (e.g., hospital staff) is used:
* Any authorized member can collect completed items.
* Storage is also shared.
* Promotes teamwork and realistic workplace dynamics.
***
#### 🏠 Placeable Workbench Item
* Workbench is an in-game item.
* Players can:
* Purchase it.
* Place it inside their house or apartment.
* Fully integrated into housing systems.
* Enables private crafting environments.
***
#### ⚙ Flexible Crafting Logic
* Supports crafting recipes with or without blueprint requirements.
* Allows advanced item customization via metadata.
* Designed for:
* Mechanics
* Police departments
* Medical crafting
* Illegal crafting systems
* Business production systems
* And more
***
### Why Use LVS Crafting?
* Encourages structured economy progression.
* Prevents storage abuse through configurable restrictions.
* Supports teamwork-based crafting.
* Works for both public and job-exclusive crafting systems.
* Adds realism and immersion to your roleplay server
# Guide
## Configuration Guide
***
### Configuration Files Overview
The script uses three main configuration files:
1. **`config/main.lua`** - General settings, language strings, UI config
2. **`config/workbench.lua`** - Workbench definitions (static and placeable)
3. **`config/recipes.lua`** - Crafting recipes
***
### Workbench Configuration
#### Configuration Structure
`config/workbench.lua` contains three main sections:
**1. `Config.PropSettings` - Prop Models and Offsets**
Defines visual models and camera positions for placeable workbenches:
```lua
Config.PropSettings = {
small = {
model = 'prop_tool_bench02_ld',
spawnOffset = { coords = vector3(0.0, 0.0, 0.0) },
camOffset = { coords = vector3(0.0, -0.1, 0.15), heading = 90.0 }
},
large = {
model = 'gr_prop_gr_bench_04b',
spawnOffset = { coords = vector3(0.0, 0.0, 0.0) },
camOffset = { coords = vector3(0.0, -0.6, 0.15) }
}
}
```
**Available prop models:**
* Small: `prop_tool_bench02_ld`
* Large: `gr_prop_gr_bench_04b` (general), `gr_prop_gr_bench_02b` (weapon)
{% hint style="info" %}
You can create new tables with other props.
{% endhint %}
**2. `Config.Workbench` - Static World Workbenches**
Pre-defined workbenches that exist in the world (not placeable by players):
```lua
Config.Workbench = {
general = {
blip = { enabled = false, label = 'Crafting Station', sprite = 351, color = 60, scale = 0.8 },
label = "Crafting Tools Station",
groups = nil, -- nil = everyone, or { jobname = 0, gangname = 0 }
objectSettings = Config.PropSettings.large,
objectCoords = vector4(x, y, z, heading),
interaction = {
type = 'interact',
distView = 5,
distInteract = 2.1
},
allowBlueprints = false,
recipes = {
"lockpick", "electronickit", "trojan_usb", "thermite",
"WEAPON_PISTOL"
},
stash = {
storage = {
label = 'Storage',
slots = 30,
weight = 150000,
whitelist = { 'metalscrap', 'iron' }
},
blueprint = {
label = 'Blueprints',
slots = 10,
weight = 5000
}
}
}
}
```
**Key fields:**
* `blip`: Map blip configuration (set `enabled = false` to hide)
* `groups`: Job/gang restrictions (nil = public)
* `objectSettings`: Reference to `Config.PropSettings` entry
* `objectCoords`: World position (vector4 with heading)
* `interaction`: How players interact with the bench
* `allowBlueprints`: If true, any blueprint can be used
* `recipes`: List of recipe keys that can be crafted without blueprints
* `stash`: Two separate inventories (storage for materials, blueprint for blueprints)
**3. `Config.WorkbenchPlaceable` - Placeable Workbench Items**
Items that players can place inside properties:
```lua
Config.WorkbenchPlaceable = {
lvs_crafting_table_small = {
objectSettings = Config.PropSettings.small,
interaction = { type = 'interact', distView = 5, distInteract = 2.1 },
stash = {
storage = {
label = 'Storage',
slots = 30,
weight = 150000,
whitelist = { 'bandage', 'burger' }
},
blueprint = {
label = 'Blueprints',
slots = 10,
weight = 5000
}
},
allowBlueprints = true,
recipes = {}
}
}
```
**Important:** The index (`lvs_crafting_table_small`) **must match** the item name in your inventory items file.
***
### Recipe Configuration
#### Recipe Structure
`config/recipes.lua` defines all craftable items:
```lua
Config.Recipes = {
lockpick = {
count = 1,
duration = 60,
ingredients = {
metalscrap = 10,
iron = 25
},
successRate = 90,
requireBlueprint = false,
prop = {
model = 'hei_prop_heist_thermite_case',
offsetZ = 0
}
},
lvs_stock_brakes = {
count = 1,
duration = 60,
ingredients = {
metalscrap = 10
},
prop = {
model = 'imp_prop_impexp_brake_caliper_01a',
offsetZ = 0
},
blueprint = {
name = 'brake_blueprint',
degrade = 0.2
},
tool = {
name = 'lvs_wrench',
degrade = 0.05
}
},
WEAPON_PISTOL = {
count = 1,
duration = 550,
isWeapon = true,
ingredients = {
metalscrap = 100
},
prop = {
model = 'WEAPON_PISTOL',
offsetZ = 0
}
}
}
```
**Recipe Fields:**
* `count`: Number of items produced
* `duration`: Crafting time in seconds
* `ingredients`: Table of `{ item_name = quantity }`
* `successRate`: Optional success percentage (1-100, default 100)
* `requireBlueprint`: If true, blueprint required even if recipe listed
* `prop.model`: Model to show in preview (optional)
* `prop.offsetZ`: Vertical offset for preview model
* `blueprint.name`: Blueprint identifier (shared across multiple recipes)
* `blueprint.degrade`: Durability loss per craft (0-1, 0 = disabled)
* `tool.name`: Required tool item name
* `tool.degrade`: Tool durability loss per craft
* `isWeapon`: Set to `true` for weapon items
***
# Blueprint
### Blueprint System
#### Blueprint Types
1. **Specific Blueprints**: One blueprint per item
* Create item with name matching the recipe
2. **Shared Blueprints**: One blueprint for multiple items
* Use `blueprint.name` in recipe to link to common blueprint
* Example: `brake_blueprint` used by multiple brake recipes
***
You can define blueprints for sale in **lvs\_shop or use** [**exports**](/qb-esx/lvs-crafting/exports-and-commands)
```lua
shops = {
{
type = 'youtool',
...
items = {
{
type = 'blueprints',
name = 'lvs_blueprint',
price = 1500,
label = 'Toolbox blueprint',
metadata = {
type = 'blueprint',
label = 'Toolbox blueprint',
recipe = 'mechanic_toolbox', -- items name
durability = 100
}
},
{
type = 'blueprints',
name = 'lvs_blueprint',
price = 5000,
label = 'Brake blueprint',
metadata = {
type = 'blueprint',
label = 'Brake Blueprint',
recipe = 'brake_blueprint', -- general name defined in recipes
durability = 100
}
},
},
...
},
...
}
```
#### Blueprint Durability Mechanics
* **Starting durability:** 100 (or custom value in metadata)
* **Durability loss:** `recipe.blueprint.degrade * 100` per craft or default `Config.DefaultBlueprintDurabilityDegrade`
* **Example:** `degrade = 0.05` → loses 5 durability per craft → 20 crafts until destroyed
* **When durability reaches 0:** Tool is automatically removed from inventory
* **If `degrade = 0`:** blueprint has no durability losses
# Tool
## Tool System
#### Understanding Special Slots
The lvs\_inventory system supports **special slots** for specific item types. The tool system uses the special slot named `'tool'`.
#### How Tools Work
When a recipe requires a tool (e.g., `tool = { name = 'lvs_wrench', degrade = 0.05 }`), the system:
1. Checks if the player has an item in their **tool special slot**
2. Verifies the item name matches the required tool name
3. Checks tool durability (if `degrade` is set)
4. Reduces durability by `degrade * 100` per craft
5. Destroys the tool when durability reaches 0
#### Creating Tool Items
**1. Define the item in your lvs\_shops `config/shops.lua` file:**
```lua
shops = {
{
type = 'youtool',
...
items = {
{
type = 'tool', -- category name
name = 'lvs_wrench',
price = 1000,
metadata = {
type = 'tool',
durability = 100
}
},
{
type = 'tool',
name = 'lvs_screwdriver',
price = 250,
metadata = {
type = 'tool',
durability = 100
}
}
}
...
},
...
}
```
**2. The item must have `metadata.type = 'tool'` to fit in the tool slot.**
When giving the item via command or script, include the `tool` type:
```lua
-- Using giveitem command (if your inventory supports it)
/giveitem [playerID] lvs_wrench 1 tool
-- Using export
exports.ox_inventory:AddItem(playerId, 'lvs_wrench', 1, { type = 'tool' })
```
#### Tool Durability Mechanics
* **Starting durability:** 100 (or custom value in metadata)
* **Durability loss:** `recipe.tool.degrade * 100` per craft
* **Example:** `degrade = 0.05` → loses 5 durability per craft → 20 crafts until destroyed
* **When durability reaches 0:** Tool is automatically removed from inventory
* **If `degrade = 0`:** Tool has infinite durability (no loss)
# Property Integration
### Property Integration
This is the **most important section** for server owners who want crafting in apartments/houses.
#### How Property Integration Works
The script uses the `lvs_bridge` events to sync workbenches placed inside properties:
1. **Player enters property**: `lvs_bridge:server:enterProperty` is triggered
2. **Script loads** property-specific workbenches from database
3. **Player exits property**: `lvs_bridge:server:exitProperty` is triggered
4. **Script unloads** property workbenches from client
#### Required Bridge Events
Your property system (apartments/houses) **must trigger** these events:
**Server-Side Events**
**When a player enters a property:**
```lua
TriggerEvent('lvs_bridge:server:enterProperty', playerId, propertyType, propertyId, extra)
```
* `playerId` (number): Player server ID (optional, defaults to source)
* `propertyType` (string): `'house'`, `'apartment'`, etc.
* `propertyId` (string): Unique property identifier
* `extra` (any): Extra data (optional)
**When a player exits a property:**
```lua
TriggerEvent('lvs_bridge:server:exitProperty', playerId)
```
* `playerId` (number): Player server ID (optional, defaults to source)
**Client-Side Events**
The bridge also provides client events (usually auto-handled):
* `lvs_bridge:client:enterProperty`
* `lvs_bridge:client:exitProperty`
#### Integration Steps
1. **Locate your property script** (apartments, housing, etc.)
2. **Find where players enter/exit properties** - typically:
* After teleporting to interior
* Before loading interior
* On leaving/despawning interior
3. **Add the event triggers**:
```lua
-- When player enters (server-side or client-side)
-- If from client, use:
TriggerServerEvent('lvs_bridge:server:enterProperty', nil, 'apartment', 'A1')
-- When player exits
TriggerServerEvent('lvs_bridge:server:exitProperty')
```
4. **Test the integration**:
* Enter a property
* Place a workbench (if you have the item)
* Exit and re-enter - workbench should persist
* Another player entering same property should see the workbench
***
#### Example Integration with qbx\_properties
If using qbx\_properties, locate the enter/exit events:
```lua
-- In properties/server/property.lua or similar
function EnterProperty(playerSource, id, isSpawn)
...
-- Before load decorations...
TriggerEvent('lvs_bridge:server:enterProperty', playerSource, 'apart', id) -- here
TriggerClientEvent('qbx_properties:client:loadDecorations', playerSource, decorations)
...
end
```
```lua
-- In qbx_properties/server/property.lua or similar
local function exitProperty(playerSource, isLogout)
...
-- Before unload...
TriggerEvent('lvs_bridge:server:exitProperty', playerSource) -- here
TriggerClientEvent('qbx_properties:client:unloadProperty', playerSource)
...
end
```
***
#### Example Integration with qb-apartments
If using qb-apartments, locate the enter/exit events:
```lua
-- In qb-apartments/client/main.lua or similar
RegisterNetEvent('qb-apartments:client:enterApartment', function(apartmentId)
-- After teleport...
TriggerServerEvent('lvs_bridge:server:enterProperty', nil, 'apartment', apartmentId)
end)
RegisterNetEvent('qb-apartments:client:leaveApartment', function()
-- Before teleport out...
TriggerServerEvent('lvs_bridge:server:exitProperty')
end)
```
***
### Placement Validation
`server/editable.lua` `_canPlaceWorkbench` Function, checks whether a player can currently place a crafting workbench at their current location.
#### Description
This function is executed when the server receives a request to place a crafting workbench. Its main purpose is to validate if the player meets the necessary requirements, specifically whether they are inside a property that allows placing workbenches.
The system retrieves the property data where the player is located using `_getPlayerPropertyData()`. If the player is not in a property, they cannot place the workbench.
Allows implementing custom logic to restrict certain types of workbenches based on property type. For example, preventing large crafting tables from being placed in small apartments.
#### Parameters
| Parameter | Type | Description |
| --------------- | -------- | ---------------------------------------------------------------------------------------------------------------------------------------------------------------------- |
| `playerId` | `number` | Server ID (source) of the player attempting to place the workbench |
| `workbenchName` | `string` | Name of the workbench item to be placed (e.g., `'lvs_crafting_table_large'`) |
| `extra` | `table?` | Additional information sent from the `lvs_bridge:server:enterProperty` trigger. May contain extra property data or additional context. Nil if no information was sent. |
#### Returns
| Type | Description |
| --------- | ----------------------------------------------------------------------- |
| `boolean` | Returns `true` if the player can place the workbench, `false` otherwise |
#### Return Values
* **`true`**: Player is inside a property and meets all requirements to place the workbench
* **`false`**: Either:
* Player is not inside any property, OR
* Custom restrictions prevent placing this specific workbench type in the current property
#### Example Usage
#### Default Behavior
By default, the function allows placing any workbench if the player is inside a property:
```lua
if playerProperty then
return true
end
return false
```
#### Custom Restriction Example
Prevent placing large crafting tables in apartments:
```lua
if playerProperty then
if playerProperty.type == 'apartment' and workbenchName == 'lvs_crafting_table_large' then
return false
end
return true
end
return false
```
#### Advanced Custom Logic
You can implement more complex restrictions:
```lua
function _canPlaceWorkbench(playerId, workbenchName, extra)
local playerProperty = _getPlayerPropertyData(playerId)
if not playerProperty then
return false
end
-- Restrict by property type
if playerProperty.type == 'apartment' and workbenchName == 'lvs_crafting_table_large' then
return false
end
-- Restrict by property ID (e.g., premium properties only)
if playerProperty.id == 5 and workbenchName ~= 'lvs_crafting_table_basic' then
return false
end
-- Use extra data for additional checks
if extra and extra.isRented then
return false -- Don't allow placing in rented properties
end
return true
end
```
#### Related Events
* **`lvs_bridge:server:enterProperty`**: Event that sends property information including the `extra` parameter used in this function
#### Notes
* The `extra` parameter contains additional data that may have been sent when entering the property
* Customize this function to implement your own server-specific restrictions
* The function
# Exports & Commands
### The `giveBlueprint` Export
#### Function Signature
```lua
exports.lvs_crafting:giveBlueprint(playerId, recipeName, label)
```
#### Parameters
* `playerId` (number): Server ID of the target player
* `recipeName` (string): Recipe identifier from `Config.Recipes`
* `label` (string): Display label for the blueprint
#### Example Usage
```lua
-- Give a specific recipe blueprint
exports.lvs_crafting:giveBlueprint(playerId, 'lvs_stock_brakes', 'Stock Brakes Blueprint')
-- Give a shared blueprint (if recipe uses blueprint.name = 'brake_blueprint')
exports.lvs_crafting:giveBlueprint(playerId, 'brake_blueprint', 'Brake System Blueprint')
```
#### Important Notes
* The function checks if the player can carry the item before giving it
* Blueprint metadata is automatically created with `durability = 100`
* The `recipeName` must exist in `Config.Recipes`
* If the recipe has `blueprint.name`, that name is used; otherwise, the recipe name itself is used
#### Admin Command
An admin command is already registered:
```
/giveBlueprint [playerId] [recipeName] [label]
```
***
### Commands
#### Built-in Commands
**Admin Only:**
```
/giveBlueprint [playerId] [recipeName] [label]
```
Gives a blueprint to a player.
* `playerId`: Target player server ID
* `recipeName`: Recipe identifier from Config.Recipes
* `label`: Display name (optional, uses recipe label if empty)
# lvs-idmanager
lvs-idmanager documentation
## LVS IDManager – Advanced Identification System
Bring a new level of realism to your FiveM server with **LVS-IDManager**, a complete identification system that allows players to manage and display multiple types of IDs, including legal and forged documents.
> Enhance the realism of your server with **LVS-IDManager** and provide your players with an immersive identification system!
***
## Key Features
* **Custom & Predefined ID Types**: Create your own **custom identification cards** or use the default ones, including **identity cards, driver’s licenses, firearm licenses, and job IDs**.
* **Forgery System**: Players can create **fake IDs**, adding a layer of realism and roleplay opportunities.
* **Seamless Integration**: IDs can be generated via **exports**, allowing easy integration with other scripts.
* **Multi-Language Support**: Easily adaptable to any language for a better server experience.
* **View & Show IDs**: Players can inspect their own IDs or show them to others in-game.
* **Commandering IDs**: Configure specific job roles (e.g., **Police, FIB**) to **seize or manage** certain types of identifications.
***
## Changelog
{% tabs %}
{% tab title="v1.0.0" %}
### 2024/03/15
Initial commit
**Files Changed:**
* [ ] All Files
* [ ] All Files Except config.lua
* [ ] Specific Files
{% hint style="warning" %}
Fix:
{% endhint %}
{% hint style="success" %}
Add:
{% endhint %}
{% hint style="info" %}
Edit:
{% endhint %}
{% endtab %}
{% endtabs %}
# Installation
## Step 1. Download package
Download the lvs\_idmanager package from your portal.
* lvs\_idmanager
* lvs\_bridge
* lvs\_lib
* lvs\_interact
\
The best way to place the downloaded files is by creating a folder `[lvs]` in `resources`, where you can put all the scripts related to this **LVS Store.**
***
## Step 2. Install dependencies
Install the dependencies if they are not installed.
| ox\_lib | |
| ------------- | ---------------------------------------- |
| lvs\_bridge | Included in the package |
| lvs\_lib | Included in the package |
| lvs\_interact | Included in the package |
***
## Step 3. Config
Now configure and translate your resources.
Config files
`lvs_idmanager/config/config.lua`\
`lvs_idmanager/config/locales.lua`
***
## Step 4. Start the script (server.cfg)
In the `server.cfg` file, you need to start or ensure the scripts
```editorconfig
-- start CORE
start ox_lib
-- start INVENTORY
start lvs_bridge
start lvs_lib
start lvs_id_manager # or ensure [lvs]
```
***
# Configuration
Explore and fine-tune your settings effortlessly. Customize your script experience according to your preferences
## Configuration File
```lua
Config = {}
Config.CardType = {
citizen = {
item = 'lvs_citizen_card', -- item name of the card
subtitle = 'Citizen ID', -- Subtitle for visual print on the card
},
citizen_fake = {
item = 'lvs_citizen_fake_card',
subtitle = 'Citizen ID',
ilegal = true
},
driver = {
item = 'lvs_driver_license',
subtitle = 'Driver License',
},
weapon = {
item = 'lvs_weapons_license',
subtitle = 'Weapon License',
},
police = {
item = 'lvs_police_card',
subtitle = 'Los Santos Police Department',
job = 'police',
commandeering = true, -- Can a player take a ped's vehicle with player work ID Card
dark = true, -- White text on card
},
fib = {
item = 'lvs_fib_card',
subtitle = 'Los Santos Federal Investigation Bureau',
job = 'fib',
commandeering = true,
dark = true,
},
ems = {
item = 'lvs_ems_card',
subtitle = 'U.S. Department of Labor - DOL',
job = 'ambulance',
},
mechanic = {
item = 'lvs_mechanic_card',
subtitle = 'U.S. Department of Labor - DOL',
job = 'mechanic',
},
}
Config.ProcessingPoint = {
-- It's possible that you want to remove those points. The best option is to use the exports to grant licenses through other scripts.
general = {
types = { -- Types of licenses that can be purchased from this "processing point" [Config.CardType]
citizen = {price = 100}, -- price and groups ( groups: option will only appear if they belong to the group)
driver = {price = 50},
weapon = {price = 200},
police = {price = 300},
fib = {price = 500},
ems = {price = 300},
},
-- common refers to global settings for the locations, which you can still configure individually for each location if needed.
common = {
ped = 's_m_y_cop_01', -- ped model
scenario = 'WORLD_HUMAN_CLIPBOARD_FACILITY', -- ped scenario
--animation = {dic='amb@world_human_clipboard@male@idle_b', anim = 'idle_d'}, -- not required if scenario is set
interaction = {
type = 'interact', -- interact | target
view = 3.5, -- distance to view
distance = 1.5, -- distance can interact
label = 'Talk'
},
groups = nil, -- required if you want only interact with these groups (jobs or gangs)
},
locations = {
{coords = vector4(437.29, -978.94, 30.69, 176.89)}, --"z" is +1 from the ground
}
},
driver = {
types = {
driver = {price = 50},
},
common = {
ped = 'hc_driver',
scenario = 'WORLD_HUMAN_CLIPBOARD_FACILITY',
interaction = { type = 'interact', view = 3.5, distance = 1.5, label = 'Talk'},
groups = nil,
},
locations = {
{coords = vector4(224.29, -1395.17, 30.59, 279.15)}
}
},
fake = {
types ={
citizen_fake = {price = 5000}
},
common = {
ped = 's_m_m_snowcop_01',
scenario = 'WORLD_HUMAN_COP_IDLES',
interaction = { type = 'interact', view = 3.5, distance = 1.5, label = 'Talk'},
groups = nil,
},
locations = {
{coords = vector4(1468.63, 1134.29, 114.32, 90.46)}
}
},
fake2 = {
types ={
citizen_fake = {price = 5000}
},
common = {
interaction = { type = 'interact', view = 3.5, distance = 1.5, label = 'Talk'},
groups = nil,
},
locations = {
{
task = true,
ped = 'mp_m_bogdangoon',
coords = {
spawn = vector4(714.21, -966.17, 30.4, 353.48), --[caution] "z" is +1 from the ground
camera = vector4(707.12, -965.36, 30.41, 43.38), --[caution] "z" is +1 from the ground
laptop = vector4(707.3, -966.85, 30.44, 187.19), --[optional] - [caution] "z" is +1 from the ground
mugshot = vector4(705.9, -964.01, 30.4, 219.43), --[caution] "z" is +1 from the ground
},
pickup = { --[optional] - random location to pick up the identification
model = 'prop_box_guncase_02a',
coords = {
vector4(2447.41, 4971.29, 46.81, 310.0),
vector4(63.84, 3713.4, 40.0, 73.0),
vector4(2359.21, 3137.16, 48.07, 114.0),
vector4(-69.74, 6256.55, 31.09, 0.0)
}
},
processingTime = '5m' -- 1m (1 minute) - 30s (30 seconds)
}
}
},
-- You can add or remove any of the ones listed above
}
Config.Buttons = {
commandeering = {
label = 'Commandeering',
key = 'E', -- for display
keyIndex = 38, -- https://docs.fivem.net/docs/game-references/controls/
cancel = 'Cancel',
cancelKey = 'Esc',
cancelKeyIndex = 202
},
selectPlayer = {
label = 'Movie Cam',
key = 'M',
keyIndex = 244,
cancel = 'Cancel',
cancelKey = 'Esc',
cancelKeyIndex = 202
}
}
Config.VersionControl = true
```
# Exports
## Server
### `exports.lvs_idmanager:create`
#### Syntax
```lua
exports.lvs_idmanager:create(playerId, typeId, extra)
```
#### Parameters
* **playerId** (*number*): The player's server ID.
* **typeId** (*string*): One of the types defined in `Config.CardType` (located in `config.lua`).
* **extra** (*table | nil*): Optional parameter used when `typeId` is `'driver'`. It should contain the key `class`, indicating the driver's license class.
#### Return Value
* If `typeId` does not exist in `Config.CardType`, the function returns `nil`.
* On success, the function grants the player an item with the following metadata:
```lua
type = 'identification'
id_number
id_type
id_cid
id_dob
id_firstname
id_lastname
id_sex
id_nationality
id_photo
id_job? -- Only on jobs id's
id_occupation? -- Only on jobs id's
id_class? -- Only if typeId is 'driver'
```
#### Example Usage
```lua
-- Create a Citizen ID for a player
exports.lvs_idmanager:create(1, "citizen")
-- Create a driver's license with a specific class
exports.lvs_idmanager:create(1, "driver", { class = "Class B" })
```
#### Notes
* If `typeId` is not defined in `Config.CardType`, the function returns `nil` and does not execute any actions.
* If `typeId` is `'driver'`, it is recommended to always provide a valid `extra.class`.
* **Best Practice:** Before granting the item, it is advisable to check whether the player can carry it to avoid inventory issues.
***
### `exports.lvs_idmanager:createFake`
#### Syntax
```lua
exports.lvs_idmanager:createFake(playerId, typeId, data)
```
#### Parameters
* **playerId** (*number*): The player's server ID.
* **typeId** (*string*): One of the types defined in `Config.CardType` (located in `config.lua`).
* **data** (*table*): A table containing the following information:
```lua
dob
firstname
lastname
sex
nationality
class? -- Only if typeId is 'driver'
```
#### Return Value
* If `typeId` does not exist in `Config.CardType`, the function returns `nil`.
* On success, the function grants the player an item with the same metadata structure as `create`.
#### Example Usage
```lua
-- Create a fake Citizen ID
exports.lvs_idmanager:createFake(1, "citizen", {
dob = "1990-01-01",
firstname = "John",
lastname = "Doe",
sex = "M",
nationality = "USA"
})
-- Create a fake driver's license with a specific class
exports.lvs_idmanager:createFake(1, "driver", {
dob = "1992-05-10",
firstname = "Jane",
lastname = "Smith",
sex = "F",
nationality = "Canada",
class = "Class A"
})
```
#### Notes
* If `typeId` is not defined in `Config.CardType`, the function returns `nil` and does not execute any actions.
* If `typeId` is `'driver'`, it is recommended to always provide a valid `extra.class`.
* **Best Practice:** Before granting the item, it is advisable to check whether the player can carry it to avoid inventory issues.
***
### `exports.lvs_idmanager:isFake`
#### Syntax
```
exports.lvs_idmanager:isFake(metadata)
```
#### Parameters
* metadata (table): ID Item metadata to check.
#### Return Value
* Returns `true` if the document type is illegal (fake), otherwise `false`.
#### Example Usage
```lua
-- some metadata example from a ID item
local metadata = {
type = 'identification',
id_type = 'citizen_fake',
id_number = '9999999',
id_cid = 'AAAAAAA',
...
}
if exports.lvs_idmanager:isFake(metadata) then
print("This is an illegal document!")
end
```
***
### `exports.lvs_idmanager:isOwner`
#### Syntax
```lua
exports.lvs_idmanager:isOwner(playerId, metadata)
```
#### Parameters
* **playerId** (*number*): The player's server ID.
* **metadata** (*table*): The data of the identification item metadata.
#### Return Value
* Returns `true` if the identification belongs to the specified `playerId`, otherwise `false`.
#### Example Usage
```lua
local metadata = {
type = 'identificaction',
id_type = 'citizen',
id_number = 'UFR1245',
id_cid = 'UFR1245',
...
}
if exports.lvs_idmanager:isOwner(1, metadata) then
print("The player is the owner of this ID.")
end
```
# lvs-gizmo
### Gizmo
`exports.lvs_gizmo:useGizmo()` opens an interactive gizmo UI for editing an entity's position and rotation.
#### Parameters
* `entityData` (table|string|number):
* If string/number: treated as entity handle
* If table: should contain at least `handle` (entity handle), optionally:
* `label` (string): display name for the entity (defaults to 'Unknown')
* `hash` (number): model hash (defaults to GetEntityModel(handle))
* `model` (string): model name (defaults to 'Unknown')
* `image` (any): optional image data for UI
#### Returns
* `boolean|table`:
* `false` if gizmo cannot be opened (NUI already focused) or entity is invalid
* On success, returns a table with:
* `placed` (boolean): true if edit was confirmed and object placed, false if cancelled
* `position` (vector3): final position coordinates (only when placed=true)
* `rotation` (vector3): final rotation coordinates (only when placed=true)
* `initialCords` (table): contains initial position and rotation: -> `position` (vector3): initial position before edit -> `rotation` (vector3): initial rotation before edit
#### Usage Example
```lua
local model = 'prop_mp_cone_02'
local obj = CreateObject(model, pos.x, pos.y, pos.z, false, false, false)
local result = exports.lvs_gizmo:useGizmo({
handle = obj,
label = 'Cone',
hash = GetEntityModel(obj),
model = model,
})
if result then
if result.placed then
print("Object placed at:", result.position)
print("Initial position was:", result.initialCords.position)
else
print("Edit cancelled")
end
end
```
#### Behavior
1. Prevents multiple simultaneous gizmo sessions (returns false if NUI already focused)
2. Validates entity existence before proceeding
3. Captures initial entity state (position, rotation)
4. Opens NUI gizmo interface for interactive editing
5. Blocks most player controls during gizmo operation (except camera when right-click held)
6. Synchronizes game camera with UI during operation
7. On completion:
* If confirmed ("placed"): returns updated position/rotation plus initial values
* If cancelled: returns false for placed flag but still provides initial values for restoration
* Always clears NUI focus and resets gizmo entity reference
# \[Jobs]
## LVS Miltiplayer Jobs
Brings a new level of cooperative roleplay to your server. This pack includes four fully multiplayer job systems where teamwork is essential to complete tasks, progress through job stages, and earn rewards. Each job is designed to create immersive interactions, synchronized tasks, and a strong sense of working as a real crew.
> Whether players are restoring power, cutting trees, building structures, or keeping the city clean, every job requires coordination between teammates to succeed. If you're looking to improve server immersion, boost player cooperation, and offer unique gameplay systems, this pack is the perfect upgrade.
***
* Builder Job
* Electrician Job
* Garbage Job
* Lumberjack Job
***
# install
{% stepper %}
{% step %}
### Download Package
Download the job package you purchased from your LV Soft portal.
Each job resource is practically drag & drop. Simply place the job folders into your server’s `resources` directory.
Every job comes with:
* **lvs\_bridge**
* **lvs\_jobs\_assets\_pack#**
{% hint style="warning" %}
lvs\_lib, lvs\_interact, lvs\_npcdialog are **only included** when purchasing the **full pack of 4 jobs**. Individual job purchases **do not include** this resources.
{% endhint %}
For better organization, we recommend creating a folder:
```
[lvs]
```
Place all LVS scripts inside this folder.
{% endstep %}
{% step %}
### Install Dependencies
Make sure the following dependencies are installed and started.
#### Required
* **lvs\_bridge**
* **lvs\_jobs\_assets\_pack#**
#### Optional (visual enhancements)
Included **only** when buying the full 4-job package.
* lvs\_lib
* lvs\_interact
* lvs\_npcdialog
{% endstep %}
{% step %}
### Install Required Maps
The jobs use small map additions to support certain work areas. These **maps are NOT included** and must be downloaded separately:
Download here: \
After downloading, place the files inside:
```
lvs_jobs_assets_pack1
```
Make sure the folder is started in your server.
{% endstep %}
{% step %}
### Configuration
Each job comes preconfigured and works out-of-the-box, but you can customize everything.
You must review:
* The **config folder** inside each job resource
* The file:
```
lvs_bridge/config.lua
```
Adjust values according to your server economy, framework, or gameplay style.
{% endstep %}
{% step %}
### Start the Scripts (server.cfg)
Add the following lines to your `server.cfg`:
{% code title="server.cfg" %}
```cfg
# LVS Framework
start lvs_lib # Only if included in your package
start lvs_bridge
# JOBS
ensure [lvs] # Or start individual jobs manually
```
{% endcode %}
If you placed all resources inside the `[lvs]` folder, simply include:
```
ensure [lvs]
```
{% endstep %}
{% endstepper %}
# lvs-drift
Drift-style realistic
## LVS Drift Handling & Smoke
> Experience the thrill of drifting like never before in FiveM with our drift-style driving and realistic smoke effects script. This innovative script will completely transform the way you drive in the game, providing you with a unique and exciting driving experience.
{% embed url="" %}
***
## Key Features
* **Realistic Drift-Style Driving**: Turn any vehicle into a drift master. Drift through the streets of Los Santos with precise control and an authentic sense of sliding. Choose from four pre-set handling configurations to better suit different types of vehicles.
* **Realistic Smoke Effects**: Your tires will leave a trail of realistic smoke as you make your turns and drifts, adding an authentic touch to your driving experience. What makes it even more special is that the color of the smoke matches perfectly with the tire burnout color of the car, creating a unique and customized smoke trail.
* **Drift System Item**: To enable the drift system, you'll need a special in-game item, adding an element of strategy to your roleplay. Install the system on any vehicle or restrict it to a whitelist of approved vehicles, giving you full control over its usage
* **Easy to Set Up**: Our script is easy to install and configure. You can customize the intensity of the smoke effects and adjust the driving to your preference.
* **Universal Compatibility**: It works with any vehicles, allowing you to bring drift action to any part of Los Santos.
* **Performance-Optimized**: Enjoy a smooth and seamless experience even on servers with high activity levels.
# Installation
### Step 1
Execute the SQL:
```sql
ALTER TABLE `player_vehicles`
ADD `drift` TINYINT UNSIGNED NOT NULL DEFAULT '0' AFTER `state`;
```
***
### Step 2
Add those items to your QBCore items shared. [`resources\[qb]\qb-core\shared\items.lua`](#user-content-fn-1)[^1]
***
### Step 3
***
Download the following imagen and copy in to your inventory items folder
{% tabs %}
{% tab title="URL" %}
{% endtab %}
{% tab title="Preview" %}
{% endtab %}
{% endtabs %}
***
### Step 4
Drag And Drop, Put `lvs_drift` in resources folder
***
### Step 5
Start The Script Start in `server.cfg` , `ensure lvs_drift.`
***
{% hint style="info" %}
You can use ox\_lib for menu, download at .\
make sure to modify the `fxmanifest.lua` file, uncomment the line 19 and 38
{% endhint %}
[^1]:
# Configuration
Explore and fine-tune your settings effortlessly. Customize your script experience according to your preferences
## Configuration File
```lua
Config = {}
Config.Framework = 'qb' -- qb | esx
Config.Menu = 'ox_lib' -- MenuV | ox_lib
Config.DriftPresetMenuKey = 'RCONTROL'
Config.InstallItemName = 'kit-drift'
Config.InstallJob = 'mechanic' -- Job can install the system, false anyone can install the item
-- UseWhitelist: (string) - 'config' | 'share' | false
-- 'config': allow to install drift system on car listed in Config.Whitelisted
-- 'share': use the QBCore shared vehicles object, cars you want to able install need a property 'drift' = true
-- false: can install on any car
Config.UseWhitelist = 'config'
-- Required for UseWhitelist = 'config'
Config.WhitelistCars = {'buffalo3','buffalo5'}
Config.Smoke = {
enabled = true, -- enable smoke by default, false need to player execute de command /smoke for toggle smoke
command = 'smoke', -- command to toggle smoke on/off
size = 0.2, -- smoke size
dens = 10, -- smoke density
distance = 60.0, -- distance at which the player begins to see the smoke (sync), if you experience a performance loss, it is recommended to set a low value.
-- Not implemented, maybe for the future. --
burnout_size = 0.8, -- burnout smoke size
key = 348, -- force keypress to smoke
}
```
# Commands
## Chat Commands
Command
Description
/smoke
Enable or disable tire smoke particles for better realism or performance
# lvs-animations
lvs-animations documentation
## LVS Animations
Bring life and expression to your characters in FiveM with our Emote/Animation Script. This versatile script empowers players to engage in a wide array of emotes and animations, adding depth and personality to their in-game interactions.
> Transform your characters into expressive individuals. Download our Emote/Animation Script today and let the personalities of your players shine through in every emote.
{% embed url="" %}
## Key Features
* Walk Styles and Face Expressions saving after relogging.
* Possibility to one time animation play or in loop mode.
* Favourite animations saving:
* List with favourite animations.
* Possibility to set 6 different sets of favorite animations (5 animations in each set), which can be played by pressing the key.
* 1000+ animations in config by default.
* Dark and light mode.
* Full screen and compact mode.
* Weapon Animations
* Ability to edit the position of the character during the animation to fit it anywhere.
* Injured walking style from a certain amount of hp.
* Animation play with whole body or only upper body.
* Fully optimized; 0.00-0.01 ms on idle and 0.02-0.03 ms when using playing anim, handsup etc.
* Synced perfectly between all players and works flawlessly.
* Crouch system builded in animations.
* Built-in ability to raise your hands.
* Finger pointing bind.
* Option to combine animations
* Option to play animations in vehicle
* Shared Animations
* Exports for animations to use in another scripts
* Easy to add more animations.
# Installation
### Step 1
Run the **qb.sql** file located in the resource folder in your database!\
Or execute the SQL:
```sql
ALTER TABLE `players` ADD COLUMN `lvs_animation` longtext COLLATE utf8mb4_bin;
ALTER TABLE `players` ADD COLUMN `lvs_walking_style` longtext COLLATE utf8mb4_bin;
ALTER TABLE `players` ADD COLUMN `lv_expression` longtext COLLATE utf8mb4_bin;
CREATE TABLE IF NOT EXISTS `lvs_animation_favorite` (
`id` int(11) NOT NULL AUTO_INCREMENT,
`identifier` varchar(100) NOT NULL,
`animation_name` varchar(100) NOT NULL,
UNIQUE KEY `id` (`id`),
KEY `identifier` (`identifier`)
) ENGINE=InnoDB AUTO_INCREMENT=1 DEFAULT CHARSET=utf8;
```
***
### Step 2
Drag And Drop, put `lvs_animations` in `resources` folder
***
### Step 3
Install the dependencies if they are not installed.
***
### Step 4
Now configure and translate your resource.
Config files
`/lvs_animations/configs/config.lua`\
`/lvs_animations/configs/animations.lua`\
`/lvs_animations/configs/locales.lua`\
`/lvs_animations/html/configs/config.js`\
`/lvs_animations/html/configs/locales.js`
***
### Step 5
Start The Script Start in `server.cfg` , `ensure lvs_animations.`
# Configuration
Explore and fine-tune your settings effortlessly. Customize your script experience according to your preferences
## Configuration File
```lua
Config = {}
-- 0 standalone
-- 1 ESX
-- 2 QBCore
-- 3 NEW ESX (USING EXPORT NOT TRIGGER EVENT)
Config.Framework = 2
Config.QBCoreFrameworkResource = 'qb-core' -- if you don't use qb-core skip this point
Config.ESXGetSharedObjectTrigger = 'esx:getSharedObject' -- if you don't use ESX skip this point
-- 0 oxmysql/mysql-async
-- 1 ghmattimysql
Config.SQLType = 0
Config.UpdateChecker = false
Config.BlurBackground = false -- Blur background
Config.DeadCheck = { -- Disable menu and playing animations while player is dead
Enable = true,
UseStateBag = false -- Will use LocalPlayer.state.dead instead of IsPedDeadOrDying(PlayerPedId())
}
Config.OpenMenu = {
Command = 'openanimation', -- Name of command to open animation menu.
Keybind = 'F3' -- Input Parameter from https://docs.fivem.net/docs/game-references/input-mapper-parameter-ids/keyboard/
}
Config.PlayAnimation = {
ShortCommand = 'a', -- Name of command to play animation
Command = 'animation', -- Name of command to play animation.
}
Config.CancelAnimation = {
--CommandToogle = true,
Command = 'c', -- Name of command to cancel animation
Keybind = 'X' -- Input Parameter from https://docs.fivem.net/docs/game-references/input-mapper-parameter-ids/keyboard/
}
Config.DisableInCar = true -- Disable playing all animations in cars
Config.ChangeAnimationSetCommand = 'emoteset' -- It allows players to set their preset set of favorite animations (numbers 1-6)
Config.CombineAnimations = true
Config.QuickAnim = {
Enabled = true,
Key1 = '1', -- SHIFT + Input Parameter from https://docs.fivem.net/docs/game-references/input-mapper-parameter-ids/keyboard/
Key2 = '2', -- SHIFT + Input Parameter from https://docs.fivem.net/docs/game-references/input-mapper-parameter-ids/keyboard/
Key3 = '3', -- SHIFT + Input Parameter from https://docs.fivem.net/docs/game-references/input-mapper-parameter-ids/keyboard/
Key4 = '4', -- SHIFT + Input Parameter from https://docs.fivem.net/docs/game-references/input-mapper-parameter-ids/keyboard/
Key5 = '5' -- SHIFT + Input Parameter from https://docs.fivem.net/docs/game-references/input-mapper-parameter-ids/keyboard/
}
Config.Saving = {
WalkStyle = true, -- WalkStyle in Database Saving
FaceExpression = true -- FaceExpression in Database Saving
}
Config.Pointing = {
Enabled = true, -- Toogle Pointing
Keybind = 'B', -- Input Parameter from https://docs.fivem.net/docs/game-references/input-mapper-parameter-ids/keyboard/
DisableInCar = true,
}
Config.Crouch = {
Enabled = true, -- Toogle Crouch
Key = 36, -- Control Index from https://docs.fivem.net/docs/game-references/controls/
CanShoot = false, -- Players can shoot crouched? true/false
DisableSprint = false, -- Disable sprint while crouched
}
Config.Crawl = {
Enabled = true, -- Toogle Crawl
Keybind = 'RCONTROL' -- The default keybind for crawling
}
Config.HandsUp = {
Enabled = true, -- Toogle HandsUp
Keybind = 'H' -- Input Parameter from https://docs.fivem.net/docs/game-references/input-mapper-parameter-ids/keyboard/
}
Config.Ragdoll = {
Enable = true, -- Toogle Ragdoll
Keybind = '', -- Input Parameter from https://docs.fivem.net/docs/game-references/input-mapper-parameter-ids/keyboard/
DisableWhileDead = true
}
Config.InjuredWalkStyle = {
Enable = false, -- Toogle Injured Walk style by Ped HP
PedHealth = 130, -- Number of Ped HP from native GetEntityHealth (https://docs.fivem.net/natives/?_0xEEF059FAD016D209)
}
Config.AnimEdit = {
Enable = true,
CanEditAll = true,
Command = 'animedit',
MaxDistance = 1,
UpKey = 44,
DownKey = 20,
FrontKey = 32,
BackKey = 33,
LeftKey = 34,
RightKey = 35,
AcceptKey = 23,
}
-- ** UPDATE 1.4.0
Config.WalkWhileUsing = true
-- ** END OF NEW OPTIONS
-- Weapons that work with aim styles
Config.WeaponAnimationsAllowed = {
"WEAPON_PISTOL",
"WEAPON_COMBATPISTOL",
"WEAPON_APPISTOL",
"WEAPON_PISTOL50",
"WEAPON_SNSPISTOL",
"WEAPON_HEAVYPISTOL",
"WEAPON_VINTAGEPISTOL",
"WEAPON_MARKSMANPISTOL",
"WEAPON_MACHINEPISTOL",
"WEAPON_VINTAGEPISTOL",
"WEAPON_PISTOL_MK2",
"WEAPON_SNSPISTOL_MK2",
"WEAPON_FLAREGUN",
"WEAPON_STUNGUN",
"WEAPON_REVOLVER",
}
Config.CustomNotifiaction = false
--[[
-- To use custom notifications, implement client event handler, example:
AddEventHandler('lvs_animations:notification', function(message)
print(message)
end)
]]
Config.CustomHelpNotifiaction = false
--[[
-- To use custom notifications, implement client event handler, example:
AddEventHandler('lvs_animations:helpnotification', function(message)
print(message)
end)
]]
Config.LVServer = GetConvar('LVServer', '') -- Don't touch
```
# Adding Animations
### Animation Template
```lua
["name"] = {
label = "Label",
category = "main",
animDict = animDictionary --[[ string ]],
animName = animationName --[[ string ]],
animFlag = flag --[[ integer ]]
},
```
***
### Scenario Template
```lua
["name"] = {
label = "Label",
category = "main",
scenario = scenarioName --[[ string ]]
},
```
{% hint style="info" %}
List of scenarioNames: pastebin.com/6mrYTdQv
{% endhint %}
***
### Animation with prop Template
```lua
["name"] = {
category = "prop",
label = "Label",
animDict = animDictionary --[[ string ]],
animName = animationName --[[ string ]],
animFlag = flag --[[ integer ]],
bone = boneIndex --[[ integer ]],
prop = model --[[ string ]],
propPos = {xPos --[[ number ]], yPos --[[ number ]], zPos --[[ number ]], xRot --[[ number ]], yRot --[[ number ]], zRot --[[ number ]],}
},
```
# Exports/Events
## Events
### Open Menu
This event open menu.
```lua
TriggerEvent('lvs_animations:client:OpenMenu')
```
***
### Cancel Animation
This event cancels the animations
```lua
TriggerEvent('lvs_animations:client:StopAnimation')
```
***
## Exports
{% hint style="info" %}
**All exports are client-sided**
{% endhint %}
### SetCanPlayAnimation
This export allows or disallows playing animations.
```lua
exports.lvs_animations:SetCanPlayAnimation(false)
```
***
### CanPlayAnimation
This export show that is player allowed to play animations based on the previous export.
```lua
exports.lvs_animations:CanPlayAnimation()
```
***
### IsPlayingAnimation
This export shows if the player is currently playing the animation.
```lua
exports.lvs_animations:IsPlayingAnimation()
```
***
### StartAnimationPlay
This export start animation for player.
```lua
exports.lvs_animations:StartAnimationPlay(animation)
-- Example:
-- exports.lvs_animations:StartAnimationPlay('dance2')
```
***
### SetCanCancelAnimation
This export allows or disallows canceling animations.
```lua
exports.lvs_animations:SetCanCancelAnimation(false)
```
***
### GetAnimationFromSet
This export return animation from set
```lua
exports.lvs_animations:GetAnimationFromSet(setnumber, animnumber)
-- Example:
-- exports.lvs_animations:GetAnimationFromSet(1, 2)
-- return
```
***
### StopAnimation
This export cancels the animations
```lua
exports.lvs_animations:StopAnimation()
```
# lvs-accident
Realistic Crash Effects Script
## LVS Vehicle Accident
> Elevate the intensity of collisions in your city with our Realistic Crash Effects script for FiveM. This immersive script enhances the aftermath of accidents, providing players with a dynamic and authentic experience when their vehicles collide.
{% hint style="info" %}
Immerse your players in the realism of vehicular collisions. Download our Realistic Crash Effects script today and redefine the consequences of accidents in your city.
{% endhint %}
## Key Features
* **Impact-Driven Screen Effects**: Experience the realism of post-collision disorientation. When a player has an accident, the screen mimics a dizziness effect, intensifying the immersive aftermath of the crash.
* **Damage-Based Gravity Impact**: The severity of the impact is directly linked to the damage sustained after the accident and the deceleration experienced. A more forceful collision results in a more pronounced and immersive effect, creating a realistic connection between damage and in-game consequences.
* **Temporary Unconsciousness**: In the event of a severe collision, players may experience temporary unconsciousness for a few seconds, adding an extra layer of realism to high-impact crashes.
* **Configurable Settings**: Adjust the script settings to fine-tune the balance between realism and gameplay, allowing server owners to tailor the experience to their preferred level of intensity.
* **Performance-Optimized**: Enjoy a smooth gaming experience with our script, designed to be efficient and enhance realism without compromising server performance.
* **Easy Integration**: Simple installation and setup ensure that the Realistic Crash Effects script seamlessly becomes a part of your server, transforming collisions into visceral and immersive moments.
# Installation
## Step 1
Drag And Drop, Put `lvs_accident` in resources folder
## Step 2
Start the script in `server.cfg`, `ensure lvs_accident.`
# Configuration
Explore and fine-tune your settings effortlessly. Customize your script experience according to your preferences
## Configuration File
```lua
-- Note: Update v1.7
-- Due some vehicles are extremely strong than other, the script is based on the damage received and
-- the deceleration of the vehicle to calculate the accident.
-- Accident take effect when 'damage' or 'deceleration' it is greater than those set here in the config
-- increases 'damage' and 'deceleration' at each level
Config = {}
Config.Debug = false -- Use only for testing purpose
Config.UseBaseEvents = false -- If you have base events improve performance
-- The crash effect works according to the damage a vehicle receives, there are 5 levels according to it, you can create more if you wish
-- The blacking out effect is due to the speed deceleration, if the vehicle decelerates rapidly by the threshold you set, the player blacks out
Config.Levels = { -- effects levels
[1] = {
damage = 30, -- Vehicle damage
deceleration = 50, -- Vehicle deceleration (KMH)
time = 6, -- Effect time in seconds
},
[2] = {
damage = 40, -- Vehicle damage
deceleration = 70, -- Vehicle deceleration (KMH)
time = 12, -- Effect time in seconds
},
[3] = {
damage = 60, -- Vehicle damage
deceleration = 90, -- Vehicle deceleration (KMH)
time = 20, -- Effect time in seconds
blackout = { -- Blackout effect is base on deceleration
enabled = true, -- Enable/Disable
speedThreshold = 110, -- Speed in KMH
time = 6 -- Time in seconds
},
},
[4] = {
damage = 80,
deceleration = 120,
time = 25,
blackout = {
enabled = true,
speedThreshold = 120,
time = 10
},
},
[5] = {
damage = 100,
deceleration = 150,
time = 30,
blackout = {
enabled = true,
speedThreshold = 150,
time = 12
},
}
}
-- Enable the disabling of controls if the player is blacked out
Config.DisableControlsOnBlackout = true -- Disable controls when blackout is active ?
Config.MessageOnBlackout = 'Estas inconsciente por el accidente'
-- Multiplier of screen shaking strength
Config.ScreenShakeMultiplier = 0.1
-- Disable the effects on some classes or vehicle individually
--[[
Vehicle Classes:
0: Compacts 1: Sedans 2: SUVs 3: Coupes 4: Muscle 5: Sports Classics
6: Sports 7: Super 8: Motorcycles 9: Off-road 10: Industrial 11: Utility
12: Vans 13: Cycles 14: Boats 15: Helicopters 16: Planes 17: Service
18: Emergency 19: Military 20: Commercial 21: Trains
--]]
Config.IgnoreVehicleClass = {8, 13, 14, 15, 16} -- disable the script for this vehicle class
Config.IgnoreVehicle = {'some_model'} -- disable the script for this vehicles
-- Notification function, modify according to your needs
Config.Notify = function(text, type, time)
exports['lv-player']:Alert('Accidente', text, type, time)
end
```
{% hint style="warning" %}
`Config.Notify` is only for displaying a message when the character is unconscious. If you use native functions, it won't be visible because the screen goes black. You should use some notification/alert system with UI to make it visible above the black screen.
{% endhint %}
# lvs-explosion
## ***LVS Vehicle Explosion***
> Elevate the excitement in the skies of Los Santos with our altitude-based vehicle explosion script for FiveM. This innovative script adds a touch of realism to falling from significant heights, causing vehicles to erupt in an epic display.
{% hint style="info" %}
Are you ready to take the adrenaline to the sky? Download our **LVS Vehicle Explosion** script today and add a new level of excitement to the heights of Los Santos. Get ready for a fall and an explosion that will change the game!
{% endhint %}
## Key Features
* **Altitude-Based Explosion Dynamics**: Experience a realistic reaction when your vehicle plummets from substantial heights. The script assesses the altitude and unleashes an epic explosion, taking immersion to new heights.
* **Vehicle Armor Consideration**: The probability of explosion adjusts based on the amount of armor the vehicle has. More resilient vehicles have a lower chance of exploding, providing a strategic element to the game.
* **Customizable Probability**: Adjust the explosion probability to suit your preferences. The script is highly configurable, allowing you to tailor the experience to your server's gameplay style.
* **Universal Compatibility**: Works with a wide variety of vehicles in the world of Los Santos, delivering a consistent and thrilling experience for all players.
* **Easy Integration**: Installation and setup are straightforward. Simply add the script to your resource folder and start enjoying realistic explosions on your server.
* **Performance-Optimized**: Enjoy smooth performance without compromising server stability. Our script is designed to minimize load and ensure a seamless gaming experience.
# Installation
## Step 1
Drag And Drop, Put `lvs_explosion` in resources folder
## Step 2
Start the script in `server.cfg`, `ensure lvs_explosion`
# Configuration
Explore and fine-tune your settings effortlessly. Customize your script experience according to your preferences
## Configuration File
```lua
Config = {}
Config.Debug = false -- Use only for testing purpose
Config.UseBaseEvents = false -- If you have base events improve performance
--Config.CustomBaseEvent = true --If you have custom base events in you server ( need UseBaseEvents = true )
Config.ExplosionHeight = 20 -- Minimum height at which the vehicle will explode after jumping
Config.UseArmor = true -- If the vehicle has armor installed, it will be protected from explosion (false always explode)
-- When UseArmor = true
Config.ArmorChance = {
-- 80 = 80% to protect, 20% chance to explode ( need UseArmor = true )
-- Armor has 5 level
[1] = 20,
[2] = 40,
[3] = 60,
[4] = 80,
[5] = 100,
}
Config.ArmorChanceDecrease = 1 -- 1 = reduce 1% of ArmorChance by each 1% of ExplosionHeight, 2 = -1% by each 2% of ExplosionHeight
--[[
Vehicle Classes:
0: Compacts 1: Sedans 2: SUVs 3: Coupes 4: Muscle 5: Sports Classics
6: Sports 7: Super 8: Motorcycles 9: Off-road 10: Industrial 11: Utility
12: Vans 13: Cycles 14: Boats 15: Helicopters 16: Planes 17: Service
18: Emergency 19: Military 20: Commercial 21: Trains
--]]
Config.DefaultArmorClass = { -- add default armor to a vehicle class
[9] = 80,
}
Config.DefaultArmorVehicle = { -- add default armor to a vehicle
['riata'] = 200,
['baller5'] = 200,
}
Config.IgnoreVehicleClass = {8, 13, 15, 16} -- disable the script for this vehicle class
Config.IgnoreVehicle = {'kamacho', 'trophytruck'} -- disable the script for this vehicles
-- LVS Accident compatibility:
-- If you have "lvs_accident" when you land safely, you can configure to trigger accident effects to players in the vehicle
Config.UseAccident = true -- use lvs-accident
Config.AccidentLevel = 3 -- accident level
```
# lvs-racing
Work in progress
# Soon...